This article was co-authored by Yuka Arora and by wikiHow staff writer, Janice Tieperman. Yuka Arora is a self-taught makeup artist who specializes in abstract eye art. She has been experimenting with makeup art for over 5 years, and has amassed over 5.6K Instagram followers in just 5 months. Her colorful and abstract looks have been noticed by Jeffree Star Cosmetics, Kat Von D Beauty, Sephora Collection, among others.
There are 11 references cited in this article, which can be found at the bottom of the page.
This article has been viewed 15,206 times.
Eyeliner is an essential part of many eye makeup routines, especially when you’re going for a winged look. Once you’ve applied eyelid primer, try drawing and connecting two lines around the corner of your eye. If you’d prefer a simpler method, try dotting out the shape of the flick before connecting the lines, or tracing along a piece of scotch tape. Depending on your eye shape, you can also go for variations on the flick, like a double wing. While eyeliner flicks can be difficult to master, they can become second nature with enough practice and dedication.
Steps
Freehanding the Eyeliner Flick
-
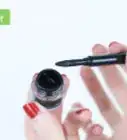
1Start applying liner at the middle point of your lash line. Take the tip of your liquid eyeliner and begin lining the product directly above your lashes. Try not to apply too much product, so your eyes can be highlighted without being overwhelmed.[1]
- You can also apply the liner a bit closer to the inner corner of your eye. It all depends on your personal preferences.
-
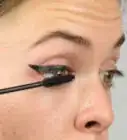
2Work in small, even lines until you reach the outer corner of your eye. Continue applying the product along the lash line, working as slowly as necessary to outline the shape of your eye. Don’t worry about this line being perfect—you can always go back and fix any smudges or smears later on![2]
- If you feel confident applying liquid eyeliner, feel free to apply the product in a smooth, singular motion.
Tip: To fix eyeliner mishaps, dip a Q-tip in micellar water, then lightly dab at the problem areas.[3]
You can also use a cotton swab dipped in skin-tone concealer to mask any unwanted smears or smudges.[4]
Advertisement -
3Sketch a short, angled line pointing from your lower lid. With the tip of your liquid eyeliner, draw a diagonal line following the angle of your lower lid. Aim for the line to be around 0.125 inches (0.32 cm) long, or a bit longer if you’d prefer to go for a dramatic look. To keep the line fluid and smooth, try drawing the line out more quickly. If you’d rather take it slow, use a gradual motion to sketch out the line.[5]
- This line will serve as the base of your flicked eyeliner wing. Ideally, it should be pointing in a 45-degree angle away from the eyelid.
Did you know? Different styles of eyeliner work better for different eyelid shapes. Close-set eyes look best with a double wing look, while downturned eyes look especially nice with the wing covering the outer edge of the crease.[6]
-
4Draw a second line from your base liner that connects to the first angled line. Starting ⅓-way down your eyelid from the outer corner, sketch a smooth, fluid line that meets your initial section of eyeliner. Keep the second line of product connected to the base eyeliner that lines your lid.[7]
- At this point, the corner of your eye will resemble the outline of an eyeliner wing.
-
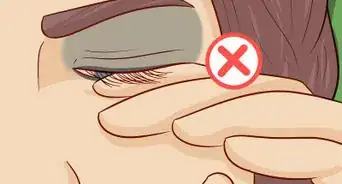
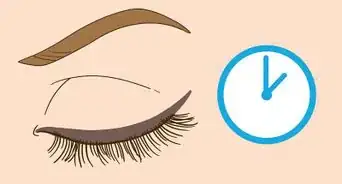
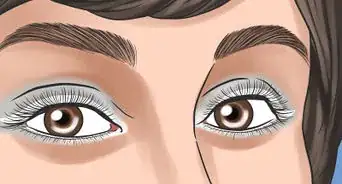
5Color in the gap to fully form your eyeliner flick. Use the tip of your liquid eyeliner to color in the small triangle you’ve formed above your eye’s outer corner. Using small, careful strokes, fill in the flicked eyeliner wing until it’s completely colored. Make sure that the tip of the wing is thin and tapered from the base. Finally, wait 1 minute or so for the product to dry.[8]

Drawing Dots to Form a Flick
-
1Sketch a series of dots along your lash line. Draw small beads of eyeliner above your upper lash line, starting at the center of the lid. Do your best to make the dots evenly shaped, so you can connect them more smoothly. Continue forming a line of dots to the outer corner of your eye.[9]
- If you’re trying to make a thin eyeliner flick, keep the dots on the smaller side. If you’re aiming to make a thick, bold eyeliner flick, then make the dots larger.
-
2Add more dots in angled line beyond the corner of your eye. Continue sketching dots in a diagonal line above the outer corner of your eye. Angle these dots as high or as low as you’d like, depending on the type of flick that you’re trying to create. Keep this line centered with the dots that you drew on your lash line.[10]
- Make sure that the dots above the outer corner of your eye are identical in size to the dots along your lash line.
-
3Connect the dots in a smooth, straight line. Move your eyeliner pen slowly, drawing a swift line across your lash line. Angle the line as you reach the outer corner of your eye, focusing on making a smooth flick shape as you connect the dots. After you’ve formed the line, take a moment to touch up any areas where the dots are still visible.[11]
- Don’t worry if your eyeliner doesn’t look very smooth at first. Continue practicing until you perfect the technique!
Using a Flat Edge
-
1Sketch out your liner along your upper lash line. Draw a consistent layer of eyeliner directly above your upper lashes. Depending on your personal style, you can start sketching the product from the center of your eyelid or as far as the inner corner. Continue lining your eyes until you reach the outer corner.[12]
- If you want to go for a bolder, more colorful style, try using a different color of eyeliner!
-
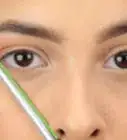
2Angle a flat object along the corner of your eye. Take a business card or other small item with a flat edge and rest it against the outer corner of your eye. Make sure the object doesn’t go in your eye, and that it forms a straight, angled line along the outer corner of your eye.[13]
-
3Trace along the edge of the object to create a straight flick. Take your liquid eyeliner and sketch along the edge of the flat surface, making the flick as long or as short as you’d like. Try and keep the line consistent in width. Once the basic line is in place, touch up the flick by tapering the outer corner and creating a thicker stem of liner at the corner of your eye.[16]


Creating Flicks for Different Eye Shapes
-
1Highlight almond-shaped eyes with a thicker edge on the outer corner. Work the product along your upper lash line, continuing to the outer corner. Focus on building the flick along the outer third of the lash line, working the liner into a winged shape along the outer eye section.[17]
- Consider working with eye pencil to create a soft, smudged look along the upper lash line. This works best when done with eye pencil.
-
2Draw a short, upturned flick on downturned eyes.[18] Make your eyeliner flick extra pronounced by creating a prominent wing along the outer corner of the eye. Apply eyeliner all across your upper lash line before tapering the flick off at the end. Aim for the flick to be a small, curvy wing that’s visible directly above your outer eyelashes.[19]
- To make your look stand out even more, opt for a bright shade of eyeliner, like teal.
-
3Make your close-set eyes look wider by sketching the liner at the corners. Start sketching along the outer third of your upper lash line, working the product to the outer corner. Flick the product out in an obvious wing, keeping the liner centered with your upper lash line.[20]
- If you want to line the inner portions of your upper lash line, consider applying eyeliner in a very thin line.
-
4Add a flick to hooded eyes along the base of the hood.[21] Apply the eyeliner in a consistent layer above your upper lash line, working your way out as you go. Distract away from the hood of your eyelid by sketching your eyeliner flick in this exact area. Keep the flick small, and only slightly tapered from the outer corner of your eye.[22]
- The start of your eye’s hood can be found above the outer corner of your eye.
-
5Apply a thick flick of eyeliner to monolid eyes. Working from the inner corner of your eye, sketch a thick layer of eyeliner across your upper lash line. Work beyond the outer corner, tapering the edge of the flick into a cat eye look.[23]
- If you want, try experimenting with different eyeliner thicknesses until you find a flick that best suits your personal style.


Expert Q&A
-
QuestionHow do I do winged eyeliner as a beginner?
 Yuka AroraYuka Arora is a self-taught makeup artist who specializes in abstract eye art. She has been experimenting with makeup art for over 5 years, and has amassed over 5.6K Instagram followers in just 5 months. Her colorful and abstract looks have been noticed by Jeffree Star Cosmetics, Kat Von D Beauty, Sephora Collection, among others.
Makeup ArtistIt's going to depend on what looks best for your eye shape. If you have eyes that are more down-turned, try angling the wing a little higher. -
QuestionHow do you do winged eyeliner on hooded eyes?Yuka AroraYuka Arora is a self-taught makeup artist who specializes in abstract eye art. She has been experimenting with makeup art for over 5 years, and has amassed over 5.6K Instagram followers in just 5 months. Her colorful and abstract looks have been noticed by Jeffree Star Cosmetics, Kat Von D Beauty, Sephora Collection, among others.
Makeup ArtistDraw the flick at the base of your hood, and keep the flick small. This can draw attention away from the fact that you have hooded eyes.
Things You’ll Need
Freehanding the Eyeliner Flick
- Liquid eyeliner
- Cotton swab (optional)
- Micellar water (optional)
Drawing Dots to Form a Flick
- Liquid eyeliner
Using a Flat Edge
- Liquid eyeliner
- Business card
- Tape (optional)
Creating Different Flicks for Different Eye Shapes
- Liquid eyeliner
References
- ↑ https://www.cosmopolitan.com/uk/beauty-hair/makeup/how-to/a38409/makeup-tutorial-classic-liner-flick/
- ↑ https://www.self.com/story/how-to-apply-liquid-eyeliner
- ↑ https://www.cosmopolitan.com/uk/beauty-hair/makeup/g13915380/how-to-apply-liquid-eyeliner/#4
- ↑ https://www.look.co.uk/beauty/11-eyeliner-hacks-575558
- ↑ https://www.cosmopolitan.com/uk/beauty-hair/makeup/how-to/a38409/makeup-tutorial-classic-liner-flick/
- ↑ https://www.goodhousekeeping.com/beauty/makeup/how-to/g3490/winged-eyeliner-for-every-eye-shape/
- ↑ https://www.cosmopolitan.com/uk/beauty-hair/makeup/how-to/a38409/makeup-tutorial-classic-liner-flick/
- ↑ https://www.cosmopolitan.com/uk/beauty-hair/makeup/how-to/a38409/makeup-tutorial-classic-liner-flick/
- ↑ https://www.cosmopolitan.com/style-beauty/beauty/how-to/a31500/eyeliner-hacks-every-woman-must-know/
- ↑ https://www.goodhousekeeping.com/uk/fashion-beauty/a551808/easy-eyeliner-tips-and-tricks/
- ↑ https://www.cosmopolitan.com/style-beauty/beauty/how-to/a31500/eyeliner-hacks-every-woman-must-know/
- ↑ https://www.cosmopolitan.com/style-beauty/beauty/how-to/a31500/eyeliner-hacks-every-woman-must-know/
- ↑ https://www.cosmopolitan.com/style-beauty/beauty/how-to/a31500/eyeliner-hacks-every-woman-must-know/
- ↑ https://www.elle.com/beauty/makeup-skin-care/tips/g19/liquid-eyeliner-tape-trick-how-to/
- ↑ https://www.look.co.uk/beauty/11-eyeliner-hacks-575558
- ↑ https://www.look.co.uk/beauty/11-eyeliner-hacks-575558
- ↑ https://www.cosmopolitan.com/style-beauty/beauty/a25394115/different-eye-shapes/
- ↑ Yuka Arora. Makeup Artist. Expert Interview. 30 August 2018.
- ↑ https://www.cosmopolitan.com/style-beauty/beauty/a25394115/different-eye-shapes/
- ↑ https://www.harpersbazaar.com/beauty/makeup/advice/a11565/best-eyeliner-technique-for-your-eye-shape/
- ↑ Yuka Arora. Makeup Artist. Expert Interview. 30 August 2018.
- ↑ https://www.goodhousekeeping.com/beauty/makeup/how-to/g3490/winged-eyeliner-for-every-eye-shape/
- ↑ https://www.goodhousekeeping.com/beauty/makeup/how-to/g3490/winged-eyeliner-for-every-eye-shape/
About This Article