wikiHow is a “wiki,” similar to Wikipedia, which means that many of our articles are co-written by multiple authors. To create this article, 49 people, some anonymous, worked to edit and improve it over time.
wikiHow marks an article as reader-approved once it receives enough positive feedback. In this case, 92% of readers who voted found the article helpful, earning it our reader-approved status.
This article has been viewed 370,807 times.
Learn more...
Taxidermy is the traditional method of preserving and mounting vertebrate animals for display. Whether you want to commemorate a beloved pet or celebrate a hunt, learning the basic skills of preparation, preservation, and upkeep will save you money in preserving your animals.
Steps
Preparing the Animal
-
1Freeze the animal until you're ready to prepare it. You'll want to remove the skin as soon as is possible, but it's important to keep the animal from spoiling before you commit to preserving it and caring for the skin. To be safe, freeze the animal so you can acquire the necessary materials for performing basic taxidermy in the meantime:
- Sharp knife
- Sewing needle
- Thread
- Stuffing or plaster cast of animal
- Borax, alcohol, or your preferred preserving agent
-
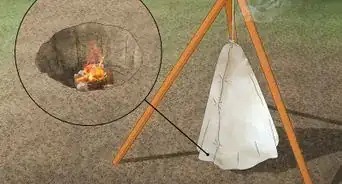
2Prepare the form. Depending upon your animal, you can prepare a plaster cast of the body at this point, or purchase a premade form (as is usually done with deer busts). You can also create your own form out of recycled materials, a particularly useful process for smaller animals. Use sticks to create a wood frame the size of the skinned body, and wrap the frame in twine or old plastic bags.[1]
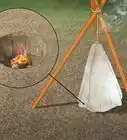
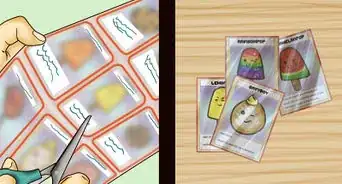
- To prepare a cast, purchase a commercial molding agent like "Smooth On" to create a shape mold of the animal to fill with plaster. Mix a small batch of plaster with water and pour quickly into your mold. Remove the mold and smooth the cast form with sandpaper or a small pocketknife. Don't worry too much about the details, you really just want the basic form and shape to fit the skin.
- If you make your own form, it helps to have a workable example to compare it to. Take a picture of the animal before you remove the skin and use materials that can be manipulated easily once you've started putting the form together. Mammal legs are particularly difficult to get right. Consider purchasing a premade mold for your first go around to use as a model for subsequent projects.
Advertisement -
3Remove the skin. Whether you're going to preserve an iguana or a bobcat, the process starts by removing the skin and preserving it.[2] The particulars of the preservation process will vary depending on whether or not you have a mammal or a reptile, fish, or bird, so read on for more specific instructions regarding the preservation of the skin.
- Using a sharp knife, carefully cut a seam up the belly, being particularly careful not to puncture any of the organs or body cavity, which can ruin the skin. Work your knife evenly along the inside to loosen the skin, while peeling it back with your other hand. Think of it as taking off the animal's jacket and trousers. Remove as much of the flesh and fat as possible, using care to not tear or rip the skin.
-
4Leave the head alone if you're preserving a fish, bird, or a lizard. Remove the skin from a mammal's head as you would the rest of the body, but for lizards, fish, and birds, you'll need to remove the brain, eyes, and tongue and leave the shape of the head intact for preservation. The physiology of the bird makes it such that you can't (and wouldn't want to) remove the beak, so you'll have to remove the parts of the bird that would spoil and smell bad.
- Smaller animals are much more difficult to taxidermy than larger mammals. It helps to have small dentistry tools or an X-Acto knife for this part of the process, and you must be careful to remove as much of the flesh as possible. Small debris can be removed during the preservation process, but you'll want to make sure you get most of the big bits of flesh removed from the head before moving on. It takes patience and a strong stomach.


Preserving the Skin
-
1Tan the skin of mammals. Rub non-iodized salt onto the flesh-side of the hide, roughly an inch thick, and let sit for 24 hours. Remove the old salt and repeat the process with new salt. In a cool dark place, let the hide dry. Watch carefully to make sure it doesn't get too hard to mold, however.[3]
- When it's toughened up, hydrate the skin using cool water, a small capful of Lysol disinfectant, and table salt. Soak the skin in this mixture overnight and rinse several times until the salt mixture is removed. Hang skin up to drain, and towel dry when its stopped dripping. You can consider using a pickling agent at this point to treat the hide farther, but make sure you take care to remove any more bits of flesh or fat that are clinging to the hide before you move on to tanning it.
- Treat the hide with tanning oil. Heat up the oil a bit in the microwave and rub it into the skin with your hands. Let the skin sit for several hours and roll the skin up in a plastic bag, keeping it in the refrigerator until you're ready to mount it on the form.
-
2Use an alcohol mixture to preserve reptile skin. Soak the skin in a 50/50 mix of glycerin and alcohol for up to two weeks. Keep in a cool and dark place. When you remove the skin, pat it dry and remove any glycerin from the inside.[4]
-
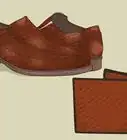
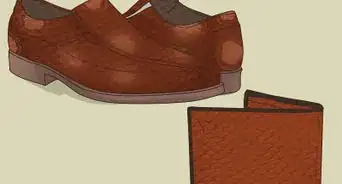
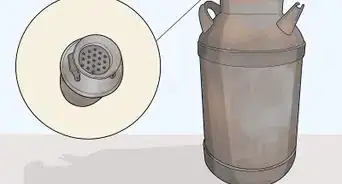
3Rub borax on the inside of the skin for bird and fish preservation. Place the skin flesh-side down on a generous coating of borax inside a shoebox. Sprinkle about a 1⁄4 inch (0.6 cm) more borax on top of the feathers. Leave in a cool, dark, and dry location for about 4 days. The flesh will be quite stiff after you remove from the borax.[5] Brush off the excess and your bird or fish skin will be preserved nicely.


Arranging and Caring for Taxidermy
-
1Dress your form. If you've made an accurate form, stuffing your hide should be as easy as dressing a doll. Fix your preserved skin onto the form, being careful to smooth out any unnatural looking lumps or irregularities. You'll want to fix any structural problems now before you sew it up.[6]
- Keep some twine on hand to stuff into spots that need some adjustment. Cut small bits of string or newspaper to fill out a muscle striation or other body part.
-
2Sew it up. Using an appropriate color of thread, stitch together the seam that you originally cut with as tight and invisible a stitch as possible. Adorn your taxidermy with false eyes and original teeth by gluing them in place.
-
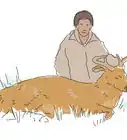
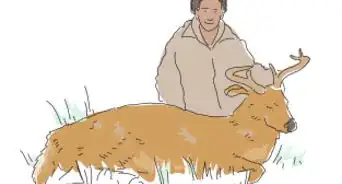
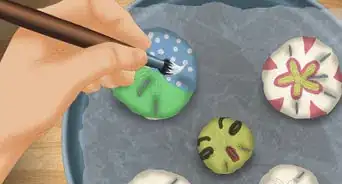
3Display your project. Use your imagination. If you're displaying a pet, keep them immortalized in a peaceful position, possibly curled up in a nap. Or, if you're celebrating a successful hunt, bare the animal's fierce-looking teeth. More complicated mounts are available commercially, but make up your own. Arrange a tableau of branches or rocks on your wall to position your taxidermy among.
-
4Care for your taxidermy. After the work of preserving your animal, make sure you don't let that work go to waste by ignoring it. Keep your mounts away from sunlight, in a climate controlled area of your home. Dampness can result in mildew, while excessive dryness can cause hides to crack or split. If the form settles in an unnatural way, consider splitting it open and resewing. Dust them periodically to keep them clean and realistic looking.


Community Q&A
-
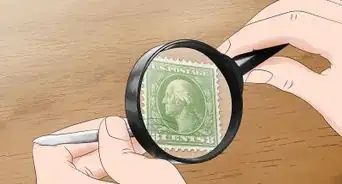
QuestionWhy is borax used for in taxidermy?
 Community AnswerTaxidermists use chemicals such as alum and borax, which are desiccants, to draw out the moisture and dry flesh. It is mainly used to treat areas where it is difficult to remove all the flesh (such as the feet and hands). It also acts as an insect repellent.
 -
QuestionHow do I wash the fur and eliminate any possible bacteria while keeping it looking natural?Community AnswerUse a typical pet-shampoo with a flea and tick killing chemical. Bacteria would more likely be the result of what's on the inside than the exterior fur. As long as you treat the hide properly to dry the tissue before bacteria takes hold, you won't do any damage to the fur. If the bacteria starts to degrade the skin, you'll lose the hair no matter how you clean it. In fact, letting the bacteria go for a few days is one way to de-hair a hide. Hartz or a similar brand of pet shampoo will not only clean the fur, it will help to remove any remaining fleas, ticks, or more importantly, mites, which eat the fur and skin.
-
QuestionHow long will taxidermy preserve an animal?
 Community AnswerBones will last hundreds of years if cared for properly. Mounted hides/skins are more difficult to maintain, but they also can last for decades or even centuries.


References
About This Article
To do taxidermy, start by placing your animal in the freezer to prevent decay from setting in while you prepare a plaster cast for it. Next, remove the animal's skin and tan it with non-iodized salt to preserve it. Then, once the skin has hardened, fix the preserved skin onto the plaster form, being careful to smooth out any unnatural looking lumps or irregularities. Finally, sew the skin up tightly with a needle and thread, glue false eyes and teeth in place, and display your artwork! To learn more about working with fish, reptiles, and birds, read on!