This article was co-authored by wikiHow Staff. Our trained team of editors and researchers validate articles for accuracy and comprehensiveness. wikiHow's Content Management Team carefully monitors the work from our editorial staff to ensure that each article is backed by trusted research and meets our high quality standards.
This article has been viewed 51,964 times.
Learn more...
Braids have made a major comeback in recent years. Not only are they perfect for getting your hair out of your face, they’ve become the ultimate chic, bohemian accessory. If you’re looking for a way to spice up a traditional braid while giving your hair a bit of extra volume, the pull-through braid is the perfect choice. While it looks ornate and sophisticated, it is actually quite simple. In fact, the braided effect is actually an illusion created by several ponytails. To create the pull-through braid, you’ll need long hair, clear, elastic bands, and just a little bit of practice!
Steps
Starting Your Braid
-
1Create a ponytail at the top of your head. Pull back the section of hair at the very top of your head. You can pull it straight back or leave a part if you prefer. Tie it into a ponytail. Because you will be working with multiple ponytails and it can get a bit confusing, this will be referred to as Ponytail #1.[1]
-
2Flip Ponytail #1 to the front. Grab the entire ponytail and bring it toward your face. It will be hanging right in front of your eyes, but don’t worry – it’s only temporary! Clip your ponytail here so that you can work with the rest of your hair without it getting in the way.[2]Advertisement
-
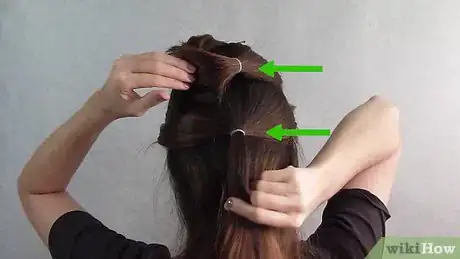
3Make a second ponytail below the first. Grab hair on either side of the first section. Bring it towards the back, securing it with a hair elastic into Ponytail #2. It should be directly below the base of Ponytail #1.[3]
-
4Unclip Ponytail #1 and split it into two sections. Split the ponytail right down the middle so that you have a left and right section. Pull Ponytail #2 straight through the two sections of Ponytail #1 so that it’s going toward your face. Just like you did with Ponytail #1, secure Ponytail #2 toward your face with a hair clip so that it is out of the way.[4]
-
5Gather more hair into a third ponytail. Section more hair from the sides, bringing it to the back of your head. This time, include all of the hair from Ponytail #1 as well. Use a hair tie to create Ponytail #3, right below the base of Ponytail #2.[5]
-
6Let down Ponytail #2 that was clipped up. Just like you did before, divide this ponytail into two equal sections of hair. Take Ponytail #3 up through those two sections and clip it forwards again. Now, you will probably start seeing the pattern you use to create this “braid.”[6]
-
7Gather more hair to create Ponytail #4. Again, gather your hair from the sides of your head and pull it to the back. Include the hair of Ponytail #2. Secure this ponytail with another clear elastic. Once that ponytail is secured, unclip Ponytail #3 from the top of your head. Split Ponytail #3 into two sections, bring Ponytail #4 up through the middle, and clip it to the top of your head.[7]
-
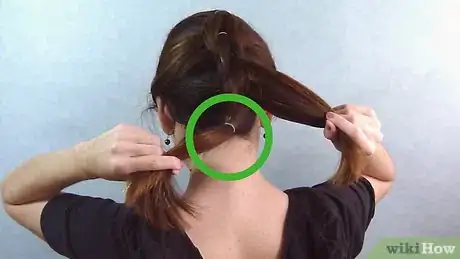
8Continue doing this until you reach the nape of your neck. Once you’ve reached your neck, secure all of the hair (except the clipped up section) into a low ponytail. Let down the clipped section so that you’re left with two ponytails, which will be used to create the tail part of your braid.[8]
Creating Volume in Your Braid
-
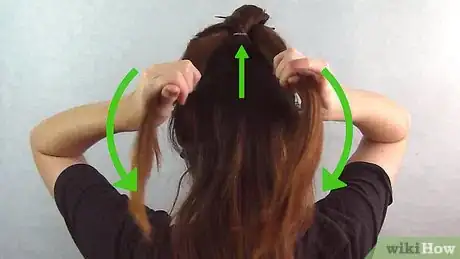
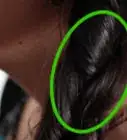
1Loosen the loops of hair you created. After you’ve “braided” to the nape of your neck and secured your hair into low ponytails, you want to go back and create the volume that makes this braid so big. Gently pull on the loops of hair you created when you split each ponytail into two sections. You want to loosen them carefully so they aren’t pulled tightly against your head.[9]
-
2Use your fingers to “fluff” up the loops of hair. After you’ve pulled on the loops in order to loosen up the strands of hair, gently pull them outwards to add volume. In other words, the loops should be loosened up so that you can pull them wide. The larger your loops become, the thicker and more voluminous your hair will look in this braid.[10]
-
3Secure your braid with hair spray. This step is optional. After you’ve tugged and fluffed the loops so that you’re satisfied with how they look, it can be helpful to secure them a bit with some hairspray. This will help hold your braid in place all day, and it can also help reduce flyaways.[11]
Finishing the Tail of Your Braid
-
1Divide the top ponytail into two sections. As you begin the tail of your braid, you should be starting with two low ponytails at the nape of your neck. You will be finishing the tail of your braid using the same method you used for the beginning of your braid. Pull the lower ponytail through the two sections of the upper ponytail, clipping it out of the way.[12]
- Clip your lower ponytail carefully so you don’t mess up the section of your braid that is already completed. You can even hold it in your mouth if that is easier than using a hair clip.
-
2Tie the two sections into another ponytail. After you’ve pulled your lower ponytail up through the two sections of the upper ponytail, bring these two sections back together. Secure them into a ponytail with yet another elastic. Unclip or let go of the clipped up ponytail, which is now on top.[13]
-
3Continue doing this process until you’ve run out of hair. Split the top ponytail into two sections. Bring the bottom ponytail through the two sections and clip it out of the way. Secure the two sections back together into a ponytail. Secure the end with one hair elastic and examine your work. Loosen up any pieces that look tight or flat, and you’re all set![14]
Community Q&A
-
QuestionHow long does this process take?
 Community AnswerAt first it might take 15 minutes to half an hour, but with practice you'll get it down to about 5 minutes.
 -
QuestionHow could I conceal the rubber elastics in my hair?
 GeGeGeLLCommunity AnswerYou could wrap a piece of your hair around the elastic to cover it. You could also buy hair elastics that match the colour of your hair so that it blends in easily.
Things You’ll Need
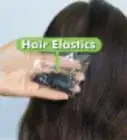
- Elastic hair ties
- Hair clip
References
- ↑ https://www.youtube.com/watch?v=DVANKVEtSrE
- ↑ https://www.youtube.com/watch?v=DVANKVEtSrE
- ↑ https://www.youtube.com/watch?v=DVANKVEtSrE
- ↑ https://www.youtube.com/watch?v=DVANKVEtSrE
- ↑ https://www.babble.com/beauty/the-hottest-braid-right-now-isnt-a-braid-at-all/
- ↑ https://www.youtube.com/watch?v=DVANKVEtSrE
- ↑ https://www.youtube.com/watch?v=DVANKVEtSrE
- ↑ https://www.youtube.com/watch?v=DVANKVEtSrE
- ↑ https://www.babble.com/beauty/the-hottest-braid-right-now-isnt-a-braid-at-all/
