This article was co-authored by Matt King. Matt King is the Director of Education at Fox and Jane Salon Group. With over 15 years of experience and expertise in cutting and coloring hair, he specializes in crafting trend-forward and technically savvy training and development materials for hairstylists. Matt received his cosmetology education from The Blaine Beauty School.
This article has been viewed 33,924 times.
A twisted crown hairstyle is similar to a milkmaid brad style, where you wrap your hair around your head. Instead of using Dutch and regular braids, however, you use twisted braids instead. You can do a standard up-do, where you pull all of your hair up into a twisted crown. You can also try a relaxed version, where you only pull part of your hair up into the twisted crown, leaving the bottom part of your hair loose, like a half-up, half-down ponytail.
Steps
Making a Twisted Crown Up-do
-
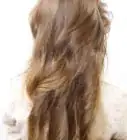
1Brush your hair to remove any tangles. Some people find it easier to do this with wet hair.[1] Other people find it easier with dry hair. If you are going with freshly-washed dry hair, however, you might want to apply some texturizing spray or mousse to it to make it easier to work with.
-
2Gather two sections from your hairline, right next to the part. It does not matter which side of the part you will start from.[2] This style will end up looking like a braided crown around your head, similar to a milkmaid braid style.Advertisement
-
3Twist and cross the two sections. Twist both sections towards your face, like starting a rope. Next, cross one section over the other towards the back of your head.[3]
-
4Add some hair to the section that's closer to your face. Gather some hair from your hairline. Add it to the bottom section—the one that is closer to your face.[4]
-
5Twist and cross the two sections again. Twist the front section towards your face. Cross it over the back one. What used to be the back section should now be in front.[5]
-
6Repeat the process until you reach the back of you head. Keep gathering hair from your hairline and adding it to the front section before twisting and crossing it over. Only add hair to the front section, not the back one. When you reach the nape of your neck, stop.[6]
-
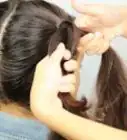
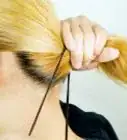
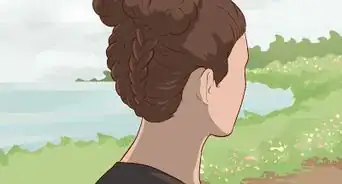
7Finish off with a rope braid. Gather all of your hair into a ponytail, then split it into two sections. Twist each section towards the right to form two ropes. Next, twist the sections together towards the left to form one rope. Tie the rope off with a clear elastic.[7]
-
8Wrap the rope around your head and pin it in place. Pull the braid across the back of your head, up the side, and back towards where you started. Secure it to the start of the braid with bobby pins.[8]
-
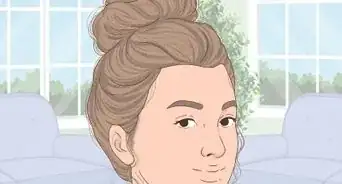
9Muss up your hair, if desired. You don't have to do this, but it will help give you a more boho-chic touch. Set your style with a light misting of hairspray, if needed.
- It's actually trendy for crown-style braids to look a little messy.


Making a Relaxed Twisted Crown
-
1Brush and part your hair down the center. This style is suitable for longer hair. It focuses on twist braiding only part of your hair into a headband-like crown. The rest of your hair will still be loose.
-
2Gather two small sections of hair close to the part. Try to make them just above your eyebrow. Make sure that you are only gathering hair from either the left or the right side of the part. You will be making two identical twisted braids on either side of your head.
- Try to make the section triangular, with the pointed part facing away from you face.
- Use a rat-tail comb or your pinky to create clean sections of hair.
-
3Cross the two sections. Smooth both sections down; if you have frizzy hair, give them a slight downward twist. Next, pull the bottom section upward so that it crosses in front of the top one in an X shape.
-
4Add some hair to the bottom section. Gather some hair from just below the bottom section. Add it to the bottom section to make a thicker strand. Do not grab the hair from your hairline, otherwise you will end up with an up-do. You want the crown to wrap around the side of your head, with the rest of your hair hanging loose.
-
5Add some hair to the top section. This time, gather some hair from your part. Add it to the top section to make it thicker.
-
6Cross the two sections again. Smooth the hairs down first, if you need to. Next, pull the bottom section upwards so that it crosses in front of the top one, like an X.
-
7Repeat the process until you reach the back of your head. Continue adding hair, then twisting and crossing the ropes until you reach the middle-back of your head. The process is similar to that French braiding, except with two strands instead of three.[9]
- Don't add hair from your hairline below the two sections, otherwise you'll end up with an up-do.
-
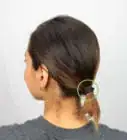
8Twist the two sections again, then tie them off with a clear elastic. Don't add any extra strands of hair to the sections this time. If you can't find a clear elastic, you can use a black one instead. You will be snipping this elastic off later on, so make sure that you don't mind ruining it.
-
9Repeat the process on the other side of your head. End the twisted braid right next to the first one that you made.
-
10Join the ropes. Make a hole in one of the ropes between the two twisted strands. Pull the other rope through it. Gently tug the ropes away from each other to form an X shape. Use bobby pins to secure the X in place, then cut off the clear elastics from before.
-
11Loosen the twists for more volume, if desired. You don't have to do this, but it can add a nicer touch.[10] You can also add some loose curls or waves to the rest of your hair, if you want to.
- Give your hair a light misting of hairspray, if needed.


Community Q&A
-
QuestionIs the first step of making the crown just doing a french braid?
 Nana_Ro'MeaveCommunity AnswerYes. Start braiding from one side, then just continue to the other side, going as far as you can. Wrap the rest around, and you're done!
Things You'll Need
- Brush
- Texturizing spray or mousse
- Clear elastics
- Bobby pins
- Hair spray, if needed
References
- ↑ http://abeautifulmess.com/2016/07/the-twisted-crown-braid.html
- ↑ http://abeautifulmess.com/2016/07/the-twisted-crown-braid.html
- ↑ http://abeautifulmess.com/2016/07/the-twisted-crown-braid.html
- ↑ http://abeautifulmess.com/2016/07/the-twisted-crown-braid.html
- ↑ http://abeautifulmess.com/2016/07/the-twisted-crown-braid.html
- ↑ http://abeautifulmess.com/2016/07/the-twisted-crown-braid.html
- ↑ http://abeautifulmess.com/2016/07/the-twisted-crown-braid.html
- ↑ http://abeautifulmess.com/2016/07/the-twisted-crown-braid.html
- ↑ http://blog.lulus.com/beauty/lulus-how-to-twisted-crown-hair-tutorial/
About This Article