This article was co-authored by wikiHow Staff. Our trained team of editors and researchers validate articles for accuracy and comprehensiveness. wikiHow's Content Management Team carefully monitors the work from our editorial staff to ensure that each article is backed by trusted research and meets our high quality standards.
This article has been viewed 102,946 times.
Learn more...
Dyeing canvas shoes can be a fun and creative craft project. With a package of dye, some canvas shoes, and a little bit of know how, you can make a cool pair of custom kicks for yourself or for someone else. This project does take some preparation, and can get a little bit messy, but that is just part of the fun. The best part of this craft project is that you get to wear it, and show it off, after you create it!
Steps
Gathering Your Supplies
-
1Decide what color (or colors) to use. Pastel colors show up nicely on white shoes and give nice muted tones. On the other hand, strong, bright colors also work well and will probably show up better from a distance. The choice is up to you!
- Remember that the color on the dye packaging may not be exactly the same color that ends up on your shoes. With home dying you need to be prepared for a little variation and fun surprises when it comes to coloring.
-
2Buy your dye and other supplies. Many craft stores and online sellers have dyes for fabrics, so look around. Read the packaging on dyes you are considering buying in order to judge whether you want to put in the work to use them. Some dyes are more complicated to apply than other ones.
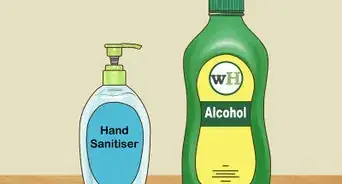
- You will also need other supplies. These can include: plastic sheeting (to protect surfaces), latex gloves (to protect your hands), and rubber cement (or another product to protect the soles of your shoes from the dye). In addition, you may want to use a paint brush to paint on detailed designs and you will probably want to have paper towels on hand to clean up any little spills.
- Rubber cement can usually be found at any supermarket or office supply store.
Advertisement -
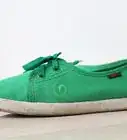
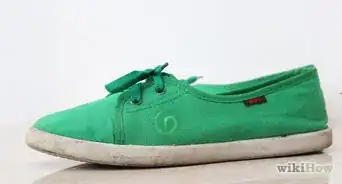
3Buy white canvas shoes to dye. If you already have some shoes that you want to dye that is just great. However, if you need to buy some, pick out white canvas shoes. It doesn't matter whether they are laces-ups or slip-ons, whichever you like. The most important part is that they are white, so that they can be dyed easily.
- Cotton canvas in particular is a great fabric to dye because it will absorb and hold dye really well. That is because, in general, natural fibers are easier to dye than synthetic fibers.[1]
- If you have never dyed anything before, and you don't want to spend a lot of money on this project, consider getting the cheapest sneakers or slip-ons you can find. They may not be as comfortable to wear as more expensive shoes but their inexpensiveness will keep you from getting really upset if you mess up the dying process.


Preparing to Dye Shoes
-
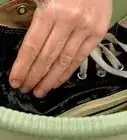
1Clean the shoes, if necessary. Make sure your shoes are clean because dirt, grime, and stains can interfere with how the dye will look on the canvas. Use warm water and soap to clean. Hand washing canvas shoes may easier than tossing them in the washing machine if you just need to do a spot cleaning.
- You do not need to dry the shoes after cleaning. To dye your shoes you will get them wet ahead of time, so drying them is unnecessary.
-
2Set up your dying area. You should place your dying basin on a hard secure surface that won't move around a lot. This is to prevent the basin full of dye moving around so much that the dye spills over the edges. Additionally, you may want to put down plastic either on the surface you are working on or on the floor beneath your work area. This will protect the area in case of spills.
- Set out all of your supplies so you don't have to search for them while you are in the middle of dying. It can be pretty annoying if you are searching for something you need while your gloved hands are covered in dye.
- There are some dyes that need to be used while being heated on a burner. If you are using one of these dyes, and you don't have a portable burner, prepare an area in your kitchen that will be the dying area. Remove all extraneous items that could get dye on them by accident and cover sensitive surfaces with plastic.
- Consider doing your dying outside if you can. Even dyes that need to be simmered can be used outside if you have a portable electric burner and access to electricity outside. If you can't do your dying outside, you should find an area in your house that won't be ruined if a little dye spills. This could be an unfinished basement or a utility room of some sort.
-
3Prepare the dye. Most fabric dyes need to be mixed with water in order to use them. Some dyes also require other additions, such as salt. Follow the directions on the dye package, as the ratio of dye to water varies by brand.
- Be sure that you are mixing your dye and water in a container that is big enough that you will also be able to add your shoes to it without spilling over. It's best to have a lot of leeway in this area, as you don't want to have to deal with the mess of spilled dye.
- You may need to mix your dye on the stove, if it requires heating to high temperatures. Once again, follow the manufacturers directions when using commercial dyes.
-
4Figure out if you need to protect the soles of your shoes. Whether you need to protect the soles of your shoes depends greatly on the type of dye you are using. There are some dyes that will not penetrate a rubber or synthetic sole, meaning that you can simply wipe any dye off that gets on the sole. Other dyes, however, will permanently dye the sole.
- To figure out if the dye you have will dye the soles of your shoes, place a little bit of the prepared dye on the bottom of the sole of one of your shoes. Once it is dry try to remove the dye with a little soap and water.
- If you can easily get it off, great! You don't have to protect the soles from your dye. If not, you should keep all dye off the soles completely.
-
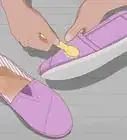
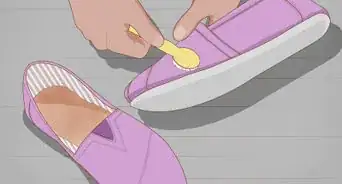
5Protect the soles, if you need to. Slick the rubber cement all around the areas on the shoe where you don't want the dye. That goes for the canvas too, so you can etch little designs if you're handy with rubber cement. If you mess up with the rubber cement, don't panic, because as soon as it dries, you can peel it off with your (gloved) hands.
- Alternatively, you can cover the soles in either high-stick painters tape or a thick layer of vaseline. This technique for protecting the soles of your shoes is best if you don't plan of dipping the shoes completely in the dye, but rather you plan of painting the dye on with a brush.
-
6Wet your shoes, if necessary. Some dyes require that the shoes are wet before they enter the dye.[2] This is because the dye will move across the surface better if it doesn't have to do the additional work of moistening the canvas in the first place.
- Use warm water, as this helps most dyes thoroughly penetrate the canvas.


Dyeing Your Shoes
-
1Place the shoes in the dye. If you want the shoes to be all one color, simply place the tops of the shoes completely in the dye. If you want several colors, place one section of the shoe into the dye, while keeping another part of the shoe out of the dye.
- Keep the shoes in the dye for as long as the directions tell you to. This varies greatly depending on the dye you use, but might be anywhere from a few seconds to several minutes.[3]
- You will probably want to wear gloves while you are doing this. This will allow you to get your fingers into the dye while holding the shoes without getting dye all over them. While most dyes that are sold for home use won't be particularly dangerous to get on your skin, they will dye your skin and take a long time to wear off. In addition, getting dye on your fingers means that you risk making a mess if you touch surfaces or areas of your shoes that you don't want dyed.
-
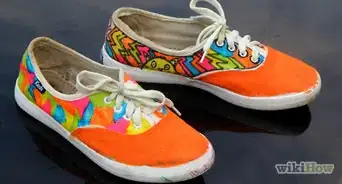
2Apply additional colors. Why not add a few colors to your shoe? Using a second color (or more) won't be a lot more work but it will add a lot more fun to your shoe design!
- Be strategic if you want to dye your shoe multiple colors. For example, if one color you are using is very light and the other is dark, consider applying the light color first. That way, you can dye the whole shoe the light color (which is easier that dying a specific section) and then cover up a section of that lighter dye with a darker color afterwords.
- Try dyeing your laces as well! You can dye them the same color as your shoes or pick a different color to add another pop of color to your kicks.
-
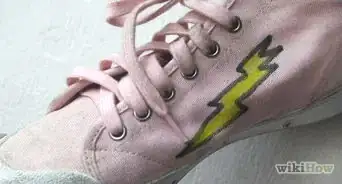
3Add fun designs. Don't limit yourself to just solid colors. Use a paint brush to paint a creative design onto your shoes with additional colors. Perhaps you could cover them in polka dots? Or maybe you could draw your favorite animal onto the tops of your shoes? Draw whatever inspires and excites you!
- Mixing colors of dyes on your shoes can make totally new colors. Think of the dye as watercolor paints which you can use to make a beautiful array of blended colors.
-
4Rinse the shoes. Most dyes need be rinsed out after use. This removes any extra dye from the shoe so it doesn't get all over your socks. Follow the directions on the package of the dye you used, but most dyes should be rinsed with cold water until the water runs clear.
-
5Remove the protection on the soles. If you used rubber cement, or painter's tape, it should peel right off. Vaseline will need to be cleaned off with a little soap and water once the shoe dye is dry.
- Don't do this immediately after you dye your shoes, as the dye could drip a bit on to the soles. Instead, wait a few minutes until you are sure there will be no more drips. You could even use a paper towel to soak up any areas of excessive dye that might eventually drip on to the soles.
-
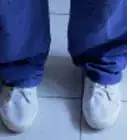
6Allow the shoes to dry completely. You can either allow the shoes to dry naturally or you can put them in your dryer.[4] Just be warned that a bit of dye may rub off in the interior of your dryer, so you may want to wipe it out thoroughly after your shoes are dried and before you put clean laundry in it.
-
7Set the dye, if necessary. Some dyes actually do need to go into the dryer because the dye needs to be set. Setting a dye means making sure it won't come out. In the case of many home dyes, this is done by applying high heat to the canvas. Check your dye package to find out if you have this kind of dye.
- Sometimes you can also use a hairdryer to set a dye. Check your dye packaging to see if this is an option for you.


Community Q&A
-
QuestionCan I use watercolors to dye my shoes?
 Community AnswerNo, it won't last because watercolors are water soluble and will run and wash out.
 -
QuestionWhich brand of dye do I have to use?
 Community AnswerYou can use any brand that you prefer.
 -
QuestionCan I use fabric paint to dye my shoes?
 Community AnswerYou can use fabric paint, but please note that it can make your shoes quite stiff, so it's best to use dyes.

References
- ↑ http://www.marthastewart.com/1110589/fit-be-dyed
- ↑ http://www.marthastewart.com/273320/dyed-canvas-sneakers
- ↑ http://www.marthastewart.com/1110589/fit-be-dyed
- ↑ http://www.marthastewart.com/273320/dyed-canvas-sneakers
- ↑ http://www.marthastewart.com/273320/dyed-canvas-sneakers
- ↑ http://gutenberg.us/articles/rubber_cement
About This Article

To dye canvas shoes, start by making sure the shoes are clean since dirt, grime, or stains can interfere with how the dye will look. Next, prepare the dye according to the instructions on the packet and keep an eye out for any warnings or special instructions. For example, some dyes can penetrate rubber soles, so make sure to cover them in rubber cement or painter's tape. Then, place the shoes in the dye for the specified amount of time, add designs if you like, then rinse the shoes to remove any extra dye. To learn how to dye your shoes more than one color, keep reading!