X
wikiHow is a “wiki,” similar to Wikipedia, which means that many of our articles are co-written by multiple authors. To create this article, 15 people, some anonymous, worked to edit and improve it over time.
This article has been viewed 20,079 times.
Learn more...
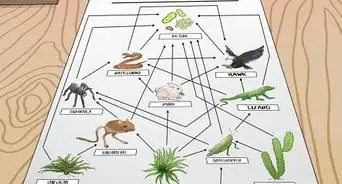
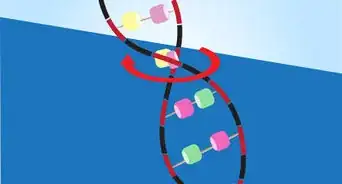
DNA, or Deoxyribonucleic Acid, is the basic programming in the cells of all living organisms. Though it is much too small to see on its own, it is visible to the human eye en masse. Extract the DNA of a strawberry easily with some basic materials! This activity makes for a great children's science project or simply a trick to show off to your friends or family. It's not difficult or tedious, though.
Steps
Part 1
Part 1 of 5:
Preparing the Materials
-
1Gather your materials in the "Things You'll Need" section. You can find this section at the bottom of the page.
-
2Place the rubbing alcohol in the freezer. You will need the rubbing alcohol in a later step, but it must be chilled. Rubbing alcohol is also called ethanol sometimes, so if you see the name ethanol on the bottle but it appears to be rubbing alcohol, that's it.Advertisement
-
3Remove the green section from the strawberry. Try to seize the leaves in one fist, then tug the entire crown of leaves out. If pulling doesn't work, cut the section out with a small kitchen knife.
-
4Mix three pinches of salt with 15 milliliters (0.51 fl oz) liquid dish soap in the small cup. Stir until salt is dissolved with a skewer. Set aside for later.


Advertisement
Part 2
Part 2 of 5:
Preparing the Strawberry
-
1Place your strawberry into your plastic bag. Then, push out the extra pockets of air and seal the opening.
-
2Keep your fingers on the outside of the plastic bag, then mash the strawberry for approximately ninety seconds. Don't be afraid to smash the strawberry well.
- Overall, the purpose of this step is to break up the cell membranes and enzymes in the strawberry cells.
-
3Open the plastic bag, then set it aside. Be careful not to spill the strawberry guts as you open the bag.
-
4Pour ten mL of your dish soap-salt mixture into the graduated cylinder. View the liquid at eye level as your pour. That way, you can make sure you have measured out the correct amount.
-
5Pour your measured-out liquid into the strawberry mush in the plastic bag. While performing the pouring process, make sure not to get any liquid caught on the seams of the plastic bag sealer.
- You may want to tip the bag one way. This will allow for all the liquid to flow into one corner of the plastic bag.
-
6Push out all the extra air in the bag and reseal. Smush with your fingers again for about one minute. Do this in order to mix the liquid solution with the strawberry mush.


Advertisement
Part 3
Part 3 of 5:
Precipitating the DNA
-
1Stuff the cheesecloth into the funnel. Do this until the funnel is completely covered with cheesecloth. Keep in mind that the cheesecloth should be large enough for the corners to stick out of the funnel's rim.
- Hold the sticking-out corners so that the cheesecloth can't slide down into the funnel's tube. Another option is to simply hold the cheesecloth onto the funnel as you would hold a cup. Make sure your thumb and index finger form a circle.
-
2Position the cheesecloth-covered funnel. Make sure its end is in your beaker/test tube.
-
3Snip a slit in the corner of the plastic bag with the strawberry slush. Be careful not to cut the slit too big; otherwise, the slush will slide out too quickly. Pretend you're a pastry chef and you're cutting a hole in the end of an icing bag.
-
4Slowly squeeze out the strawberry slurry from the plastic bag onto the cheesecloth covering the funnel. Be sure not to rush, or else the slurry could spill everywhere and make a big mess.
- This process may take some time, but there should be strawberry-colored liquid dripping into your beaker/test tube filtered through the cheesecloth. Continue until all of your strawberry slurry is squeezed out of the plastic bag.
-
5Remove the cheesecloth from the top of the funnel. Do this when the strawberry liquid has mostly stopped dripping. Place it in the compost, along with all of the strawberry that was previously extruded onto the cheesecloth.
- For more convenient cleanup, make a little bowl shape with the cheesecloth as you lift it so that none of the strawberry waste falls out.
- You may need to use a paper towel to support the bottom of the cheesecloth as you carry it because some liquid may still be dripping


Advertisement
Part 4
Part 4 of 5:
Extracting the DNA
-
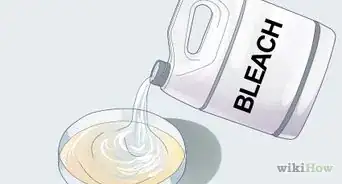
1Retrieve the rubbing alcohol from your freezer. You will need it to extract the DNA.
-
2Carefully pour the rubbing alcohol into your liquid-filled beaker/test tube. Do this until there is a one-inch layer of the alcohol on top of your strawberry liquid. The measurement doesn't need to be precise, but way too much or way too little can make a difference
-
3Stir the mixture with a bamboo skewer. Stir gently, but not too gently; just enough to mix the two layers. You may see a goopy cluster of bubbles forming in the liquid, but this is supposed to be there. The bubbles are part of the DNA.


Advertisement
Part 5
Part 5 of 5:
Retrieving the DNA
-
1Make sure there is a gooey substance inside the liquid. Use your skewer to pick up the goo by scraping it out. It may be clear, white, or translucent pink. Inside the liquid, it may be difficult to see and may resemble clusters of bubbles.
-
2Observe the gooey substance once it's out of the water. This will be your DNA.
- If you would like to preserve it, use the bamboo skewer to scrape the DNA out of the beaker/test tube. Then put it in a small plastic capsule or clear box. It may dry out over time, but should last a while
-
3Finished.


Advertisement
Community Q&A
-
QuestionWhere was the DNA in the strawberry?
 DonaganTop AnswererDNA is located within every cell (particularly the nucleus) of every known life form.
Advertisement
Warnings
- Messes are natural, but to avoid necessary cleanup, be careful when kneading the strawberry in the plastic bag. If you knead too hard and there's an air bubble you missed, the bag could pop and strawberry slushy could spatter everywhere.⧼thumbs_response⧽
Advertisement
Things You'll Need
- 1 strawberry
- Rubbing alcohol
- Dish soap
- Salt
- 1 plastic funnel
- 1 piece of cheesecloth. It must be able to cover the mouth of the plastic funnel easily with some wriggle space.
- 1 test tube or beaker
- 1 small cup
- 1 graduated cylinder
- 1 resealable plastic bag
- 2 wooden or bamboo skewers

About This Article
Advertisement