This article was co-authored by R. Sonia Batra, MD, MSc, MPH. Dr. R. Sonia Batra is a board certified Dermatologist and the Founder of Batra Dermatology based in Los Angeles, California. With over 15 years of experience, Dr. Batra specializes in lasers, medical devices, patient and public medical education, and skin cancer research. She received her Bachelor’s degree, Master’s degree in Public Health, and her Doctor of Medicine (MD) degrees from Harvard University. As a Rhodes Scholar, she earned a Master’s degree in Molecular Genetics at the University of Oxford. She completed her residency training in Dermatology at Stanford University. Dr. Batra has contributed and reviewed for the Journal of Dermatologic Surgery, the Journal of the American Academy of Dermatology, and JAMA Dermatology. She is also a co-host of CBS’ Emmy award-winning television show, The Doctors.
There are 17 references cited in this article, which can be found at the bottom of the page.
This article has been viewed 37,112 times.
Using fake tan on your face can give you a gentle glow that makes it seem like you just got home from vacation! To get a non-streaky glow, exfoliate and moisturize your face before adding any tanner. Then, pick a spray or lotion tanner to apply to your face. Spray tanners tend to be a bit quicker, but you may get more even coverage with a lotion tanner.
Steps
Getting Your Skin Ready
-
1Remove any makeup with removal wipes or face wash. If you wear makeup, it can cause an uneven tan. Your tan may even wash away if you have enough foundation. Wipe your face clean with makeup removal wipes, or apply a gentle face wash to remove any traces of makeup.[1]
-
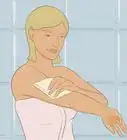
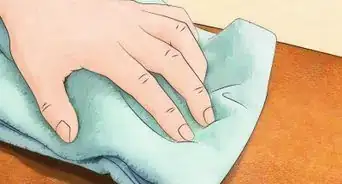
2Apply a scrub or peel to exfoliate your face. For a scrub, pick a light facial scrub, and rub it into your face. Rinse it off afterwards. For a peel, choose one that's gentle on your skin and made from AHA. Apply it to your face, and leave it for the amount of time the package says before rinsing it off.[2]
- "AHA" refers to "alpha hydroxy acid," which is what works to remove the dead skin. Typically, you'll find exfoliants with AHA, BHA (beta hydroxy acid), or a combination of both. Opt for the AHA formula, as it is oil-free.[3] Picking an oil-free formula is important, as oils can make it more difficult for your skin to absorb the tanner.[4]
- Look for exfoliants that describe themselves as "gentle" or "for sensitive skin." You want something gentle, as anything too harsh could remove too much skin and cause streaks.
- Dead skin cells can result in an uneven tan. Plus, if they slough off after your tan, it will fade much quicker. A light exfoliation will help prevent this issue.
Advertisement -
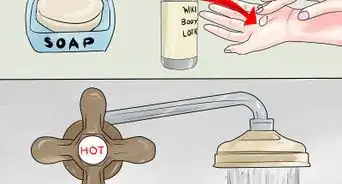
3Use a light moisturizer in any area that tends to be dry. Pick an oil-free facial moisturizer. Rub a small amount into your dry skin areas, such as under your nostrils.[5]
- This process will help reduce streaking.
- If you're using a spray tan, apply moisturizer all over, as these tans can be drying.
- Let your face dry for at least 20 minutes before sealing your pores for the tan.
-
4Seal your pores by rubbing ice on your face. Self-tanner can clog your pores, so you want to tighten them up if possible. Grab an ice cube, and run it over your face several times, until your skin feels slightly cold.[6]
- You can also use a cool, damp washcloth over your face for a few minutes instead.[7]
- Pat your face dry when you're done.
-
5Use petroleum jelly on your eyebrows and hairline. If you get tanner in these areas, it can really stick out. For instance, if you get it in your hairline, it can create an uneven tan along that edge. Petroleum jelly will keep these areas from the fake tanner, creating nice, even edges.[8]
- Apply a thin coating with your finger on your eyebrows and hairline. Along your hairline, get as close to the hair as you can.
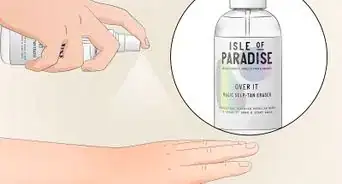
- If you're worried about getting spray tanner on your hair, consider wearing a shower cap to help protect it.


Using a Spray Tanner
-
1Close your eyes before spraying. You don't want to get the tanner in your eyes at all. Before you start spraying, shut your eyes, but don't squeeze them tight. That can create wrinkles, making streaks in your tan.[9]
-
2Avoid breathing in while you're spraying. It's also not a great idea to breathe in the tanner you're spraying. Take a deep breath before you start spraying, and try to hold it the whole time you're spraying.[10]
- If you can, move out of the cloud of tanner a little before taking a deep breath.
-
3Spray downward with the can. Spraying upward can cause problems: you might get the tanner in your nose and eyes. Hold the can slightly above your face for the best effect.[11]
-
4Hold the can about 8 inches (20 cm) from your face when spraying. If you get the can too close to your face, it can create blotches. It may even cause the tanner to run down your face. Keep the can out a bit, so you get a nice, even coverage.[12]
- Think about how you'd apply spray paint. Hold it away from your face and move it back and forth as you move down your face, creating an even cover.
-
5Concentrate on your forehead, cheeks, nose, and chin for a few seconds. Spray your forehead, and then move down the center of your face, catching your nose and chin. Hit the apples of both cheeks, then open your eyes to check your work. Try to keep the spray going continuously.
- If it looks like you got the high points with your tan, use a buffing mitt to dab the areas and gently pull it out to your jawbone and hairline.
- If you don't quite have the coverage you want, try a few more seconds of spray.
-
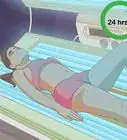
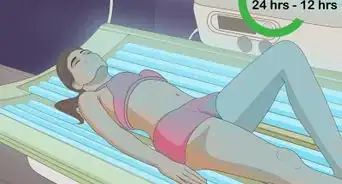
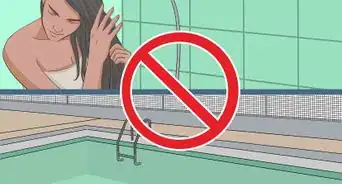
6Wait at least a few hours to wash your face. You may even want to wait overnight. However, you should wash the tanner off in warm water before you leave your home.[13]


Applying a Lotion or Gel Tanner
-
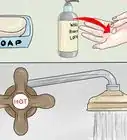
1Put gloves on to protect your hands. If you apply the tanner without gloves, you're likely to end up with orange-tinted hands, a dead giveaway. Don some latex or nitrile gloves to avoid this situation.[14]
- You should still wash your hands afterwards, even if you do put gloves on.
- If you're using a gradual tanner, such as a moisturizer with a tanner in it, you likely won't need the gloves, but you should wash your hands after applying it.
-
2Rub the tanner into your face with your fingertips. Add a dime-sized dollop to your palm, and move it to your fingertips. It's easiest to use your fingertips to rub the tanner in.[15]
-
3Begin with the areas that typically tan first. The areas that receive the most sun are your forehead, your cheeks, your nose, and your chin, so begin with those areas with your fake tan. Rub the tanner into these areas in a gentle circular motion.[16]
- Apply it gently to the area around your nostrils, including your upper lip. The driest areas of your face, such as the skin around your nostrils, will absorb the tanner more readily. When applying the tanner to these areas, be gentle.
-
4Move outward from these areas. Lightly pull the tanner down past your jawbone. Move it out under your ears, and up towards your hairline. Skip over your eyebrows altogether.[17]
- Don't apply tanner to your eyelids, as it can turn them orange. The tanner can also get in your eyes.
-
5Buff your face lightly at the end. Grab a buffing mitt, and dab at your face. Hit areas where you think you may have applied more than to help spread it out. This process will help create a more even-looking tan. You can buy buffing mitts online or at beauty supply stores.[18]
-
6Leave the tanner on for at least a few hours. It may be tempting to wash the tanner off quickly, but you need it to do its job on your skin. Try to leave it on for at least a few hours or even overnight. However, do wash your face in warm water before leaving your home.[19]


References
- ↑ https://www.makeup.com/what-you-need-to-know-about-spray-tans
- ↑ https://www.cosmopolitan.com/style-beauty/beauty/news/a53481/how-to-exfoliate-your-face/
- ↑ https://intothegloss.com/2016/10/physical-exfoliation-vs-chemical-exfoliation/
- ↑ https://www.allure.com/story/how-to-self-tan-your-face
- ↑ https://www.allure.com/story/how-to-self-tan-your-face
- ↑ https://www.huffingtonpost.com/byrdie/self-tanning-tips_b_7952902.html
- ↑ https://www.marieclaire.co.uk/beauty/skincare/fake-tan-tips-211418
- ↑ https://www.marieclaire.co.uk/beauty/skincare/fake-tan-tips-211418
- ↑ https://www.cosmopolitan.com/uk/beauty-hair/advice/a33872/first-time-you-get-a-spray-tan/
- ↑ https://www.cosmopolitan.com/uk/beauty-hair/advice/a33872/first-time-you-get-a-spray-tan/
- ↑ https://www.marieclaire.co.uk/beauty/skincare/fake-tan-tips-211418
- ↑ https://www.marieclaire.co.uk/beauty/skincare/fake-tan-tips-211418
- ↑ http://www.thefashionspot.com/beauty/419481-self-tanner-tips/
- ↑ https://www.marieclaire.co.uk/beauty/skincare/fake-tan-tips-211418
- ↑ https://www.allure.com/story/how-to-self-tan-your-face
- ↑ https://www.allure.com/story/how-to-self-tan-your-face
- ↑ https://www.allure.com/story/how-to-self-tan-your-face
- ↑ https://www.marieclaire.co.uk/beauty/skincare/fake-tan-tips-211418
- ↑ http://www.thefashionspot.com/beauty/419481-self-tanner-tips/
- ↑ http://stylecaster.com/beauty/best-self-tanner-for-face/#slide-2
About This Article