This article was co-authored by wikiHow Staff. Our trained team of editors and researchers validate articles for accuracy and comprehensiveness. wikiHow's Content Management Team carefully monitors the work from our editorial staff to ensure that each article is backed by trusted research and meets our high quality standards.
There are 12 references cited in this article, which can be found at the bottom of the page.
wikiHow marks an article as reader-approved once it receives enough positive feedback. In this case, 95% of readers who voted found the article helpful, earning it our reader-approved status.
This article has been viewed 540,121 times.
Learn more...
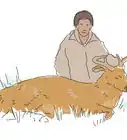
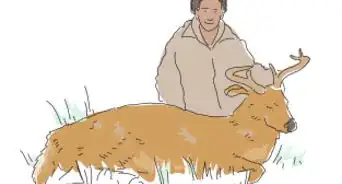
After shooting a deer, field dressing is the most important step in getting high quality meat (venison) from the animal. For the most part, all you need to field clean a deer is a sharp knife and a strong stomach. Once you've gutted the deer, drag it to your vehicle and transport it home or to a butcher to skin and quarter it.
Steps
Making it Safe to Clean the Deer
-
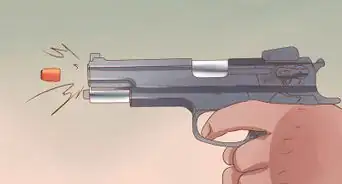
1Reload your weapon and watch the deer for a few minutes for signs of life. After shooting the deer, close the distance between you and the deer to make sure you can deliver another shot if the deer is still alive. Approaching an injured deer is very dangerous, so if you see signs that the deer is still alive, you can either shoot the deer again or wait for it to die.[1]
- Do not approach a live deer to slice its throat with a knife. Deer can be very dangerous when injured.
- Aim about a third of the way up the body of the deer, directly behind the front shoulder when firing a second shot. That’s the vicinity of the deer’s heart.
-
2Unload your weapon. Once you’re sure the deer is dead, you need to clear the firearm before safely setting the weapon aside to clean the deer. Remove the magazine (if present) and clear the chamber or barrel. Make sure to visually confirm that there are no rounds or shells still in the chamber or barrel.[2]
- Different shotguns and rifles utilize different loading mechanisms. Clearing a muzzleloader, breach loader, pump shotgun, bolt action, or a semi-automatic rifle all require different methods you should be apprised with well before hunting deer.
-
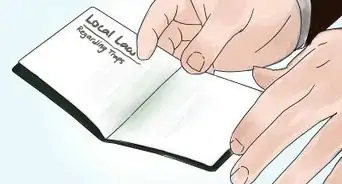
3Attach your tag to the deer in a convenient location. If a game warden approaches you while cleaning your deer, you will be expected to be able to show the tag you’ve attached to the deer. Fill out the required information on the tag (which varies depending on local government but usually includes date and time of the kill) and tie it to the deer in a visible spot.[3]
- Most states don’t require the tag be placed anywhere specifically, just as long as its visible.[4]
- The tag must stay on the deer until it's done being transported and has been quartered.
-
4Drag the deer to clearing on a slight incline to field dress it. Chances are good that the deer didn’t die in the best spot to be field cleaned. Grab it by the hind legs and pull the deer to a suitable clearing that is preferably on a slight incline.[5]
- Never pick up and carry a dead deer. Other hunters may mistake it for a live one and shoot you.
- Look for a clear patch of grass with a slight incline.
-
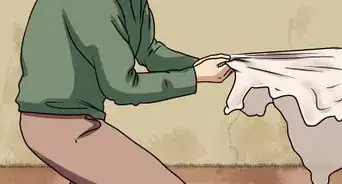
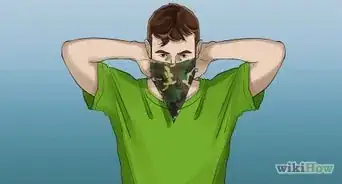
5Hang a piece of blaze orange fabric on a nearby tree. Once you’ve determined where you’ll field dress the deer, remove an article of clothing that’s blaze orange and hang it near you on a tree. It may be your hat, jacket, vest, or any other piece of orange fabric you’re carrying. This will catch the eye of other hunters and reduce the chances that you could be shot while you work.[6]
- You may want to remove your jacket to avoid getting it bloody anyway.
- Try to keep something blaze orange on your body for safety as well, such as a hat.


Removing the Entrails
-
1Position the deer with its head facing uphill. Drag the deer by its front or hind legs to position it. If you were able to find a slight incline, keeping the head higher than the body will direct the flow of blood while you work and help to prevent creating a big mess in your workspace.[7]
- If there are no hills or inclines around you can still clean the deer.
-
2Slice into the belly just deep enough to get through the skin. Pinch the skin and hair together with your thumb and index fingers and pull it away from the deer’s body. Then insert a sharp knife to carefully begin cutting away the skin without penetrating the organs and entrails beneath it. Use a sharp 2 to 4 in (5.1 to 10.2 cm) fixed blade hunting knife.[8]
- Piercing the deer’s stomach or entrails could release contaminants that might ruin the meat.
- Be very careful not to cut your hands or fingers while cutting the skin.
-
3Slice the skin all the way up to the neck and down to the anus. While you could feasibly cut the skin along with the muscle of the deer, separating it ahead of time will reduce the chances that you get any hair or debris in the meat.[9]
- Slice in a straight line, holding the skin up and away from the meat of the deer when necessary to avoid cutting deeper into the organs of the stomach.
- You can pull the skin to the side a little while working, if necessary.
-
4Make an incision into the middle of the belly muscle and insert 2 fingers into the hole. Again, be very careful not to cut too deep into the deer as you slice into the muscle tissue. Cut just a large enough hole through that muscular barrier to insert your knife and 2 fingers. Once done, insert those 2 fingers into the hole with your palm facing up and spread them into the shape of a “V” or peace sign.[10]
- The muscular barrier you cut through is also sometimes called an abdominal wall.
- It is not required, but you can wear gloves for this step if it makes you more comfortable.
-
5Insert the blade facing up between the 2 fingers you inserted. Place the back or spine of the blade between the knuckles of the 2 fingers you have inserted. Press up with those fingers to keep the muscle separated slightly from the entrails and organs found beneath it.[11]
- Your fingers will guide the blade and because it’s facing upward, it won’t cut the entrails beneath the muscle.
-
6Cut all the way up the deer’s midline without piercing the entrails. Keep your fingers inserted as you begin to cut a straight line through the deer’s muscle the entire length of its belly. As you move the knife further up, move your fingers along with it to keep the muscle separated from the entrails.[12]
- Cut from the deer’s pelvis all the way up to its sternum.
- Try to keep the cut centered on the deer’s midline as you go.
-
7Remove the sex organs if they’re in the way (when applicable). Some states require that you leave a buck’s sex organs intact to verify its gender, however, if you don’t live in such a state you may choose to cut away the sex organs as you work. Reach inside the body cavity and cut the penis and testicles at their base to remove them.[13]
- You may also cut out the udders of female deer. Cut around both sides of each udder to remove them.
-
8Cut a hole around the anus, then tie it off from the inside to prevent spilling. With female deer, make the hole larger to include the vagina. Then pull the anus up from the inside and tie it off like you would a balloon. This will prevent anything from leaking out of it and spoiling the meat.[14]
- The cut around the anus and vagina should be about 4 inches (10 cm) deep. Be careful not to puncture the rectum while cutting.
-
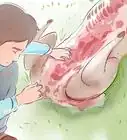
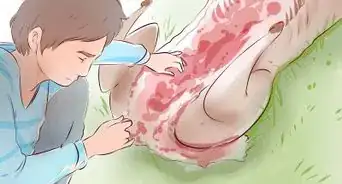
9Roll the deer on its side and carefully pull out the entrails with your hands. With the deer on one side, start by removing the pear-shaped translucent sac near the bottom of the abdomen (the bladder). Pinch the tube going into the bladder and cut just above where you’ve pinched to avoid letting any urine leak onto the meat. After that, most of the entrails will come out of the deer pretty easily until you get to the back.[15]
- Most of the entrails you remove at this point will be the deer’s stomach, colon, and intestines. The rest will be in the chest cavity.
- Reach into the cavity and cut the entrails and organs loose from the back of the stomach once you’ve pulled them all out.
- Use the same method as you did with the bladder to pinch off the esophagus when cutting the stomach cavity free to avoid any old food from spilling out.


Cleaning out the Chest Cavity
-
1Saw the sternum all the way into the upper chest area if you want easier access. Some hunters may choose to leave the chest intact for mounting purposes. Otherwise, use your knife to saw through the sternum and up into the chest for easier access to the organs housed inside.[16]
- Keep the blade oriented down toward the deer as you press down and saw back and forth with the blade to separate the sternum the best you can.
- You can still access the organs in the chest without doing this, but it may make it easier.
-
2Cut the diaphragm away from the deer’s ribs on both sides. The diaphragm is a thin layer of tissue that holds the entrails on the ribs of the deer. Slide your hand into the chest cavity and use the blade to cut the diaphragm away from the ribs so the entrails come out easily.[17]
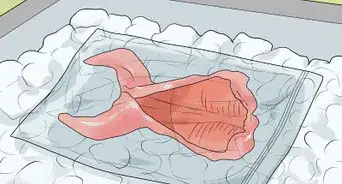
- If you want to keep them, separate the heart and lungs by cutting them free from the organs you’ve removed. Place each in separate plastic bags and put those bags in a cooler if you have one available.
- Don’t pull anything out of the chest cavity as you cut unless it comes out loose.
- Be extremely careful cutting inside the chest cavity where you can’t see.
-
3Reach into the chest with a knife to cut the windpipe and esophagus. Depending on whether or not you were able to saw through the rib cage, this can be a difficult step. Reach both hands up into the chest cavity toward the deer’s head and grab the windpipe and esophagus (2 tubes running up to the deer’s mouth). Grip them both with your non-dominant hand and cut both tubes.[18]
- This will separate the windpipe and esophagus from the deer’s mouth above where you cut.
- Move slowly and deliberately to ensure you don’t accidentally cut yourself.
- Don’t let go after you cut the windpipe and esophagus.
-
4Grip the windpipe and pull downward while cutting away any snags. Remove the entrails and organs out of the deer’s chest by keeping your grip of the windpipe and esophagus as you pull your hand back down toward the stomach and out of the deer. Use the knife to cut any snags that hinder your progress.[19]
- If you cut the diaphragm well, most of the entrails will come sliding out as you pull.
- Most of the entrails of the deer will now be removed.
-
5Prop the body cavity open with a stick. Use any sturdy stick you find lying around to help hold the opening open. Propping the cavity open will allow you to get a good look inside to spot anything you may have missed while also helping to dry the cavity out. [20]
- It can be difficult to see down into the cavity while you’re working. With the stick in place, it will allow more light to get in.
-
6Clean out any remaining entrails or debris. If you choose, you can use clean water to help clean out the cavity, but its not necessary. Remove any chunks of entrails or debris that may have fallen into the cavity while you were working.[21]
- Be sure the cavity is cleaned out completely. Use a knife to cut away anything that’s left stuck to the inside of the ribs.
- If you use water, you can also use paper towels or whatever else you have around to help dry it out.
- Cleaning out the entrails and drying the meat is the most effective way to prevent spoilage until you can get the deer quartered and refrigerated.
-
7Dry the cavity by letting it sit for an hour. During that time the deer will cool and more of the blood will drain out. Draining the blood will reduce the weight of the deer and make it much easier to transport out of the woods. If you have a long drive home, add ice to the body cavity and wrap the deer in plastic to protect it from exposure to heat and debris.[22]
- You may want to prop the deer up on a nearby tree to help with draining.
- Be careful not to slip in the blood while working around the deer’s body.
- Cleaning and drying the meat will help to prevent spoilage. Get the deer out of the woods and quartered as quickly as you can once it's dry.


Community Q&A
-
QuestionWhy is this necessary?
 Lily IrelandCommunity AnswerThis is necessary to preserve the meat and to avoid having it spoil.
Things You'll Need
- A sharp knife
- A bone saw or zip saw
- Disposable gloves
- A few bags (to carry out trash)
- Water and some paper towels
- Drag rope

References
- ↑ https://huntfish.mdc.mo.gov/hunting-trapping/species/deer/deer-getting-started/field-dressing-your-deer
- ↑ https://www.michigan.gov/documents/dnr/how_to_field-dress_deer_493715_7.pdf
- ↑ https://www.michigan.gov/documents/dnr/how_to_field-dress_deer_493715_7.pdf
- ↑ https://tpwd.texas.gov/regulations/outdoor-annual/licenses/tagging-instructions/tagging-deer
- ↑ https://files.dnr.state.mn.us/fish_wildlife/wildlife/disease/cwd/cwdfdbrochure.pdf
- ↑ https://www.michigan.gov/documents/dnr/how_to_field-dress_deer_493715_7.pdf
- ↑ https://www.hunter-ed.com/washington/studyGuide/Field-Dressing-a-Deer-Detailed-Instructions/20105001_700046905/
- ↑ http://ucfoodsafety.ucdavis.edu/files/26399.pdf
- ↑ https://wildlife.ohiodnr.gov/portals/wildlife/pdfs/publications/hunting/pub111.pdf
- ↑ https://extension.psu.edu/field-dressing-deer-pocket-guide
- ↑ https://extension.psu.edu/field-dressing-deer-pocket-guide
- ↑ https://wildlife.ohiodnr.gov/portals/wildlife/pdfs/publications/hunting/pub111.pdf
- ↑ https://www.michigan.gov/documents/dnr/how_to_field-dress_deer_493715_7.pdf
- ↑ https://www.hunter-ed.com/washington/studyGuide/Field-Dressing-a-Deer-Detailed-Instructions/20105001_700046905/
- ↑ https://wildlife.ohiodnr.gov/portals/wildlife/pdfs/publications/hunting/pub111.pdf
- ↑ https://files.dnr.state.mn.us/fish_wildlife/wildlife/disease/cwd/cwdfdbrochure.pdf
- ↑ https://www.michigan.gov/documents/dnr/how_to_field-dress_deer_493715_7.pdf
- ↑ https://www.michigan.gov/documents/dnr/how_to_field-dress_deer_493715_7.pdf
- ↑ https://www.michigan.gov/documents/dnr/how_to_field-dress_deer_493715_7.pdf
- ↑ https://huntfish.mdc.mo.gov/hunting-trapping/species/deer/deer-getting-started/field-dressing-your-deer
- ↑ https://extension.psu.edu/field-dressing-deer-pocket-guide
- ↑ https://huntfish.mdc.mo.gov/hunting-trapping/species/deer/deer-getting-started/field-dressing-your-deer
About This Article

To field dress a deer, put on gloves to prevent possible contamination. Next, lay the deer on its back, find its sternum, and make a cut from the sternum to the crotch, penetrating the deer's hide and membrane but not its guts. Then, start from the deer's crotch and pull out its guts while you cut the membranes linking the innards to the spine and diaphragm. Sever the last membranes holding its guts, and pull the guts free. Finally, pound your knife through the center of its pelvic bone, cut the skin around the anus, and pull out the colon. To learn how to field dress a deer if you’ve got a hoist, keep reading!