This article was co-authored by William & Shannon Latil. William & Shannon Latil are Furniture Refinishing & Home Remodeling Specialists and the Founders of Furniture Refinishing Services based in Houston, Texas. With over 30 years of experience, William and Shannon specialize in repairing and restoring wood furniture, refinishing kitchen cabinets, remodeling kitchens, and building live-edge wooden tables. William and Shannon have won Awards for Excellence from the Better Business Bureau and the Houston Chronicle Best Small Business Award. Their work has also been featured in Houston Press Magazine - Kitchen Design. Additionally, the Furniture Refinishing Services team has conducted major refinishing work on venues such as NRG Stadium and Minute Maid Park.
There are 9 references cited in this article, which can be found at the bottom of the page.
This article has been viewed 231,744 times.
Though cracks are unappealing, there are plenty of products available that can save a damaged piece of wood. Wood putty or wood filler sticks are easy to use and effective for covering over wide cracks in indoor and unstained wood. For a quick fix, a mixture of wood glue and sawdust seamlessly blends in small cracks and gaps in assembled furniture. Purchase epoxy to handle larger gaps, such as on outdoor projects. After some blending and sanding, no one will notice the damaged area you patched.
Steps
Using Wood Putty or Filler Sticks
-
1Purchase a filler compound that’s the same color as the wood. Look for crayon-shaped wood filler sticks or wood putty. These products, purchased from home improvement stores or ordered online, come in a variety of colors. Pick the one that blends in best with the wood you’re treating.[1]
- If you can’t find the exact shade you need, you can buy different colors and mix them together to create different shades.
- If you wish to color the wood later, make sure the label says the product is stainable. It’ll take on the color of the stain, blending in with the wood.
-
2Push the filler into the hole with your finger. If you’re using a filler stick, simply rub the stick over the crack. You can then use your finger to spread it more as needed. When using putty, a putty knife or chisel can help spread the material over the crack.Advertisement
-
3Overfill the crack with filler material. Continue applying filler until it comes out the top of the crack. When you smooth and sand the filler later, it’ll blend the crack more effectively because of the overfill.[2]
-
4Smooth the filler with a putty knife. Before the material dries on the wood, flatten it out as much as possible. If you don’t have a putty knife, run a clean rag or your finger over the crack. Make sure the rag is clean to avoid introducing debris.[3]
-
5Let the wood filler dry for 8 hours. The amount of time needed for the filler material to dry depends on the product, so check the label for the recommended wait time. To be safe, leaving the wood alone for 8 hours or overnight will ensure the filler dries completely.[4]
-
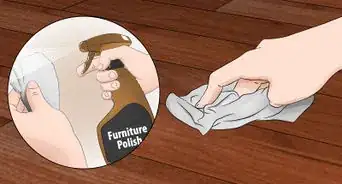
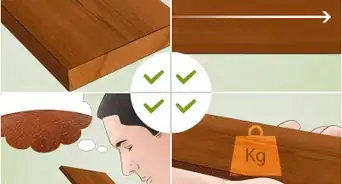
6Sand down the excess filler. Blend the cracked area with a plane or fine grit sandpaper. Aim for a sandpaper grit between 120 and 220. Wear away the filler until it’s as flat against the wood as you can make it. When finished, the crack shouldn’t stand out as a discolored patch.[5] If it does, lightly go over it with a matching color stain.


Filling Cracks with Glue and Sawdust
-
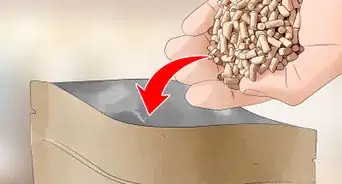
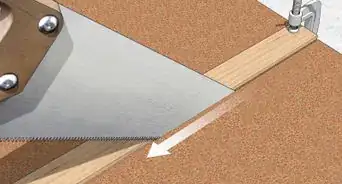
1Get sawdust that matches the type and color of your wood. Sawdust is used to cover the white glue and blend the crack, so it needs to match the wood you’re treating as much as possible. For the best blend, get some sawdust from the wood by sawing or sanding it.
- When this isn’t possible, purchase a bag of sawdust from a home improvement store.
-
2Squeeze wood glue into the crack. Get a bottle of wood glue from the store. Press the nozzle against the crack and squeeze the container until the glue fills the entire space you need to repair. For small cracks, you may also use a syringe to ensure the glue gets all the way down inside the crack.[6]
-
3Cover the glue with sawdust. Layer a lot of sawdust over the glue to completely cover it. Rub your finger over the crack to ensure the glue holds the sawdust in place. When you’re finished, the sawdust should hide the glue from view, blending in with the rest of the wood.[7]
-
4Let the glue dry overnight. Leave the glue to rest until the next day. When the glue is completely dried, the crack should be hard to see. If it’s still visible, reapply the glue and sawdust combination or a different filler.[8]
-
5Sand the crack smooth. Go over the crack with a piece of fine grit sandpaper that's between 120 and 220 grit. Carefully rub down the treated area until the filler is flat and unnoticeable.[9]


Fixing Cracks with Epoxy
-
1Wear a respirator mask and work in a well-ventilated area. Epoxy isn’t something you want to breathe in, so stay safe by putting on a mask before you begin. Working outdoors is your safest option, and make sure pets and family members aren’t near your work area.[10]
-
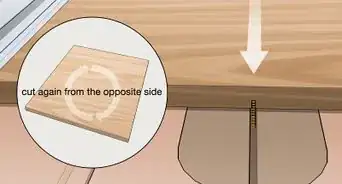
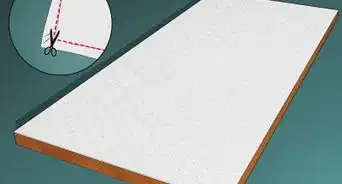
2Cover the crack with masking tape if it goes through the wood. If the crack goes all the way through the wood, tape over one side. The tape will hold the liquid epoxy in place long enough for it to solidify.[11]
- Epoxy is better for treating large cracks than the other filler methods.
-
3Squirt equal parts of epoxy components into a bowl. Epoxy consists of two parts packaged together, resin and hardener. Estimate how much you’ll need to fill the crack. Add them to the bowl, but don’t mix them yet.[12]
- The epoxy immediately begins to harden when the parts are combined. You’ll have about 5 minutes to get it into the crack, so start with a small batch.
-
4Add a drop of wood-colored dye to the epoxy. At home improvement stores you can usually find all sorts of epoxy coloring dyes, powdered pigments, or metallic powders. Pick one that matches your project, then use a drop of dye or sprinkle of powder to color the epoxy.[13]
- You can even mix in a scoop of coffee grounds to turn the epoxy black.[14]
-
5Stir the epoxy immediately. Grab a spoon or stirring stick and quickly mix the epoxy parts together, along with any added coloring. After a few seconds it’ll turn into a paint-like substance ready to be spread over the crack.[15]
-
6Spoon the mixture into the crack. Transfer the epoxy to the crack using the stirring spoon or stick. Push it as far into the crack as possible. Most of it will flow down to the bottom. If you don’t have enough to fill the entire crack, simply make more.
- Use a needle to pop any bubbles that appear when pouring the epoxy.
-
7Mix more epoxy to fill larger cracks. The epoxy hardens within minutes, so you’ll know right away whether or not you need to mix another batch. Continue mixing equal amounts of resin and hardener until you’ve filled the entire crack.[16]
-
8Let the epoxy dry overnight. After 2 to 4 hours, the epoxy will have dried significantly. Press your fingernail into it. If you leave a dent, it’s not ready. Letting it dry overnight is always preferable and, in cool weather, is necessary to ensure that the epoxy stays in place.[17]
-
9Level the epoxy with sandpaper. First, cut away any excess epoxy with a putty knife. Then get some fine grit (120-220) sandpaper or a file to carefully flatten the epoxy-treated area until it’s level with the rest of the wood.[18]
- If you have a block plane, it’ll make this part easier and can prevent you from sanding off part of the wood.
-
10Color in white specks with a felt tip marker. When you’re finished, you may see some undyed flecks of hardened epoxy. These can be colored in with any marker that’s a similar color to the dye you used. You won’t even know the crack was there and can move on to the rest of your project.


Community Q&A
-
QuestionI'm using epoxy resin to seal a crack in wood. Masking tape did not work, and resin leaked out within minutes. What kind of tape would be best to use?
 Terry HeapsCommunity AnswerI've always used a product called "Plastic Wood." for all my crack and nail hole puttying. It is the best product in my estimate. With that being said, any hardware store will carry "Frog Tape." It's green in color and sticks to any semi-smooth surface very well. Painters and carpenters love the stuff because nothing will seep under it. Pulling it off leaves a nice clean sharp line.
 -
QuestionWhen using epoxy resin, what kind of tape should I use to seal off the underside of a wood crack?
 Community AnswerUse plastic, wood or frog tape. You can buy them at hardware stores.
 -
QuestionI have a tongue and groove 2x6 raw wood floor that has dried and shrunk. What should I fill the gaps in with? I want to paint the floor after I fill the gaps.
 Community AnswerYou can buy floor leveler, of the type used to level floors before laying vinyl. Fill in the cracks, then sand level.
Warnings
- Sanding wood leaves wood particles in the air. Wear a respirator to avoid inhaling them.⧼thumbs_response⧽
- Working with chemicals can be dangerous. Wear a respirator and work in a well-ventilated area.⧼thumbs_response⧽
Things You’ll Need
Using Wood Putty or Filler Sticks
- Wood putty or filler stick
- Putty knife
- Sandpaper
Filling Cracks with Glue and Sawdust
- Wood glue
- Sawdust
- Sandpaper
Fixing Cracks with Epoxy
- Respirator mask
- 2-part liquid epoxy (resin and hardener)
- Dye or pigment
- Mixing cup
- Stirring utensil
- Needle or pin
- Masking tape
- Dye-colored marker
- Sandpaper

References
- ↑ https://www.thisoldhouse.com/how-to/how-to-choose-and-use-wood-filler
- ↑ https://www.thisoldhouse.com/how-to/how-to-choose-and-use-wood-filler
- ↑ https://www.bobvila.com/articles/how-to-use-wood-filler/
- ↑ https://www.bobvila.com/articles/how-to-use-wood-filler/
- ↑ https://www.bobvila.com/articles/how-to-use-wood-filler/
- ↑ http://www.popularmechanics.com/home/interior-projects/how-to/a19355/how-to-fill-gaps-in-woodworking-joints/
- ↑ https://www.thisoldhouse.com/how-to/how-to-choose-and-use-wood-filler
- ↑ https://www.thekitchn.com/how-to-repair-a-cracked-butcher-block-or-cutting-board-projects-from-the-kitchn-215403
- ↑ http://www.popularmechanics.com/home/interior-projects/how-to/a19355/how-to-fill-gaps-in-woodworking-joints/
- ↑ https://www.familyhandyman.com/carpentry/how-to-use-epoxy-on-wood-for-repairs/view-all/
- ↑ https://www.prettyhandygirl.com/how-to-fill-voids-and-knot-holes-in-wood/
- ↑ http://www.woodworkersjournal.com/filling-voids-cracks-wood-two-part-epoxy/
- ↑ http://www.woodworkersjournal.com/filling-voids-cracks-wood-two-part-epoxy/
- ↑ http://www.docgreenwoodturner.com/coffee.html
- ↑ http://www.docgreenwoodturner.com/coffee.html
- ↑ https://www.familyhandyman.com/carpentry/how-to-use-epoxy-on-wood-for-repairs/view-all/
- ↑ https://bateau2.com/howto/cure_times.php
- ↑ https://www.familyhandyman.com/carpentry/how-to-use-epoxy-on-wood-for-repairs/view-all/
About This Article

To fill in cracks start by purchasing a filler compound that's the same color as the wood, so it blends in. Using your finger, push filler into the hole until it's slightly overflowing, then smooth it down with a putty knife. Once it's dry, which should take about 8 hours, sand down any excess filler using fine-grit sandpaper. Alternatively, if you want to fill cracks in wood with glue and sawdust, start by getting sawdust that matches the type and color of your wood. Then, fill the crack with wood glue and sprinkle the sawdust on top until the glue is completely covered. From here, simply wait for the glue to dry overnight, then sand the crack smooth with sandpaper. For more tips, including how to fix cracks in wood with epoxy, read on!