This article was co-authored by wikiHow Staff. Our trained team of editors and researchers validate articles for accuracy and comprehensiveness. wikiHow's Content Management Team carefully monitors the work from our editorial staff to ensure that each article is backed by trusted research and meets our high quality standards.
There are 10 references cited in this article, which can be found at the bottom of the page.
This article has been viewed 9,122 times.
Learn more...
If you’ve recently done some repairs on your hardwood floors, then you might be left with a few nail holes scattered around. What now? Well, luckily, filling those holes in is a lot easier than you probably think! The process is slightly different for bare or finished floors, but it’s just as simple either way.
Steps
Unfinished Wood
-
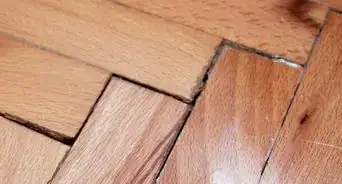
1Get a latex wood filler that matches the color of the wood. Wood filler comes in a variety of shades to match all types of wood. Get a color that matches the wood on your floor for a seamless filler.[1]
- There are lots of wood filler colors at any hardware store. They’re usually divided by wood type, so look for the type meant for the wood on your floor.
- If you’re planning on painting the wood, then the filler color doesn't matter because you'll paint right over it.
- If the wood has any stain or finish on it, then don’t use this method. It only works for bare, unfinished wood.
-
2Spread the filler into the nail holes with a plastic putty knife. Scoop a bit of filler out of the jar with the knife and rub it into the nail hole. Press the knife down flat so the hole is completely filled. Repeat this for each nail hole you have to fill.[2]
- Use a plastic putty knife so you don’t scratch the floor. Metal ones could leave marks on the floor and ruin the finish.
- Since most nail holes are small, you won’t need a lot of filler. Just scoop out a little at a time.
Advertisement -
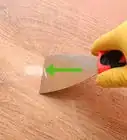
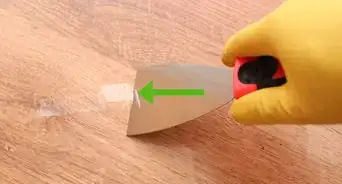
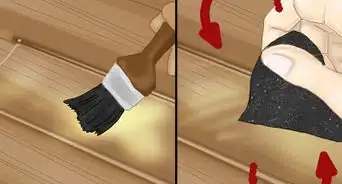
3Scrape off excess filler around each hole. Wipe off any remaining filler on your putty knife with a rag. Then hold the front edge of the knife against the floor and scrape it over the holes get rid of any excess filler on the floor. Wipe the knife down after each scrape so you don't get filler everywhere.[3]
-
4Wait 15-30 minutes for the filler to dry. This is usually all it takes for wood filler to dry. Leave it alone and make sure no one steps on the filler while it’s drying.[4]
- Read the directions on the product you use for the correct drying time, and follow those directions if they’re different.
-
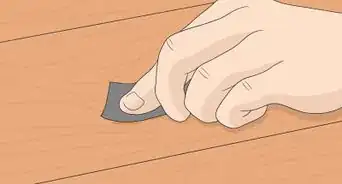
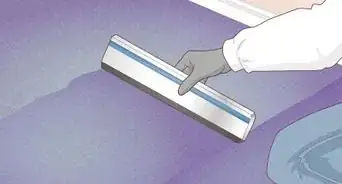
5Sand the filler smooth in a circular motion with fine-grit sandpaper. Rub around each hole with a light, circular motion. Continue sanding until the filler and wood surface are nice and smooth.[5]
- If there is some filler in the wood crevices around the hole, don’t worry. Just sand this out too by applying a bit more pressure.
-
6Vacuum up any leftover dust. The sanding will make some dust on the floor. This is no problem. Just vacuum it all up with a shop vac so your floor is nice and clean.[6]
- If you’re going to paint or stain the wood after, be sure to wipe the wood with a tack cloth or damp rag so no dust gets trapped under the paint.


Finished Floors
-
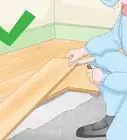
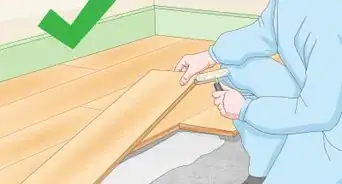
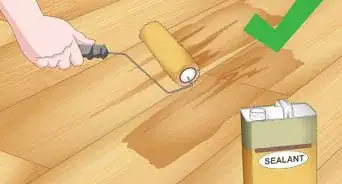
1Apply the final coat of stain and finish if the floor isn’t finished yet. You’ll want the wood putty to match the wood’s final color. If you’re not done staining or finishing the wood yet, then apply your final coat first and let it dry so the putty color matches.[7]
-
2Get a colored wax wood putty that matches the stain or paint. Wax wood putty comes in all different shades, so check your hardware store for the color that matches your floor.[8] This type of putty usually comes in a tube that looks like a pencil, but might also come in a jar.[9]
- You could also use a color that doesn’t match the paint color, but you’ll have to paint over the hole when you’re done.
-
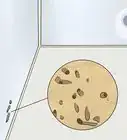
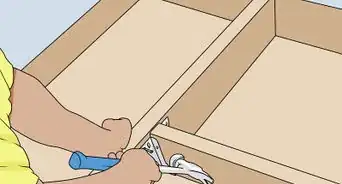
3Rub the putty into all the nail holes. Scoop a bit of putty out of the jar with your fingertip. Then press some putty into all the nail holes and rub a bit to make sure each hole is completely filled.[10]
- You could use a plastic putty knife if you don’t want your fingers to get dirty, but be very gentle. You could scratch the floor if you press too hard.
- If you’re using a pencil type putty, then you don’t have to scoop it out of a jar. Just rub the pencil tip against the holes to fill them.
-
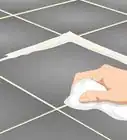
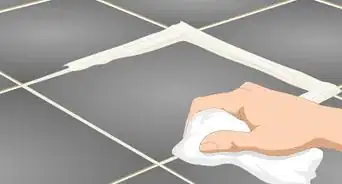
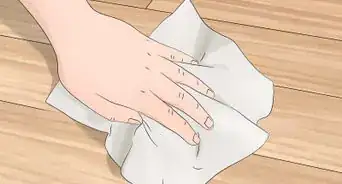
4Wipe away any excess putty with a rag. The rag doesn’t have to be wet, just make sure it’s clean. Wipe around all the holes you filled to get rid of any excess putty before it dries.[11]
- Don’t sand the wood after using the putty! This isn’t necessary and will scratch up the floor.
-
5Let the putty dry for 24-48 hours. Wood putty can harden within a few hours, but might take up to 48 hours to dry completely. Leave the putty alone while it's drying to make sure it cures completely.[12]
- If you're planning on painting over or finishing that spot, do it after the putty is completely dry.
- The drying time might be different for different brands of wood putty, so always check the packaging to confirm the right time.
-
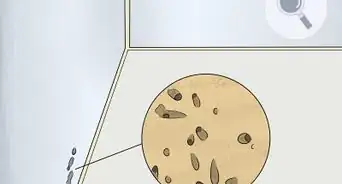
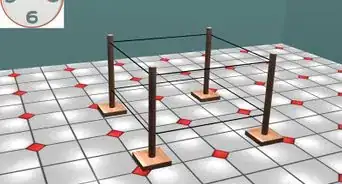
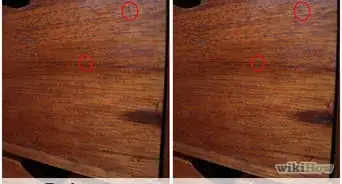
6Dig out the putty with a nail if the color is off and try a different one. It’s always possible to make a mistake and realize that the putty doesn’t match so well after using it. Don’t worry! Just use a nail and dig the putty out before it dries. Then get a different putty and try that one instead.[13]
- The putty drying time varies for different products, so always check the instructions for the type you’re using.


How Can I Fill Nail Holes?
Things You’ll Need
Bare Wood
- Cellulose wood putty
- Plastic putty knife
- Fine-grit sandpaper
- Vacuum
Finished Floors
- Colored wax wood filler
- Clean rag
References
- ↑ https://youtu.be/WFqAMnH364A?t=7
- ↑ https://youtu.be/WFqAMnH364A?t=10
- ↑ https://youtu.be/WFqAMnH364A?t=12
- ↑ https://www.bobvila.com/articles/how-to-fill-nail-holes/
- ↑ https://youtu.be/WFqAMnH364A?t=13
- ↑ https://www.popularmechanics.com/home/interior-projects/a15792/6-simple-rules-for-getting-rid-of-dust/
- ↑ https://youtu.be/-ttmdLb91ww?t=17
- ↑ https://www.popularwoodworking.com/projects/q-a-filling-nail-holes/
- ↑ https://youtu.be/WFqAMnH364A?t=24
About This Article