This article was co-authored by Kristin Pulaski and by wikiHow staff writer, Janice Tieperman. Kristin Pulaski is a Professional Nail Artist and the Founder of Paintbucket, a self-owned and operated nail salon based in Williamsburg, Brooklyn. She has over five years of experience running Paintbucket and is licensed as a nail technician. Paintbucket offers nail art manicures, pedicures, and soft gel extensions along with customized packages for wedding and bridal parties. She holds a BA in Managerial Science from Manhattan College.
This article has been viewed 20,480 times.
Aside from chipped nails, there’s nothing quite as frustrating as a smudged spot of polish on a fresh manicure or pedicure. While you may be tempted to remove all of your polish and start fresh, you might want to consider a few options beforehand. First, try covering up the blemish in your polish with a fun variety of glitter polish and nail art. If you’d prefer to take a spot treatment approach, use a small amount of acetone to loosen up the area around the smudge before reapplying an adjustment patch of polish. Finally, try erasing your smudges all together with a specialized smudge repair product. It only takes a few minutes of get your nails primed, fixed, and ready for any occasion!
Steps
Decorating the Nail to Cover the Smudge
-
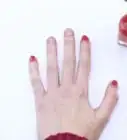
1Add a layer of glitter polish to highlight the nail. Don’t stress if a single nail looks smudged. Before you reach for the acetone, try experimenting with some glitter polish instead. Apply 1 coat of glitter polish to cover any apparent smudges, then wait at least 5 minutes for the polish to dry. To even out the appearance of your nails, paint the same nail on your opposite hand in glitter polish![1]
Tip: If you’d prefer to go all out, consider painting all of your nails with a glittery coat of polish.
-
2Choose a polish dotting tool for making playful designs. Take a special dotting tool for precise nail art and use it to make special designs all over the smudged parts of your nail. If you really like the design, you’re welcome to add more fun art to the rest of your nails as well![2]
- Nail dotting tools can be found online, or at most beauty supply stores.
Advertisement -
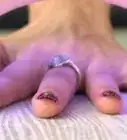
3Use gems or rhinestones for a fun and easy fix. Use a series of rhinestones to create a bright, funky design over the smudged portion of your nail. Add a dot of nail glue to each rhinestone, and position each stone with the tip of a pencil. Wait a few seconds for the glue to dry before moving your fingers around.[3]
- You can find nail gems online or at most beauty supply stores.


Performing Spot Treatment with Acetone
-
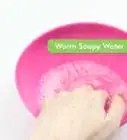
1Soak the tip of a cotton swab in acetone. Remove the cap of an acetone bottle and fill it with polish remover. Next, take a cotton swab and place 1 end in the filled cap to drench it completely. Pinch the soaked end of the cotton swab to squeeze out any excess acetone ahead of time.[4]
- Check that the cotton swab is moist but not dripping wet.
- Be careful not to drip any acetone on your other nails, as you don’t want to smudge or mess up any other coats of polish.
-
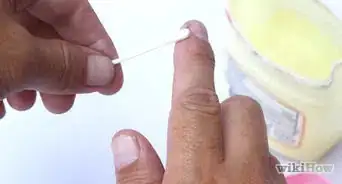
2Rub the cotton swab to spread more polish into the smudged area. Wipe around the smudged spot on your nail to loosen and spread more polish into the affected area. Use small, light movements as you rub the cotton swab, working above, below, and to the sides of the smudge to begin transferring some of the polish color.[5]
- It’s okay if you can’t get a lot of polish into the smudged spot. Just do your best to spread around as much color as you can.
-
3Apply nail polish to the affected area. Take the same polish color used on the rest of your nails and use it to reapply a coat of polish to the smudged spot on your nail. Work in short, wide strokes, spreading the polish into the smudged area as much as possible.
- View this adjustment layer as an addition to the polish that you originally applied.
-
4Wait 5 minutes for the polish to dry completely. Sit back for a few minutes, or set a timer as you let the product dry. Depending on the polish you’re using, it might not take quite as long for the product to dry completely—be sure to examine the bottle’s label to double check.
- If you don’t let this new layer layer of polish dry completely, you could be setting yourself up for more smudging.
-
5Protect your fixed nail with a layer of top coat polish. Use the applicator in the bottle to apply the clear polish in long, even strokes down the center of your nail. Apply the top coat in an even layer, making sure that all of the colored polish is fully covered and protected.[6]
Did you know? The top coat helps prevent any future smudging from occurring on that nail.


Using Smudge Repair Nail Polish
-
1Apply 1 coat of smudge repair polish to your smudged nail. Brush a layer of specialized smudge repair polish onto the affected nail. Use this product in the same way that you’d use a clear polish, letting the formula begin to work through the smudges on your nail. Apply this to any smudged nails that need fixing or adjusting.[7]
- You can find smudge repair polish online or in many beauty supply shops.
-
2Wait 10 seconds for the polish to dry. Let the formula set for at least 10 seconds before you add a protective top coat. You can see visible change in the smudged portions of your nail as the wrinkles and scuffs disappear from the surface of the polish.[8]
- If you don’t see any immediate change, apply another layer of the product after the first coat dries.
-
3Add a top coat to protect your nails from any more smudges. Apply a smooth, even layer of clear top coat polish over the surface of the smudge-free nail. Don’t use too much—instead, try keeping the polish as thin as the previous layers. Wait at least 5 minutes for the top coat to dry, or however long is specified on your bottle.[9]


Expert Q&A
Did you know you can get expert answers for this article?
Unlock expert answers by supporting wikiHow
-
QuestionWhat is the best way to get nail polish off of my skin?
 Kristin PulaskiKristin Pulaski is a Professional Nail Artist and the Founder of Paintbucket, a self-owned and operated nail salon based in Williamsburg, Brooklyn. She has over five years of experience running Paintbucket and is licensed as a nail technician. Paintbucket offers nail art manicures, pedicures, and soft gel extensions along with customized packages for wedding and bridal parties. She holds a BA in Managerial Science from Manhattan College.
Salon Owner & Nail SpecialistThe easiest solution is to just pour a few drops of acetone in a cotton ball and wipe the mistake away. If this is a consistent problem for you, there may be something wrong with your technique, though. Try to keep a steady hand while you're applying nail polish and try to work slowly so you don't make a mistake!
Support wikiHow by unlocking this expert answer.

References
- ↑ Kristin Pulaski. Salon Owner & Nail Specialist. Expert Interview. 19 May 2020.
- ↑ https://m.youtube.com/watch?v=FbcqHbv10e4&t=203s&t=4m5s
- ↑ https://www.cosmopolitan.com/style-beauty/beauty/advice/a6317/nail-art-hacks/
- ↑ Kristin Pulaski. Salon Owner & Nail Specialist. Expert Interview. 19 May 2020.
- ↑ Kristin Pulaski. Salon Owner & Nail Specialist. Expert Interview. 19 May 2020.
- ↑ Kristin Pulaski. Salon Owner & Nail Specialist. Expert Interview. 19 May 2020.
- ↑ https://www.cosmopolitan.com/style-beauty/beauty/how-to/a9261/how-to-fix-smudged-nail-polish-050211/
- ↑ https://m.youtube.com/watch?v=dhFc6_MtJbs&t=1m42s
- ↑ https://m.youtube.com/watch?v=dhFc6_MtJbs&t=1m42s
About This Article