This article was co-authored by Nicole Bolin. Nicole Bolin is a Crafting Specialist and the CEO of Stencil, a DIY Craft Studio in Phoenix, Arizona. Nicole specializes in interior design and various craft and DIY projects. Nicole holds a Certificate in Interior Design from the New York Institute of Art and Design. She opened Stencil in 2017 to teach others to create DIY projects that fit their home and lifestyle.
There are 9 references cited in this article, which can be found at the bottom of the page.
This article has been viewed 84,704 times.
If you need a quick, inexpensive way to decorate your living space, consider framing a piece of decorative fabric for a creative and appealing accent. It’s fast and simple to frame fabric using a picture frame or an embroidery hoop. Or, mount decorative fabric on a stretched canvas for a great faux-art look.
Steps
Using a Picture Frame
-
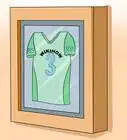
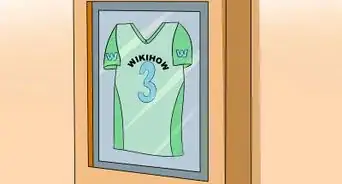
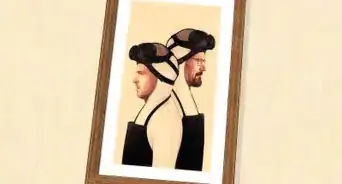
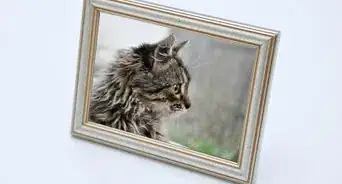
1Buy fabric and a frame that complement one another. Head to your local craft or fabric store and find a frame in the size you want. Then, choose a fabric that matches your decor and purchase enough to fill the frame, plus a little extra.[1]
- You can choose any style, weight, or pattern of fabric. Look for something that complements your decor. Maybe choose a specific color from your couch pillows that you want to bring out or a pattern from your rug that will tie the whole room together. Repeating patterns are very interesting and visually appealing when they are framed.
- If you have an elaborate print, consider using a simpler frame so that the print becomes the focal point. In contrast, if you have a simpler or smaller print, try spicing it up with a decorative or vintage frame.
-
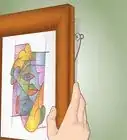
2Remove the backing from the frame. Using pliers or your fingers, lift the tabs up on the reverse side of the frame and remove the backing. Dispose of any paper, tags, or stickers that came with the frame.[2]
- Keep the backing so that you can close the frame again after you place the fabric inside.
Advertisement -
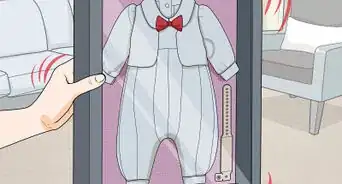
3Measure and trim the fabric to fit the frame. To measure the fabric, place the backing over the fabric, wrong-side up, and trace around it with a pen or marker. Trim the fabric down along the lines you drew.[3]
- Make sure that the portion of the fabric you want featured in the frame is centered under the backing.
- If you want to attach the fabric to the backing to make sure it doesn’t slide around, use a light spray adhesive.
-
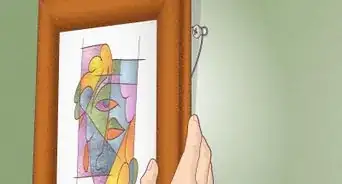
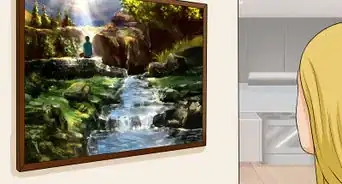
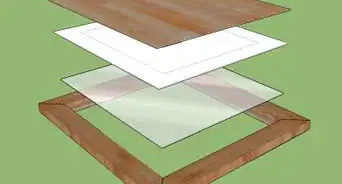
4Reassemble the frame to finish the project. Carefully turn the frame glass-side down. Then, place the cut fabric on top of the glass. Finish by putting the backing on top of the fabric and pressing the tabs back into place to close the frame.[4] [5]
- You can also leave the glass out if you want the texture of the fabric to stand out more. Just remember leaving the glass in will make it easier to clean.

Framing Fabric with an Embroidery Hoop
-
1Buy thin fabric that is a little larger than the hoop you want to use. Choose any pattern of lightweight fabric for framing. You don’t want a heavy fleece, felt, or canvas fabric because it won’t fold nicely around the hoop. Instead, choose a cotton or polyester fabric that is lightweight and flexible.[6]
-
2Cut the fabric so that it is 2 inches (5.1 cm) larger than the hoop. Pop the inner ring out of the embroidery hoop and use it to trace a circle onto the fabric. Then, trim the fabric roughly 2 inches (5.1 cm) wider than the circle you drew.[7]
- Don’t worry about being precise with your cutting. As long as it is bigger than the small hoop and you have some overhang, you will be fine.
- If you are working with a fabric that has a small, continuous pattern, you can place the hoop anywhere on the fabric since the display will look identical no matter which part you frame. For larger or uneven patterns, you may need to spend more time choosing a portion of fabric to center and display.
- You can use any scissors for cutting the fabric. Since the edges will be hidden, a perfect cut using fabric scissors or a blade is not necessary.
-
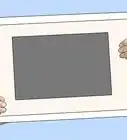
3Lay the fabric right-side up over the top of the inner ring of the hoop. Take a moment to position the fabric so it is exactly where you want it when you close the hoop. Make sure you leave a little fabric hanging over the edge of the inner hoop in all places.[8]
-
4Pull the fabric taut and close the embroidery hoop. Place the adjustable top of the embroidery hoop over the small inner ring and press it down. Before twisting the knob to close the hoop, pull the fabric tight, removing any creases or wrinkles.[9]
- The fabric should appear smooth, but not stretched.
-
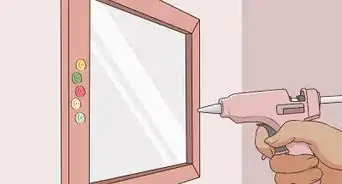
5Glue the excess fabric to the inside of the inner ring. Flip the hoop over, revealing the underside. Run a bead of tacky glue, hot glue, or super glue along the inside of the inner ring and fold the excess fabric over the ring. This will give the back a more finished look.[10]
- The fabric should be stuck to embroidery hoop ring all the way around. If there are any places that are not secure after the glue dries, reapply more glue to those places and try again.

Mounting Fabric to Canvas
-
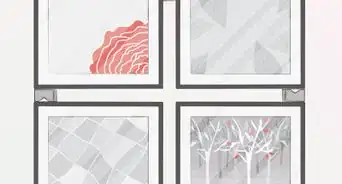
1Choose a fabric and canvas that will beautify your space. Craft and art supply stores sell canvases in a wide range of sizes, so you can find one to fit in whatever space you want to hang it. For a lighter fabric, choose a blank, white canvas, and for a darker fabric, you can go with a dark canvas.[11]
- You can mount any fabric to canvas, but a flexible, lightweight fabric will allow you to make sharper-looking edges and corners. A light cotton or cotton-blend fabric will wrap easily and beautifully on a canvas.
- Purchase enough fabric to cover the front and sides of the canvas, plus a little extra for mounting to the back of the frame.
-
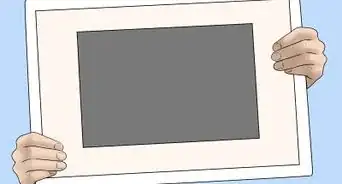
2Decide which part of the fabric you want featured on the canvas. Place the fabric right-side up over the canvas. Move it around until you find which part of the fabric looks great when restrained to the dimensions of your canvas.[12]
- If you have a fabric with a small, symmetrical, and continuous print, choosing an exact composition is not as important since the final product will look the same no matter which section of the fabric you choose. This step is significant, however, if you are working with a large print or asymmetrical pattern.
-
3Trim the fabric with scissors, leaving an edge that you can staple to the back. You want to cut the fabric down so that you have 2 to 3 inches (5 to 7.6 cm) of excess fabric along each edge of the canvas.[13]
- Don't leave too much fabric because it will bunch up on the back of the canvas and keep it from hanging flush against the wall.
-
4Glue the fabric to the canvas exactly as you want it. Flip the fabric so that it is wrong-side up. Then, apply a spray adhesive or ModPodge on the canvas and press the canvas down onto the fabric.[14]
- Gluing isn’t necessary, but will help ensure that the fabric stays put while you staple it to the back side of the frame.
-
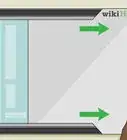
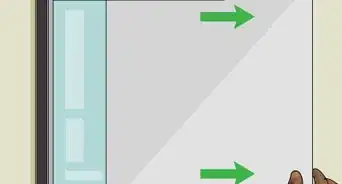
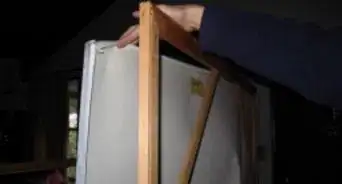
5Pull the fabric taut and staple it to the backside of the wooden frame. Fold the excess fabric over the back of the frame and staple it down, one side a time. You want to place the staples about 1 inch (2.5 cm) apart.[15]
- Work from the center out, moving toward the edges of the canvas frame.
- Leave the corners sticking out for this step.
-
6Fold and staple down the corners of the fabric. Fold the corners of the fabric down like you are wrapping a gift. Beginning on one side of the corner, create a crease against the edge of the frame and fold the tip inward. Then, repeat with the other side and use 1 or 2 staples to secure the fold into place.[16]
- If there is extra fabric after you make the corner, trim it so the canvas will hang flush on the wall.

Expert Q&A
Did you know you can get expert answers for this article?
Unlock expert answers by supporting wikiHow
-
QuestionHow can you make a framed decoration out of fabric?
 Nicole BolinNicole Bolin is a Crafting Specialist and the CEO of Stencil, a DIY Craft Studio in Phoenix, Arizona. Nicole specializes in interior design and various craft and DIY projects. Nicole holds a Certificate in Interior Design from the New York Institute of Art and Design. She opened Stencil in 2017 to teach others to create DIY projects that fit their home and lifestyle.
Crafts & DIY SpecialistSimply purchase a picture frame, then cut a piece of fabric the size of whatever photo the frame would take. Place the fabric into the frame just like you would a photo, then close the frame up.
Support wikiHow by unlocking this expert answer.
Things You'll Need
Using a Picture Frame
- Fabric
- Picture frame
- Scissors
- Spray adhesive (optional)
Framing Fabric with an Embroidery Hoop
- Fabric
- Wooden embroidery hoop
- Glue
- Scissors
Mounting Fabric to Canva
- Blank stretched canvas
- Fabric
- Spray adhesive or ModPodge (optional)
- Scissors
- Staple gun
Warnings
- If you are use an electric staple gun, put the safety on when you are not actively working with it. You should also unplug it when not in use or if you need to walk away for some reason during the middle of the process.⧼thumbs_response⧽
References
- ↑ https://thriftdiving.com/framed-fabric-wall-art-with-picture-frame/
- ↑ https://www.youtube.com/watch?v=Kc2uf0CUYgE&feature=youtu.be&t=64
- ↑ https://www.youtube.com/watch?v=Kc2uf0CUYgE&feature=youtu.be&t=96
- ↑ Nicole Bolin. Crafts & DIY Specialist. Expert Interview. 8 February 2021.
- ↑ https://youtu.be/Kc2uf0CUYgE?t=129
- ↑ https://crafts.tutsplus.com/tutorials/create-a-gorgeous-display-of-rainbow-hoop-wall-art--craft-6721
- ↑ https://crafts.tutsplus.com/tutorials/create-a-gorgeous-display-of-rainbow-hoop-wall-art--craft-6721
- ↑ https://crafts.tutsplus.com/tutorials/create-a-gorgeous-display-of-rainbow-hoop-wall-art--craft-6721
- ↑ https://crafts.tutsplus.com/tutorials/create-a-gorgeous-display-of-rainbow-hoop-wall-art--craft-6721
- ↑ https://crafts.tutsplus.com/tutorials/create-a-gorgeous-display-of-rainbow-hoop-wall-art--craft-6721
- ↑ http://fabyoubliss.com/2012/02/13/fabulous-diy-fabric-covered-canvas-wall-decor/
- ↑ https://www.realsimple.com/work-life/frame-fabric-for-quick-inexpensive-art
- ↑ https://www.realsimple.com/work-life/frame-fabric-for-quick-inexpensive-art
- ↑ https://www.dreamalittlebigger.com/post/glue-guide-use-the-right-glue-for-the-job.html
- ↑ https://www.realsimple.com/work-life/frame-fabric-for-quick-inexpensive-art
- ↑ http://fabyoubliss.com/2012/02/13/fabulous-diy-fabric-covered-canvas-wall-decor/
About This Article