This article was co-authored by David Wilkins. David Wilkins is a Professional Body Piercer and the Owner of The Axiom Body Piercing Studio in Des Moines, Iowa. David has been working in the industry since 1994 and is knowledgeable about all aspects of the body piercing industry. He runs an educational YouTube channel specializing in sharing expert body piercings and tattoo information. He completed his apprenticeship in body piercing in Omaha, Nebraska.
wikiHow marks an article as reader-approved once it receives enough positive feedback. In this case, several readers have written to tell us that this article was helpful to them, earning it our reader-approved status.
This article has been viewed 166,739 times.
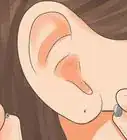
So some of you stretch your ears, or other piercings, correct? But many people don't know how to do this correctly and instead they use stretching tools that can damage their skin. This article will teach you how to stretch your earlobes with tapers. This is considered appropriate for 00g and smaller. Beyond that, the taping method is recommended.
Steps
-
1First of all, get a good lubricant: Vitamin E oil (jar or pill form), jojoba oil, olive oil, or emu oil are commonly used. This assures a smooth painless insertion of jewelry. Do not, under ANY circumstances, use Vaseline.
-
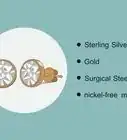
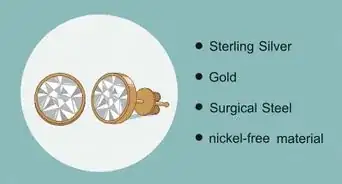
2Have a clean taper at hand; if it is made of surgical 316L steel, or glass, it can be autoclaved at a piercing shop. (316L steel is a very low grade of steel. When looking for jewelry, look for 316LVM. Surgical Steel does not mean implant grade, and should be avoided.)Advertisement
-
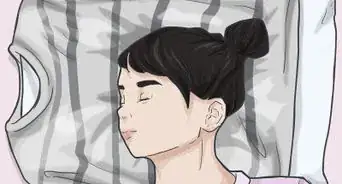
3Once that is done, some recommend taking a hot shower to open the pores of your skin and increase blood circulation in the area to aid elasticity.
-
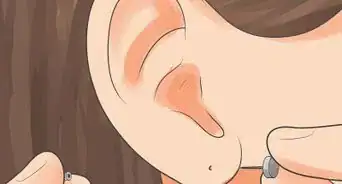
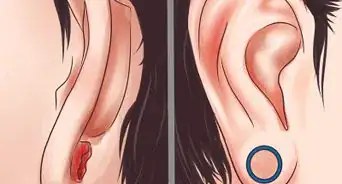
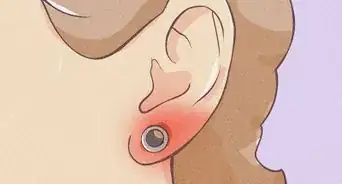
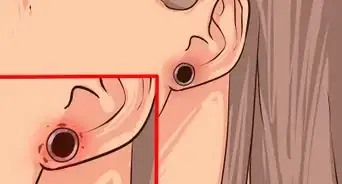
4After that, rub the lubricant onto the taper and slowly move it into the earlobe. Careful! We don't want to tear it. Be aware as this is where most blowouts occur; the fistula is being pushed out to the opposite side of insertion. If a blowout does happen to appear at any point of tapering, an upgrade to taping may be the way to go. If you don't want to do the taping method, you must downsize to the size that you were beforehand.
-
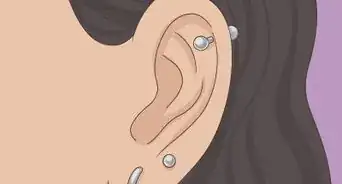
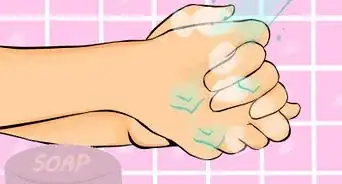
5Next, make sure that jewellery (plug, tunnel, earring, etc.) is clean and at hand. (Autoclave is the safest way because the micro tears in your skin make you vulnerable to microbes.) Do not leave tapers in for any amount of time as it will result in uneven weight distribution, greatly increasing the chances of a blowout.
-
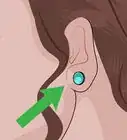
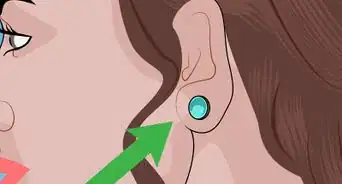
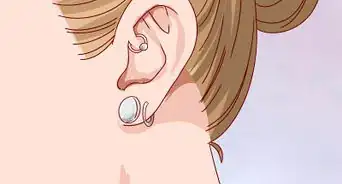
6Then, place the jewelry behind the taper and slowly move the taper out and push the jewelry through.
-
7+Preventing a blowout is just that - prevention.
-
8+Never carry out a stretch if it is painful - this means your ear is not ready to stretch. Listen to your body. While some discomfort is expected and a mild stinging, it should be easy, not painful.
-
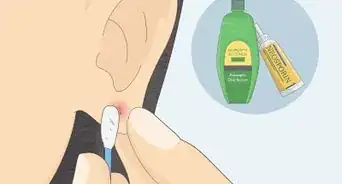
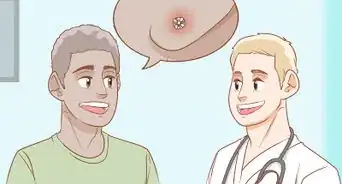
9+If your ears bleed or are infected, remove the new size and downsize to your previous size or smaller. Allow plenty of time to heal properly with warm saline solution (or sea salt soak) twice daily then follow with oil massages, and wait before you stretch again. Apart from listening to your body, this is the next best thing you can do. Bleeding stretches are a sign of tearing somewhere in the fistula; if not healed properly, this can create a blowout during future stretches.


Community Q&A
-
QuestionIs a 10 g the smallest size, or are there some smaller?
 Community AnswerThey go much smaller! Standard earrings are 20 or 18 g, while nose piercings are often 22 g. Plugs and tunnels start at a size 14, but make sure to not skip 16!
 -
QuestionHow long should I leave the taper in?Community AnswerNot long. You should push the taper in and then replace it with your plug/tunnel shortly after.
-
QuestionWhy is it not recommended to use Vaseline?
 Community AnswerVaseline is very thick. It will not allow your ears to breathe properly and there is the potential for a buildup of bacteria.
Warnings
- If you do get a blowout, do not freak out. Just take out the current size jewelry and insert a smaller size. Massage them everyday with jojoba oil, emu oil, or Vitamin E oil to reduce the size of the blowout.⧼thumbs_response⧽
- Do a sea salt soak twice a day around the area and follow with an oil massage until the earlobe is tender and warm; this is a sign of increased blood circulation.⧼thumbs_response⧽
- When your ears have completely healed and are supple once again, your ears are good to go!⧼thumbs_response⧽
Things You'll Need
- A taper one size up from your current size
- Jewellery (tunnels, plugs, earrings, etc.)
- Skin appropriate lubricant
- Warm water (optional)

About This Article