This article was co-authored by Deanne Pawlisch, CVT, MA. Deanne Pawlisch is a Certified Veterinary Technician, who does corporate training for veterinary practices and has taught at the NAVTA-approved Veterinary Assistant Program at the Harper College in Illinois and in 2011 was elected to the board of the Veterinary Emergency and Critical Care Foundation. Deanne has been a Board Member of the Veterinary Emergency and Critical Care Foundation in San Antonio, Texas since 2011. She holds a BS in Anthropology from Loyola University and an MA in Anthropology from Northern Illinois University.
There are 9 references cited in this article, which can be found at the bottom of the page.
This article has been viewed 47,106 times.
A flea infestation in your dog’s outdoor kennel means killing the pests and their eggs and larvae, preventing future fleas, and making sure to rid all areas of your home from these parasites. Use a yard and kennel treatment outdoors or try using nematodes to kill fleas naturally. Flood your dog’s kennel to kill flea eggs and larvae, and prevent fleas by spreading out cedar chips, keeping the yard tidy, and eliminating fleas in your home.
Steps
Treating the Kennel
-
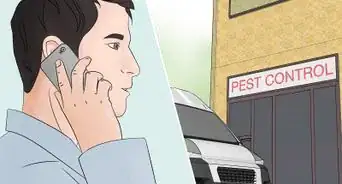
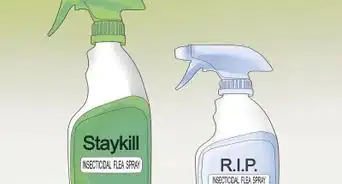
1Talk to your veterinarian about safe anti-flea products. With all the flea sprays on the market, it’s a good idea to ask your vet for a recommendation that will be safe for you, your dog, and any other pets you may have.
-
2Purchase a yard and kennel flea spray. After consulting your vet, purchase a yard and kennel spray to kill fleas on contact. Look for an all-natural, non-toxic spray to kill fleas without exposing your pet to harmful chemicals. To purchase, look in pet stores, department stores, hardware stores, or online.[1]Advertisement
-
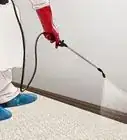
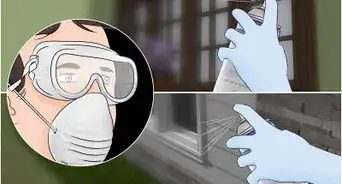
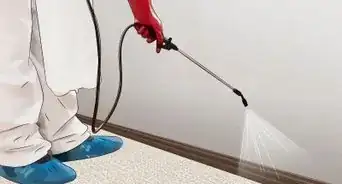
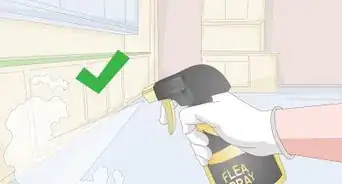
3Spray the kennel with flea spray. Connect your garden hose to the treatment sprayer and turn the hose on. Turn the product nozzle to the “on” position. Spray the entire surface of the kennel evenly and leave it to dry thoroughly, overnight.[2]
- Keep your dog out of the kennel until you are reasonably certain that it is flea-free (i.e. after a second treatment has been applied).
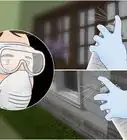
- As a precaution, use a protective mask and gloves while spraying the treatment.
-
4Treat the rest of the yard. To be safe, use the yard and kennel flea spray to treat the rest of the yard as well as the kennel. Remove chairs, toys, or any other items set up in the yard. Rake away leaves, twigs, and other debris, and mow the lawn. Spray the treatment evenly over the grass.[3]
-
5Flood the kennel. A day after the product has been applied, use a garden hose to flood your dog’s kennel to remove eggs that fleas have already laid – eggs and larvae will not survive being flooded with water. Make sure to soak every corner of the kennel, as well as the ground around the kennel. If necessary, use a fan to ensure that the kennel dries thoroughly.[4]
-
6Repeat the treatment. To ensure that the treatment is effective, use it again every month for a period of three months. Spray the kennel and surrounding grass with the yard and kennel flea spray. Focus on shady, cool, and damp areas of the yard where fleas would thrive.
- Once the treatment is repeated a second time and the kennel is dry, let your dog back into it. If your dog has fleas itself, wait until its treatment is completed.
-
7Use beneficial nematodes. Nematodes are microscopic worms found in dirt that seek out insects (like fleas), infiltrate them and release a toxin into them which kills them. Nematodes can be applied to your yard by means of a spray and do not harm humans, animals, or plants. The treatment will work quickly and last several months.[5]
- Purchase beneficial nematodes from a local garden center or online.


Preventing Future Fleas
-
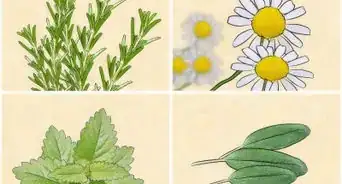
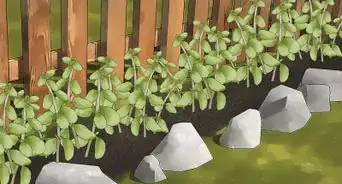
1Spread out cedar chips. Fleas hate the smell of cedar chips and tend to steer clear of them. To keep these parasites at bay, spread cedar chips around the perimeter your dog’s kennel, as well as in damp corners of the yard where fleas would thrive. For added protection, sprinkle them around the fence in your yard and near outdoor furniture.[6]
- Mow over cedar chips to turn them into a fine powder that will ward off fleas.Cedar is non-toxic for dogs and only a danger as a choking hazard (i.e. if big pieces are swallowed by a dog).
-
2Maintain a clean yard. Fleas thrive in shrubs, trees, and leaves (as opposed to open grass). Keep your yard clean by mowing the lawn, raking leaves, and trimming shrubs and tree branches regularly. Toys (belonging to pets or kids) should be stored away when they are no longer being played with, not left lying in the yard.[7]
- In particular, be sure that the area surrounding your outdoor kennel is as clear as possible of fallen leaves and foliage.
-
3Keep your lawn dry. Fleas like moisture, so keep them at bay by making sure your lawn stays dry. Avoid over-watering your lawn - as a general rule, grass needs 3/4" - 1" of water each week to stay green and healthy. Use a rain gauge to measure how much water your grass is getting.[8]
- The water that your grass gets counts whether it's from a sprinkler or from a rain fall, so adjust your watering in accordance with the weather.
-
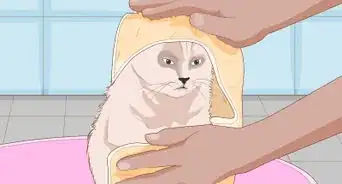
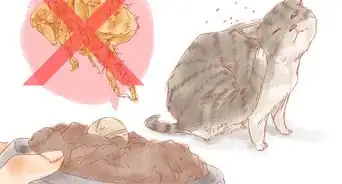
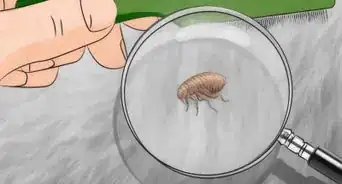
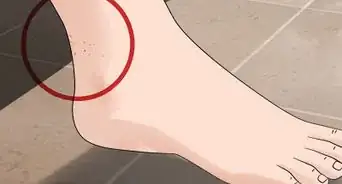
4Check your pets for fleas. To prevent fleas from returning to your dog’s kennel, make sure that your dog and all your other pets are free from infestation. Watch your pets for signs of scratching, and check for tiny dark specks in their fur. Keep an eye out for dark brown-black insects, which can sometimes be seen moving on your pets’ skin.[9]
- If you have difficulty determining whether or not your pets have fleas, try running a fine comb through their fur, close to the skin, and tap the comb onto a wet, white paper towel. If your pets have fleas, you’ll see flea dirt, which looks like reddish-brown specks.
-
5Visit the vet. If you believe that one or more of your pets has fleas, bring them to the veterinarian for advice on the best way to treat the fleas. Let the vet examine your pet to determine the extent of the infestation. Ask about topical treatments and medications, if necessary.[10]
- You should to treat your yard, kennel, and infested pets simultaneously.
-
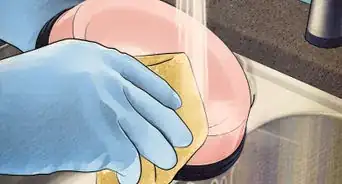
6Make sure your home is flea-free. To fully eradicate your flea problem you must eliminate these pests in all areas of your home; your dog can easily transport fleas from indoors to its outdoor kennel, and vice versa. Take all measures necessary to rid your home of fleas and keep it flea-free. This undertaking will include:
- Washing all bedding, towels, and clothing
- Vacuuming carpets and upholstery thoroughly
- Mopping floors
- Using a dehumidifier to prevent dampness and moisture


References
- ↑ http://www.puppyleaks.com/dog-fleas-signs-symptoms-treatment/
- ↑ https://www.petco.com/shop/en/petcostore/product/vets-best-flea-and-tick-yard-and-kennel-spray
- ↑ https://www.petcarerx.com/article/how-to-treat-fleas-in-the-yard/161
- ↑ https://www.petcarerx.com/article/how-to-treat-fleas-in-the-yard/161
- ↑ http://www.gardeninsects.com/beneficialnematodes.asp
- ↑ https://www.petcarerx.com/article/how-to-treat-fleas-in-the-yard/161
- ↑ http://www.petmd.com/dog/parasites/flea-infestation-where-do-fleas-live
- ↑ http://www.american-lawns.com/lawns/watering.html
- ↑ https://www.rspca.org.uk/adviceandwelfare/pets/general/fleas
About This Article

To get rid of fleas in your dog’s outdoor kennel, get a non-toxic flea spray and evenly spray the entire surface of your dog’s kennel with it. If you’re not sure which flea sprays are safe for your dog, ask your vet what they recommend. After you’ve sprayed your dog’s kennel, let the kennel dry thoroughly overnight. The day after you use the flea spray, soak the whole kennel using your garden hose to flood out any flea eggs and larvae. You should repeat this process every month for 3 months to ensure the treatment is effective. Remember to keep your dog out of its kennel until after the second treatment so you can be reasonably sure the area is free of fleas. For more tips from our Veterinary co-author, including how to use nematodes in your yard to treat fleas, scroll down!