This article was co-authored by wikiHow Staff. Our trained team of editors and researchers validate articles for accuracy and comprehensiveness. wikiHow's Content Management Team carefully monitors the work from our editorial staff to ensure that each article is backed by trusted research and meets our high quality standards.
The wikiHow Tech Team also followed the article's instructions and verified that they work.
This article has been viewed 20,604 times.
Learn more...
This wikiHow teaches you how to register for an Instagram access token for use with the Instagram API. Your access token is a unique identifier that allows your apps to communicate with the Instagram servers, and you will need it for most Instagram-based apps.
Steps
Registering as a Developer
-
1Go to https://www.instagram.com/developer] in your web browser. You can sign up as a developer and start using the Instagram API platform here.
- If you're not automatically signed in to your Instagram account, click the white figurehead or the Log in button on the top-right corner to sign in now.
-
2Click the Register Your Application button. This is a blue button under the "Hello Developers" heading. It will open the Developer Signup form on a new page.Advertisement
-
3Fill out the Developer Signup form. You will have to enter your website's URL address, your phone number, and a short description of what you want to do with the Instagram API.
-
4
-
5Click the Sign up button. This is a green button at the bottom. This will create your developer account and redirect you to the main developer page.


Registering a New Client
-
1Click the blue Register Your Application button. It's under the "Hello Developers" heading. This opens the "Manage Clients" page.
- Alternatively, you can click the Manage Clients button on the top-right. It's listed next to a gray gear icon on a blue navigation bar at the top.
-
2Click the Register a New Client button. This is a green button in the upper-right corner of the "Manage Clients" page.
-
3Enter a name for the app you want to create. Click the text box next to "Application Name," and type a name for the Instagram application you want to create with your access token.
-
4Enter a description of your app into the "Description" box. You can write a short description of what you want to do with your new app, and how you want to use it.
-
5Enter your website's link into the "Website URL" field. This will allow your website to communicate with the Instagram servers with your new access token.
-
6Type http://localhost into the "Valid redirect URIs" field. If your website is set up on an external server, make sure to type your external server's name here.
-
7Fill out the other fields on the form (optional). All the other fields on the new client form are optional. Make sure to review all the fields, and fill out the required fields for your individual needs.
-
8Click the green Register button at the bottom. This will create your new client and redirect you to the "Manage Clients" page.
-
9Click MANAGE on the top-right of your new client. This button is located next to "DELETE" on a blue bar across your new client's application name. It will open your client details.
-
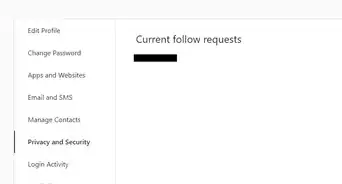
10Click the Security tab in the client details. You can find your Valid redirect URIs and other security preferences here.
-
11
-
12Click the green Update Client button. This button is at the bottom of the page. It will save your client preferences.
-
13Note down your "CLIENT ID" on the "Manage Clients" page. You can find your client ID under the "CLIENT INFO" heading here. You will now be able to generate your access token with your client ID.


Generating an Access Token
-
1Open a new tab in your browser. You can get your access token in your browser without any third-party app.
-
2Type or paste the access token URL into the address bar. The access token URL is:
-
3Replace YOUR_CLIENT_ID_HERE in the link with your client ID. Delete this part in the URL link, and type your own client ID here.
- If you're using an external host in the "Valid Redirect URIs" instead of http://localhost, make sure to also replace http://localhost in the link with your own redirect URI.
-
4Press ↵ Enter or ⏎ Return on your keyboard. This will open the authorization form on a new page.
-
5Click Authorize on the confirmation page. This will authorize your sandbox developer account to generate your new access token.
-
6Find your access token in your browser's URL field. All the characters in the address bar after access_token= is your access token.


About This Article

1. Open https://www.instagram.com/developer in a browser, and log in.
2. Click Register Your Application.
3. Fill out and submit the "Developer Signup" form.
4. Click Register Your Application again.
5. Click Register a New Client on the top-right.
6. Fill out and submit the new client form.
7. Click MANAGE, select Security, and uncheck Disable implicit OAuth.
8. Click Update Client and note down your "Client ID."
9. Open the access token URL in your browser, and click Authorize.