This article was co-authored by wikiHow Staff. Our trained team of editors and researchers validate articles for accuracy and comprehensiveness. wikiHow's Content Management Team carefully monitors the work from our editorial staff to ensure that each article is backed by trusted research and meets our high quality standards.
There are 13 references cited in this article, which can be found at the bottom of the page.
This article has been viewed 80,121 times.
Learn more...
Thanks to the strong nature of wood glues, there are several options for any home project. If applied, clamped and dried correctly, the wood is more likely to split than to come apart at the glued joint. Be sure to choose the right glue for your job.
Steps
Choosing Your Glue
-
1Use super glue for a quick and easy application. If you’re trying to repair a broken piece of furniture or simply connect pieces of wood together, use super glue for a fast-drying option. Add a dab of the super glue to the surface of the wood, press the pieces together, and hold them for about 10 seconds to connect them.[1]
- Super glue is a great way to glue wood together quickly; however, the bond isn’t strong enough to withstand a lot of pressure and the wood may separate in time.
- Most super glue is clear, which means there won’t be any visible residue.
- You can find super glue at your local hardware store, department store, or by ordering it online.
-
2Pick PVA glue for a permanent bond. Polyvinyl acetate (PVA) is a strong synthetic polymer that will form a long-lasting bond between the wood you want to glue together. It’s a great choice for most wood projects, but it isn’t waterproof, so it shouldn’t be used for gluing wood that will be placed outdoors.[2]
- If you’re trying to connect wood on furniture or repair a wooden table, PVA glue will give you the strongest bond.
- PVA is a common wood glue that you can find at your local hardware or home improvement store. You can also order it online.
Advertisement -
3Select carpenter’s glue for outdoor use. Yellow PVA glue, commonly called carpenter’s glue, is a variety of PVA that is specially designed to be water-resistant and suitable for gluing wood that will be exposed to the elements outside. Look for PVA glue that’s labeled as either “yellow,” “carpenter’s glue,” or “waterproof.”[3]
- Carpenter’s glue is great for things like repairing outdoor furniture or fixing broken wood on a deck or shed.
-
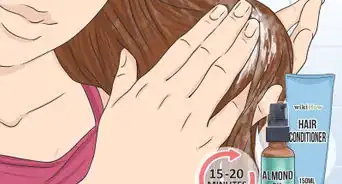
4Go with liquid hide glue for a more natural alternative. Hide glue is a natural, environmentally-friendly glue made from boiled animal collagen. It comes in liquid and solid forms, and the liquid version is easy to use and gives you more time to work as you glue the wood together.[4]
- Because of its natural flexibility and strength, hide glue is a great choice for antique furniture.
- Hide glue is usually available at hardware stores, but if you can’t find it in your area, you can order it online.
Note: For a faster drying time, go with the solid, crystallized version of hide glue, which is melted in hot water and starts to cool as soon as it’s applied.
-
5Choose epoxy to fill gaps and cracks. If you’ve got chipped or damaged wood that you want to glue back together, use epoxy, which consists of a resin and hardener that will bond the wood together and fill any extra space. Epoxy also hardens to become waterproof, so it’s a good choice for outdoor repairs as well.[5]
- Epoxy comes in 2 parts that are combined before you apply it.
- You can use epoxy to repair chips in wooden fences or for applications that are exposed to lots of water, such as repairing damage on wooden boats.


Joining the Wood
-
1Clean off any old glue before you apply new glue. Use a cloth to wipe dust and dirt away from the surface where you plan to connect the wood. If there’s already old glue on the surface, scrape it off with a putty knife or a scrubbing brush so it’s clean and will be better able to adhere.[6]
- Old glue residue will make the bond weaker if you don’t remove it first.
-
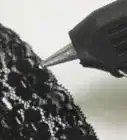
2Spread glue onto 1 side using a stiff-bristled brush. If you’re connecting 2 pieces of wood with flat faces, use a stiff-bristled brush to spread a thin layer of glue to 1 side, which saves time and prevents buildup. Then, press the wood together to connect them.[7]
- Apply glue with a brush to boards and planks.
-
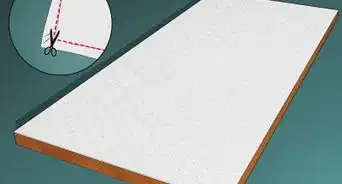
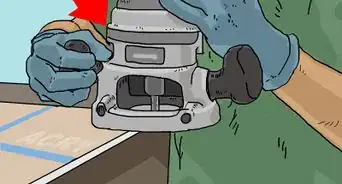
3Use a rubber roller to apply glue to large panels. For large wooden panels you plan to connect face-to-face, spread a thin, even layer of your glue using broad, consistent strokes with a rubber roller. Apply the glue to 1 side of a panel and press them together to connect them.[8]
- Look for rubber rollers at paint supply stores, home improvement stores, or by ordering them online.
Tip: You could also use a small paint roller, but be sure to clean it off as soon as you’re done so the glue doesn’t harden.
-
4Apply glue to the inside of wooden joints before you connect them. If you’re building or repairing furniture such as a chair or a table, and there’s a joint where the wood connects, apply your glue to the inside of the joint. Then, press the joints together, which will spread the glue to cover all the surface of the wood and create a cohesive bond.
- There are many different types of joints, such as dowels, scarf joints, and lap joints. For all of them, the glue needs to be added to the inside of the joint to create a strong bond.
-
5Repair loose chair rungs by applying glue with a syringe. Remove the loose chair rung and wipe it clean to remove dust and old glue. Fill a syringe with glue and insert it into the opening where the rung was inserted. Replace the rung after you add the glue.[9]
- If you can’t remove the rung, insert the syringe into the space in the slot that holds it in place.
- A syringe allows you to add the glue right where it needs to go to keep the rung from wobbling.
-
6Let the glue dry for 30 minutes, then shave off the excess. Wiping away the excess glue with a damp rag can add moisture and dilute the glue, weakening the bond. Instead, wait for about 30 minutes to allow the glue to gel and harden slightly. Then, use a tool such as a putty knife or a chisel with a flat edge and gently scrape away the extra glue.[10]
-
7Clamp the wood together until the glue is dry. Press the pieces of wood and apply pressure as you hold them together. Take a c-clamp and tighten it over the wood so it’s held firmly and securely together. If you can’t clamp the wood, place an object such as a book or a weight on top of it to apply constant pressure as the glue dries. Once the glue is dry, remove the clamp and the wood will be bonded together.[11]
- Different glues will have different drying times, so check the packaging to find out how long you need to let the glue you’re using dry.
- If you’re gluing large pieces of wood together, use multiple clamps to apply even pressure along the surface.


Crafting
-
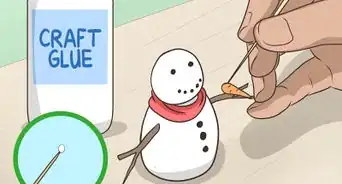
1Use white glue for wooden craft projects. White glue, also known as all-purpose glue, is a version of PVA glue that’s flexible and can be used on a variety of surfaces including paper, cardboard, and wood. It’s non-toxic and dries to form a clear adhesive that is strong enough for most craft projects.[12]
- Look for white glue at craft supply stores, department stores, or by ordering it online.
- White glue is great for craft projects that use lightweight wood like balsa wood or craft sticks.
- While it’s flexible and forms a relatively strong bond, white glue isn’t strong enough for heavy-duty applications such as furniture repair.
Craft Tip: Because white glue dries clear, you can jazz it up by adding food coloring or even glitter to make your craft projects even more fun! Just mix in the food coloring or glitter when you apply the glue and when it dries, it’ll sparkle or keep the color you add.
-
2Clean off the wood with a cloth dipped in isopropanol. Isopropanol is the solvent used in rubbing alcohol and is great at cleaning surfaces by removing dust, dirt, and residue that could affect the adhesion of your white glue. Soak a clean cloth in the isopropanol and give the wood a good wipe down before you start your craft project.[13]
- Isopropanol is flammable and toxic if it’s ingested, so keep it away from children and pets.
- The isopropanol will evaporate within about 5 minutes so the wood will be dry and good to go in a short amount of time.
-
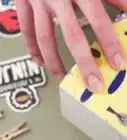
3Apply the glue in a thin even layer and connect the pieces together. Spread a thin layer of the glue on 1 of the surfaces you plan to glue together. Then, press the pieces together and apply pressure with your hands. After about 10 seconds, carefully release the wood.[14]
-
4Wipe away the excess glue with a damp cloth and let the glue dry. When you press the wood together, some of the glue may be squeezed out of the edges. Take a damp cloth and wipe up the glue that’s pushed out so it doesn’t dry and form a sticky residue. Leave the glue to dry for about 1 hour so it can set. For the glue to fully dry and cure, wait a full 24 hours.[15]
- Leave the glue in a well-ventilated area away from direct heat to help it dry properly.


Community Q&A
-
QuestionThe chipboard under my kitchen counter has swollen due to water spillage. I've sanded it. Can I apply wood glue or is there another product?
 T. ChinsenTop AnswererWood glue is unique in that it expands. It can be used to fix the chipboard. All other glues will not expand and not all are waterproof.
 -
QuestionShould I seal the wood before gluing?
 Drew Hawkins1Community AnswerIt depends on the project, but it's not necessary to seal the wood before you glue it together. In fact, some sealants, such as stains or finishes, can actually make it more difficult for the glue to adhere to the surface. Choose the best glue for your project, which will help you determine whether or not it's okay to seal the wood.
Warnings
- Glue is toxic if it’s eaten, so keep it away from children and pets. If anybody accidentally eats glue, contact poison control or get emergency medical treatment.[16]⧼thumbs_response⧽
References
- ↑ https://www.woodworkingnetwork.com/best-practices-guide/gluing-laminating-veneering/super-glue-super-woodshop
- ↑ https://youtu.be/WJe4Lwi1GhM?t=34
- ↑ https://www.finewoodworking.com/2012/09/11/how-to-choose-the-right-glue-for-woodworking-projects
- ↑ https://www.fix.com/blog/choosing-the-right-wood-glue/
- ↑ https://youtu.be/WJe4Lwi1GhM?t=237
- ↑ https://www.nytimes.com/1983/10/30/nyregion/home-clinic-there-s-a-knack-to-fixing-the-joints-of-a-wobbly-chair.html
- ↑ https://www.youtube.com/watch?v=kYhrrgxZcOI
- ↑ https://www.youtube.com/watch?v=tu2ke3-3V5I
- ↑ https://www.popularmechanics.com/home/interior-projects/how-to/g2538/furniture-problems-you-can-fix/
- ↑ https://makezine.com/2015/09/29/5-great-wood-gluing-tips/
- ↑ https://www.popularmechanics.com/home/interior-projects/how-to/g2538/furniture-problems-you-can-fix/
- ↑ https://www.youtube.com/watch?v=jRQ-nHfHZTo
- ↑ https://www.nytimes.com/1983/10/30/nyregion/home-clinic-there-s-a-knack-to-fixing-the-joints-of-a-wobbly-chair.html
- ↑ https://www.youtube.com/watch?v=kYhrrgxZcOI
- ↑ https://greaseexpert.com/how-long-does-glue-take-to-dry/
- ↑ https://pubmed.ncbi.nlm.nih.gov/23796486/
About This Article