This article was co-authored by Olivia Choong and by wikiHow staff writer, Janice Tieperman. Olivia Choong is a Plant and Gardening Specialist and the Owner of The Tender Gardener. With more than six years of experience, she specializes in gardening, permaculture, and self-sufficient and low-impact living practices. Her work has been featured in media outlets such as The Straits Times and Channel NewsAsia (CNA). Olivia holds a Bachelor of Mass Communications in PR and Journalism from Murdoch University.
There are 14 references cited in this article, which can be found at the bottom of the page.
This article has been viewed 69,228 times.
Looking to add some acorn squash to your garden? Thankfully, you don’t need a green thumb to grow this round, green veggie at home. We’re here to walk you through plenty of squash growing tips and tricks so you can transform your squash seeds into a bountiful harvest.
Steps
Growing the Seedlings
-
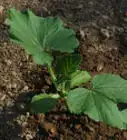
1Purchase a packet of acorn squash seeds at a gardening supply store. Around springtime, look for seedlings and starts at your local farmer’s market or garden center.
-
2Plant 2-3 seeds in 3 in (7.6 cm) pots during mid-to-late spring.[1] Fill the pots with organic, sandy soil that drains well. Then, plant each seed 1 in (2.5 cm) deep into the soil and sprinkle it with water.[2]
- Peat pots work really well for this.[3]
- Planting the seeds with landscape fabric or black plastic may help speed up the growing process.[4]
- The beginning of spring is a bit too early to get your acorn squash seedlings going since it may be too cold to transplant them outside. Ideally, wait until there is no danger of frost in the forecast before getting started, so you can immediately move your seedlings outside.[5]
Advertisement -
3Sprout the seeds in a sunny window. Acorn squash seeds thrive in warm temperatures, and need a soil temperature of 70 °F (21 °C) and a surrounding temperature of 95 °F (35 °C). If kept warm, your seeds should sprout within 5 to 10 days.[6]
- Seedlings are typically grown indoors and then transplanted outside.[7]
-
4Thin each pot down so only the tallest, strongest seedling remains. Pinch away the weaker, smaller seedlings with your fingers, or trim them out of the pot with a pair of gardening scissors. Try not to yank out the weaker seedlings, as this might hurt the root system.[8]


Planting the Seedlings Outdoors
-
1Designate at least 3 sq ft (0.28 m2) of land for your acorn squash. You need at least a 3 ft (0.9 m) plot in all directions to grow winter squash without overshadowing your other vegetables.[9]
- If you don’t have that much space to spare, build a trellis or use a fence to grow the squash vertically.[10] They can be separated 2 feet (0.6 m) apart and trained to grow up the support system.
-
2Mix a thick layer of compost or balanced fertilizer into the soil. Spread a 2 in (5.1 cm) layer of compost over the gardening space to nourish your soil ahead of time. If you don’t have any compost on hand, spread 4-6 cups (0.9-1.34 kg) of balanced fertilizer over every 100 square feet (9.3 m2) of soil.[11]
-
3Transplant the seedlings when the outdoor soil is 70 °F (21 °C). Acorn squash thrives in warm weather and doesn’t grow very well in cold soil. Check the soil in your garden with a soil thermometer, and make sure it reads at least 70 °F (21 °C).[12]
-
4Test and adjust your soil pH so it’s somewhere between 6 and 6.5. Use a testing kit to see where your garden’s soil naturally falls—soil that’s between 6 and 6.5 doesn’t need any adjustments.[13] Raise the pH of your acidic soil by applying a layer of lime. If your soil is too basic, lower the pH with aluminum sulfate or sulfur.[14]
- It’s okay if your pH is slightly above or below this range. Acorn squash can still grow in a soil pH as low as 5.8 or as high as 6.8.[15]
-
5Check that your gardening space gets 6 hours of full sun during the summer months. Acorn squash takes 60-100 days to mature, and can’t be picked before it’s ripe. The squash plants thrive with 8-10 hours of full sunlight but need at least 6 to grow properly.[16]
-
6Plant your seedlings in large mounds of dirt. Pile your soil into large, long mounds that are at least 4 ft (1.2 m) apart in your garden. Then, plant the seedlings into the mounded soil, spacing them out by 2 ft (0.61 m).[17]


Caring for the Squash Plants
-
1Spread 2-3 tbsp (28-42 g) of fertilizer over the soil for every mound in your garden. Grab a bag of balanced fertilizer over the soil and it mix it into the upper 3 to 4 in (7.6 to 10.2 cm) of soil. For a really big garden space, spread 2 to 3 lb (0.91 to 1.36 kg) of balanced fertilizer over every 100 sq ft (9.3 m2) of soil.[20]
- Balanced fertilizer has a balanced NPK (Nitrogen Phosphorus Potassium) ratio, like 10-10-10. These 3 numbers are printed on the fertilizer bag.[21]
-
2Place mulch around your squash to keep weeds from sprouting. Organic and black plastic mulch are both great options for your acorn squash plants.[22] Just make sure that the soil is at least 75 °F (24 °C) if you plan on using organic mulch, since it can keep your soil from warming up.[23]
- Organic mulch is any type of mulch made with natural ingredients, like rotted horse manure, leaf mold, or compost.[24]
-
3
-
4Get rid of squash vine borers as you notice them. These pests chew small holes into the plant leaves and leave a tell-tale, sawdust-like residue behind. Protect your plants by draping floating row covers over top, or by applying pesticides to the bottom stem of each plant once every 7-10 days.[27]
- Adult squash vine borers are around 1⁄2 in (1.3 cm) long, and have a black-spotted orange body along with black wings. Their eggs are brown-colored, flat, and extremely tiny.
- These critters tend to be most active in early-to-mid summer.
- Two pesticide treatments might do the trick, but you can do more if you’d like to be thorough. Just be sure to space out each treatment by at least a week, and stop treatments by the end of July.
- Look for pesticides with ingredients like carbaryl, bifenthrin, permethrin, and/or esfenvalerate, which are especially helpful against squash vine borers.


Harvesting the Squash
-
1Test the firmness of the acorn squash rind in September or October. They will have a dark green shell when they are nearing maturity. They are ready to pick when the skin is strong enough to resist being scraped by your fingernail.[28]
-
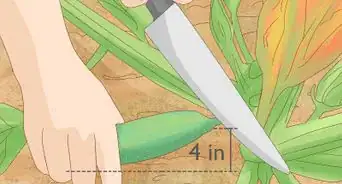
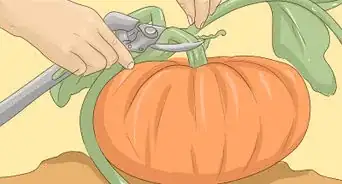
2Cut the squash from the stem with a pair of kitchen or garden shears. Try to leave approximately 3 to 4 in (7.6 to 10.2 cm) of stem on the squash. Make sure to place them side by side rather than stacking them.[29]
-
3


Expert Q&A
-
QuestionDoes acorn squash need a trellis?
 Olivia ChoongOlivia Choong is a Plant and Gardening Specialist and the Owner of The Tender Gardener. With more than six years of experience, she specializes in gardening, permaculture, and self-sufficient and low-impact living practices. Her work has been featured in media outlets such as The Straits Times and Channel NewsAsia (CNA). Olivia holds a Bachelor of Mass Communications in PR and Journalism from Murdoch University.
Plant & Gardening SpecialistA trellis can work as a space-saving measure, but you can also let the vines grow on the ground. Just make sure that allow more room around your other garden beds so the vines can sprawl! -
QuestionCan I grow acorn squash in a pot?Olivia ChoongOlivia Choong is a Plant and Gardening Specialist and the Owner of The Tender Gardener. With more than six years of experience, she specializes in gardening, permaculture, and self-sufficient and low-impact living practices. Her work has been featured in media outlets such as The Straits Times and Channel NewsAsia (CNA). Olivia holds a Bachelor of Mass Communications in PR and Journalism from Murdoch University.
Plant & Gardening SpecialistYes, but it needs to be a large and deep pot so the plant can develop a healthy root system. -
QuestionHow do I tell a male flower from a female flower?
 Community AnswerMale flowers have a straight, thin stem. Female flowers have a miniature fruit already attached to their stem. You can google for pictures if you need a visual reference; it's easy to recognize once you know what you're looking for.
Things You'll Need
- Acorn squash seeds
- Acorn squash starts
- 3-inch pots
- Water
- Soil thermometer
- pH testing kit
- Organic soil
- Compost
- Balanced fertilizer
- Netting/cheesecloth
- Mulch
- Kitchen shears
- Trellis/fence (optional)


References
- ↑ https://extension.umd.edu/resource/winter-squash
- ↑ https://extension.usu.edu/yardandgarden/research/summer-and-winter-squash-in-the-garden
- ↑ https://www.almanac.com/plant/winter-squash
- ↑ https://extension.umd.edu/resource/winter-squash
- ↑ http://www.gardening.cornell.edu/homegardening/scene11f1.html#profile%3C
- ↑ http://www.gardening.cornell.edu/homegardening/scene11f1.html#profile
- ↑ https://extension.umd.edu/resource/winter-squash
- ↑ https://extension.umd.edu/resource/winter-squash
- ↑ Olivia Choong. Plant & Gardening Specialist. Expert Interview. 3 September 2021.
- ↑ Olivia Choong. Plant & Gardening Specialist. Expert Interview. 3 September 2021.
- ↑ https://extension.usu.edu/yardandgarden/research/summer-and-winter-squash-in-the-garden
- ↑ http://www.gardening.cornell.edu/homegardening/scene11f1.html#profile
- ↑ https://extension.umn.edu/vegetables/pumpkins-and-winter-squash#soil-testing-and-fertilizer-235310
- ↑ https://hgic.clemson.edu/factsheet/changing-the-ph-of-your-soil/
- ↑ http://www.gardening.cornell.edu/homegardening/scene11f1.html#profile
- ↑ https://extension.umd.edu/resource/winter-squash
- ↑ https://extension.usu.edu/yardandgarden/research/summer-and-winter-squash-in-the-garden
- ↑ https://extension.colostate.edu/topic-areas/yard-garden/cucumbers-pumpkins-squash-and-melons-7-609/
- ↑ http://www.gardening.cornell.edu/homegardening/scene11f1.html#profile
- ↑ https://www.almanac.com/plant/winter-squash
- ↑ https://www.almanac.com/content/npk-ratio-what-do-numbers-fertilizer-mean
- ↑ https://extension.usu.edu/yardandgarden/research/summer-and-winter-squash-in-the-garden
- ↑ https://extension.umn.edu/vegetables/pumpkins-and-winter-squash#controlling-weeds-236361
- ↑ https://www.gardenersworld.com/how-to/maintain-the-garden/mulches-and-mulching/
- ↑ https://extension.umd.edu/resource/winter-squash
- ↑ http://www.gardening.cornell.edu/homegardening/scene11f1.html#profile
- ↑ https://extension.umn.edu/yard-and-garden-insects/squash-vine-borers
- ↑ https://extension.usu.edu/yardandgarden/research/summer-and-winter-squash-in-the-garden
- ↑ https://extension.umd.edu/resource/winter-squash
- ↑ https://extension.umd.edu/resource/winter-squash
- ↑ https://www.allrecipes.com/article/how-to-cook-acorn-squash/
About This Article

Acorn squash is a healthy vegetable you can grow in your garden in just 3 months. Start your acorn squash seeds 3-4 weeks before the last frost of the winter. Plant 6 seeds 1 inch deep in 3-inch deep pots filled with seed mix. Then, leave them on a sunny windowsill until they sprout around 5-12 days later. Once they’ve started to sprout, you can move them outside. Loosen the soil, dig mounds about 3-foot high, and place 3 seedlings per mound. Water the soil whenever it gets dry. Your squash should be ready to harvest after 2-3 months. For more gardening tips, including how to harvest your acorn squash, read on!