This article was co-authored by wikiHow staff writer, Hannah Madden. Hannah Madden is a writer, editor, and artist currently living in Portland, Oregon. In 2018, she graduated from Portland State University with a B.S. in Environmental Studies. Hannah enjoys writing articles about conservation, sustainability, and eco-friendly products. When she isn’t writing, you can find Hannah working on hand embroidery projects and listening to music.
There are 8 references cited in this article, which can be found at the bottom of the page.
This article has been viewed 30,694 times.
Learn more...
Clusia plants, also called autograph trees, are known for their broad leaves and bold flowers. While these plants can be grown from seeds, propagating them from cuttings is much easier and will take less time. If you have access to a large Clusia plant or you got cuttings from your local nursery, you only need a few tools and about a month to grow your very own Clusia plant.
Steps
Cutting
-
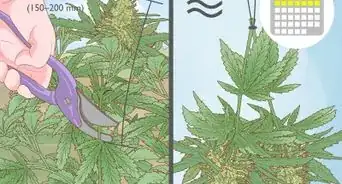
1Use pruners to cut the stems just below the buds. Take a look at your mother plant and pick out 3 to 4 stems that look green and healthy. Grab your pruners and cut each stem just below the buds to make cuttings that are 4 to 6 in (10 to 15 cm) long.[1]
- Try not to make your cuttings much longer than that! If they’re too long, they won’t root well.
- Make sure your pruners are super sharp and clean before you start.
-
2Rip off the bottom leaves, but keep 2 or 3 at the top. This will help the plant focus its energy on creating roots instead of making its leaves bigger. Gently rip off the bottom leaves on your cutting, leaving a couple leaves up top.[2]
- You’ll be submerging the bottom 1/3 of each cutting in water, so you want to get rid of any leaves in that area.
Advertisement -
3Take off any flowers. If your plant is flowering, use your fingers to gently pull off the flower heads. This will also help your cutting focus its energy on rooting instead of blooming.[3]
- You can save the flower heads and dry or press them for a fun decoration.


Rooting
-
1Fill a small glass container with 20 cm (7.9 in) of water. Pick a clear container so that you can keep an eye on your cuttings and watch their roots grow. Fill your container with water and make sure there’s enough to submerge the bottom 1/3 of your cutting fully.[4]
- Tall, skinny glass containers, like test tubes, are perfect for growing cuttings.
-
2Place 2 to 3 cuttings in the water root-side down. If your container is wide enough, you can place multiple cuttings in it at a time. Make sure the bottom part of the cutting is fully submerged to help the roots grow![5]
- Clusia plants can root in water because they’re naturally found in a rainy environment, so their roots are used to growing through swampy wetland areas.[6]
-
3Set the containers in bright, but not direct, sunlight. A window with blinds or curtains is a great spot to put your cuttings. They need sunlight, but they can get a little crispy if they’re exposed to too much.[7]
- If you notice your cuttings turning brown, move them away from the window.
- Clusia plants use photosynthesis, or energy from the sun, to create their roots. If they don’t get enough sunlight, they won’t be able to grow, so this is super important!
-
4Add more water periodically if the level gets low. As your cutting grows, it will suck up the water in your container. Keep an eye on the water levels in each glass container and add more water if it dips below 20 cm (7.9 in).[8]
- If you see any signs of rot or algae on the roots, carefully take your cuttings out of the water and rinse them off. Pour all the water out of your container and wipe it out with a towel before adding fresh water.
-
5Take the cuttings out of the water when the roots are 1 to 2 in (2.5 to 5.1 cm) long. After 3 to 4 weeks, the roots on your cuttings will be long enough to plant in soil. Take them out of the water and gently dab off the excess with a paper towel to get them ready to plant![9]
- If you don’t take your cuttings out of the water right away, that’s okay. Your plant can survive for a few extra weeks in water if it needs to.


Planting
-
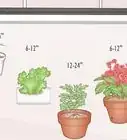
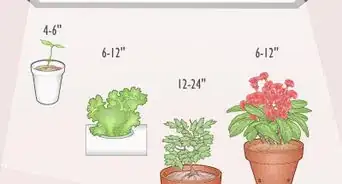
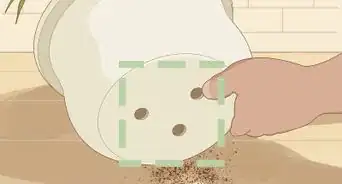
1Fill a 18 to 20 in (46 to 51 cm) pot with sandy, well-draining potting soil. Your Clusia plant prefers soil that absorbs water but doesn’t get soaked. Look for potting soil made with sand that says “well-draining,” then use a pot with a drainage hole at the bottom.[10]
- If the soil absorbs too much water, it could cause the roots to rot.
- Each cutting needs its own pot, so grab a couple if you need to.
-
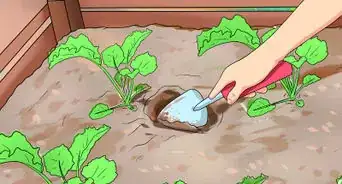
2Cover the roots in soil, gently pressing down the dirt. Use your pointer finger to gently dig a hole in the dirt. Place 1 cutting in the pot and cover the roots in dirt, then press down on the top of the soil.[11]
- Don’t press down too hard! You want to leave some air pockets in the soil so that water can still drain through.
-
3Water the soil to moisten it and establish the roots. This is especially important when you first plant your cuttings! Give the soil a nice soak so the plant can start establishing itself.[12]
- It might be helpful to keep a watering can near your plant pots since they’ll need daily watering.
-
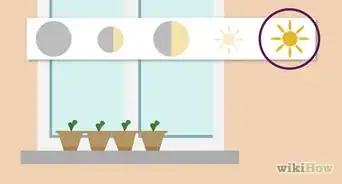
4Set the pot in an area that gets partial sunlight. Clusia plants grow well in partial sunlight and shady areas, so they don’t need to be right in front of a window. Keep your pot indoors in a spot that gets constant but filtered sunlight, like through blinds or curtains.[13]
- It may take the Clusia roots a few days to switch from water roots to soil roots. You might see their leaves get a little droopy or wilted, but they should spring back up in a day or two.
-
5Water your plant every day to keep the soil moist. Clusia plants don’t need a lot of maintenance, but they do require daily watering. Make sure the soil feels moist but not soaking to keep your plant happy.[14]
- Clusia plants are drought-tolerant, so they can survive if you accidentally skip a few watering days.


Things You’ll Need
- Pruners
- Glass containers
- Small pot
- Potting soil


References
- ↑ https://www.missouribotanicalgarden.org/gardens-gardening/your-garden/help-for-the-home-gardener/advice-tips-resources/visual-guides/rooting-cuttings-in-water.aspx
- ↑ https://www.purdue.edu/hla/sites/yardandgarden/extpub/new-plants-from-cuttings-text-only/
- ↑ https://www.missouribotanicalgarden.org/gardens-gardening/your-garden/help-for-the-home-gardener/advice-tips-resources/visual-guides/rooting-cuttings-in-water.aspx
- ↑ https://www.youtube.com/watch?v=PBP-3MaL63U&feature=youtu.be&t=70
- ↑ https://www.missouribotanicalgarden.org/gardens-gardening/your-garden/help-for-the-home-gardener/advice-tips-resources/visual-guides/rooting-cuttings-in-water.aspx
- ↑ https://www.cabi.org/isc/datasheet/16942#E84BF47A-349B-4FFA-B35A-0A78E1C5829B
- ↑ https://www.purdue.edu/hla/sites/yardandgarden/extpub/new-plants-from-cuttings-text-only/
- ↑ https://www.ukhouseplants.com/plants/clusia-rosea-autograph-trees
- ↑ https://www.missouribotanicalgarden.org/gardens-gardening/your-garden/help-for-the-home-gardener/advice-tips-resources/visual-guides/rooting-cuttings-in-water.aspx
- ↑ http://www.missouribotanicalgarden.org/PlantFinder/PlantFinderDetails.aspx?taxonid=279206
- ↑ https://www.missouribotanicalgarden.org/gardens-gardening/your-garden/help-for-the-home-gardener/advice-tips-resources/visual-guides/rooting-cuttings-in-water.aspx
- ↑ https://www.missouribotanicalgarden.org/gardens-gardening/your-garden/help-for-the-home-gardener/advice-tips-resources/visual-guides/rooting-cuttings-in-water.aspx
- ↑ http://www.missouribotanicalgarden.org/PlantFinder/PlantFinderDetails.aspx?taxonid=279206
- ↑ https://candidegardening.com/US/plants/eb355d0c-d7e6-4ecc-8387-66a0a63cb411
- ↑ http://www.missouribotanicalgarden.org/PlantFinder/PlantFinderDetails.aspx?taxonid=279206
About This Article