This article was co-authored by wikiHow Staff. Our trained team of editors and researchers validate articles for accuracy and comprehensiveness. wikiHow's Content Management Team carefully monitors the work from our editorial staff to ensure that each article is backed by trusted research and meets our high quality standards.
There are 8 references cited in this article, which can be found at the bottom of the page.
This article has been viewed 172,969 times.
Learn more...
Ivy is a prolific and lush plant that can add a lot of green to your landscape or your home. Whether you want ivy for your yard or for inside your home, growing ivy from cuttings is an easy process that will save you the cost of buying new plants. Start by gathering your cuttings, then root them in soil or water. Keep them in a warm area that gets indirect light and repot them the following spring. With just a little bit of effort and some time, you will have an abundance of new ivy plants that you didn’t have to purchase.
Steps
Gathering Your Cuttings
-
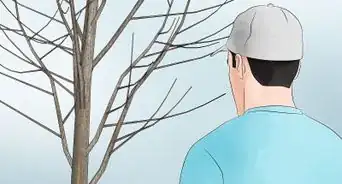
1Take cuttings from ivy in the late summer or early fall. This is the time of year when there will be fresh growth on the plant, which is especially good for cuttings. Also, the weather will be ideal in the fall to get the cuttings started. Aim to take cuttings before cold weather sets in.[1]
- Taking cuttings at this time of year will also make the timing right for planting your new plants in the spring if they are going outside.
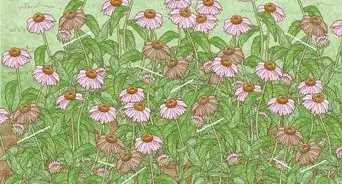
- This is the right time of year to take cuttings from a wide variety of climbers, such as passion flower, clematis, and celastrus.
-
2Look for young, fresh growth on an existing plant. Ivy cuttings work best when they are made from the current year's growth. You can identify new growth by looking for the parts of the ivy plant that look fresh and light green, not the older areas that have dark green leaves and thick stems.[2]
- This kind of cutting is called a semi-ripe cutting. It is taken from this year’s growth, not older sections.
- Avoid picking out pieces that are damaged or have unusual growth patterns.
Advertisement -
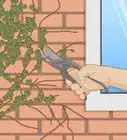
3Find a stem that has 3 to 4 nodes on it for best results. Hold the stem with 1 hand just above one of the nodes. Locate a spot right above the nodes or a set of leaves, so that the leaves will be left on the stem after you cut it.[3]
-
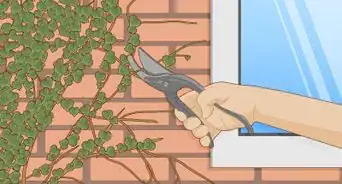
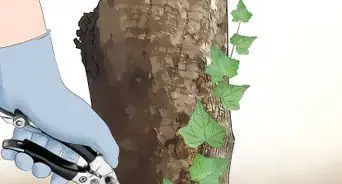
4Use clean garden shears or a knife to cut off at least 6 inches (15 cm). Using clean shears will reduce the chance of introducing a disease or pest onto the cutting as you gather it. To sterilize your shears, wipe isopropyl or rubbing alcohol over the entire cutting surface of the shears. Then, cut straight across the stem with the shears.[4]
-
5Wrap the cuttings in a damp towel and put them in a plastic bag. Wet a paper towel or rag and wrap it around the cut ends of the stems. Place the cuttings and the towel in a plastic bag to help keep them moist.[5]
- This is especially important if you need to wait to put your cuttings in soil for an hour or more.
- If possible, take your cuttings in the morning. The ivy plant will have a lot of moisture in it at that time, which can help to keep the cuttings moist.


Rooting Your Cuttings in Soil
-
1Choose pots that are big enough to insert all of the cuttings into. If you are doing 6 cuttings or less, a standard 8 in (20 cm) pot will work well. If you are doing more than 6 cuttings, choose a bigger pot or several pots.
- You can put cuttings in any type of pot, including terra cotta, plastic, and ceramic. However, no matter which you choose, the pots need to have drainage holes in the bottom.[6]
- Putting several cuttings in one pot will cut down on the space required for the cuttings and it will also mean fewer pots to water. Since the plants will need to be repotted once they have rooted, they will be perfectly fine together in one pot for this period.
-
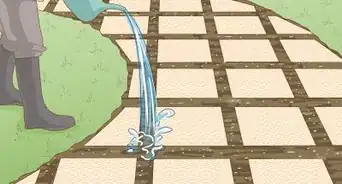
2Fill the pots with soil and water them. Pick a general potting soil or a soil made specifically for propagation, which usually has a high percentage of perlite or sand. Fill each pot with soil until it is 1⁄2 inch (1.3 cm) below the edge of the pot. Then, place the pot over a sink or set it outside, and fill the pot with water until it runs out of the bottom.[7]
- Leaving the soil below the edge of the pot will allow you to water the cuttings without the water overflowing.
-
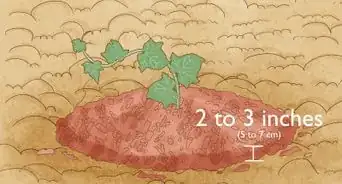
3Put holes in the soil 2 inches (5.1 cm) apart around the edge of the pot. Use the eraser end of a pencil to make the holes 3 inches (7.6 cm) deep. This will allow you to put the cuttings into the soil without moving the rooting powder off the end of the cutting.[8]
- Make as many holes as you have cuttings.
- You can also use a skewer, dowel, or another small pointed object to make the holes.
-
4Trim 1⁄2 inch (1.3 cm) off the ends of the cuttings again. Then, prune away any leaves that are within 3 inches (7.6 cm) of the end of the cutting. This will give you a clean and fresh end to insert into the soil.[9]
- This is especially important if your cuttings were gathered longer than an hour or so ago, as the end of the cuttings is more likely to be dried out.
- Use clean shears or a knife to make these additional cuts.
-
5Dip the cut end of each cutting in rooting hormone. Open the container of rooting hormone and pick up your cutting. Dip the bottom 1–2 inches (2.5–5.1 cm) of the cut end into the hormone. Lift it out to just above the surface of the hormone and tap it lightly to knock off any excess hormone.[10]
- You can buy rooting hormone in powder or liquid form. It is available at most garden stores and from online retailers.
-
6Place a cutting in each hole in the soil and secure it in place. Insert each cutting into an individual hole. Place the end with the rooting hormone into a hole until it hits the bottom. Hold the cutting upright with one hand and then press the soil around it so that it stays securely in place.
- As you are inserting the cutting, try to keep it centered in the hole so that very little of the rooting hormone is knocked off. However, losing a little of it on the top edge of the hole is fine.[11]
- If the cutting is too long or unwieldy to stay in the soil even when it’s pressed around it, you may need to keep it in place with a stake or other means of support. It’s important for the bottom of the cutting to stay put while rooting.
-
7Water the pot again until water runs out the bottom. Put the pot under a faucet or use a watering can to soak the soil. Keep watering in a light stream until water comes out of the bottom of the pot, which will signal that all of the soil is thoroughly moistened.
- Be careful not to disturb the cuttings too much as you water. Keep the stream of water away from the base of the cuttings so that they stay securely in the soil.


Rooting the Cuttings in Water
-
1Cut the stem just below the lowest root node. The nodes look like bumps on the stem where new stems and leaves grow out from. Use a clean knife or pair of sharp scissors and make the cut straight across the stem. Cut about 1⁄4 in (0.64 cm) below the node.
- If there are any leaves beside the bottom node, pinch or cut them off.[12]
-
2Place the cutting in a clean cup with room-temperature water. Ensure that the water covers the bottom node on the stem and that there are not any leaves below the surface of the water. Pour out a little water if it’s covering a stem.
-
3Change the water once every 3 to 5 days and rinse the roots. Dump out the old water and replace it with new room-temperature water once every 3 to 5 days. When you do this, rinse off the roots with room-temperature water. You can also gently rub the roots with your fingers while you rinse them to remove any film that has gathered on the roots.
- Make sure that no leaves drop down into the water, and pluck them out right away if they do.
-
4Transfer the cuttings to soil once the roots are 5 in (13 cm) in length. Observe the roots as they grow and move your cutting to a pot filled with soil after the roots are about 5 in (13 cm) long. Check the length of the roots buy pulling the ivy stem out of the water and holding a ruler next to the roots. Measure from the bottom node to the end of the roots.


Caring for Cuttings as They Root
-
1Place the pots or cups in a bright, warm location either inside or outside. The pots or cups need to be out of direct sunlight but they can’t be cold or light deprived. If the pots are inside, put them in a spot that is near a window that gets bright light but that will not shine directly on the cuttings. If you are keeping them outside, put them in a greenhouse, a propagator, or cover the pots with plastic bags and put them in a warm, bright spot out of direct sunlight.[13]
- You will need to check on the moisture level of potted cuttings often, so put the cuttings somewhere you can easily access.
- Consider putting the cuttings somewhere that you will see them regularly so that you are reminded to care for them. This could be in a room you are in daily or near a door you go in or out of every day.
-
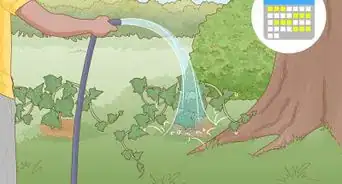
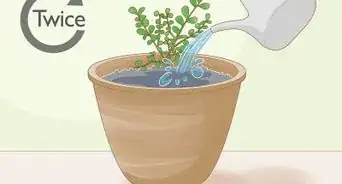
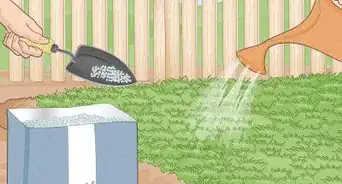
2Keep the soil in potted cuttings damp at all times. Sprinkle the soil with water whenever the surface starts to dry out. The amount of time the soil takes to dry out will depend on the warmth and humidity where the plants are located.[14]
- In many cases, a mister works well to keep outdoor cuttings wet while direct watering works well for indoor pots.
- However, be careful not to drown the cuttings in too much water either. For example, don’t leave the pot sitting in water.
-
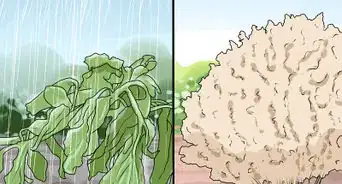
3Remove any discolored or dead cuttings in the soil or water. In most cases, some of your cuttings won’t survive. If you see a cutting that has turned yellow, wilted, or has fallen over, remove it from the pot. Taking dead and diseased cuttings out of the pot or cup will help the other cuttings to thrive.[15]
- When in doubt about whether a cutting is dead or dying, err on the side of caution and remove it. It’s best to have fewer healthy plants than to have lots of diseased ones.
-
4Repot cuttings when they have new growth or wait until the spring. Climbers like ivy usually root in 1-2 months with proper care. Once you’re ready to repot them, pot them as you would any new plant, being careful with the roots and giving them rich soil to thrive in.[16]
- If planting outdoors, you can put your young ivy plants in the ground or in a pot. However, keep in mind that a potted plant will need to be watered more often because it will dry out quicker.
- Allow the new plants establish themselves for at least a few months before repotting them.


References
- ↑ https://www.rhs.org.uk/advice/profile?pid=474
- ↑ https://www.rhs.org.uk/advice/profile?pid=474
- ↑ http://www.bbc.co.uk/gardening/basics/techniques/propagation_summercuttings1.shtml
- ↑ https://ipm.missouri.edu/MEG/2018/1/cleaning_pruning_tools/
- ↑ https://www.rhs.org.uk/advice/profile?pid=474
- ↑ https://www.rhs.org.uk/advice/profile?pid=474
- ↑ https://www.rhs.org.uk/advice/profile?pid=474
- ↑ https://www.bhg.com/gardening/yard/garden-care/starting-flowers-from-cutting/
- ↑ https://www.planetnatural.com/plant-propagation/
- ↑ https://www.marthastewart.com/1535873/how-to-use-rooting-hormone
- ↑ https://www.planetnatural.com/plant-propagation/
- ↑ https://www.youtube.com/watch?v=m-Xt-Ak8pe4&feature=youtu.be&t=535
- ↑ https://www.rhs.org.uk/advice/profile?pid=474
- ↑ https://www.canr.msu.edu/news/moisture_management_during_vegetative_cutting_propagation
- ↑ https://www.rhs.org.uk/advice/profile?pid=474
- ↑ https://www.planetnatural.com/plant-propagation/
About This Article

To grow ivy from cuttings, select a young shoot on an established plant in late summer or early fall. Choose a stem that is about 6 inches (15 cm) long and make sure there are 3-4 leaf nodes on the stem. Cut straight across the stem with disinfected garden shears. Wrap a damp paper towel around the cut end of the stem and place the whole thing in a plastic bag to help maintain moisture. Next, fill an 8-inch (20 cm) pot with potting soil to ½ inch (1.3 cm) below the top of the pot, and run water into the pot until it runs out the drainage holes at the bottom. Use the eraser end of a pencil to poke a hole in the soil that’s about 3 inches (7.6 cm) deep. If you’re planting several cuttings, make a series of holes around the edge of the pot, spaced about 2 inches (5.1 cm) apart. With clean shears, trim ½ inch (1.3 cm) off the end of each cutting and trim away any leaves that are within 3 inches (7.6 cm) of the end of the stem. Dip the cut ends in rooting hormone, then slide each cutting into the holes you made in the soil. If the cuttings can’t stay upright on their own, stabilize them with stakes. Water the soil again until you see water coming out of the drainage holes. Keep the pot in a warm, bright location out of direct sunlight, and water the soil any time it starts to dry out. Remove any cuttings that have turned yellow or wilted. It should take 1-2 months for the cuttings to take root. Once they do, repot them or plant them in the ground when you notice new growth.