This article was co-authored by Scott Johnson. Scott Johnson is the Owner and Lead Design Consultant for Concrete Creations, Inc., an award-winning landscape and design company based in the San Diego, California metro area. He has over 30 years of experience in the pool and landscape construction industry and specializes in large estate outdoor environment construction projects. His work has been featured in San Diego Home & Garden Magazine and on Pool Kings TV Show. He earned a BS degree in Construction Management with an emphasis in Architecture and CAD design from Northern Arizona University.
There are 10 references cited in this article, which can be found at the bottom of the page.
This article has been viewed 23,497 times.
Planting beautiful trees, shrubs, and flowers in your yard can transform it into a peaceful and nature-filled space. To landscape your yard effectively, plant all trees and shrubs first, placing smaller flowers such as perennials and annuals in the leftover space. Choose plants that will benefit your yard or that you'll enjoy, and take the time to provide them with rich soil, plenty of water, and the space needed for their roots to grow.
Steps
Choosing and Placing Landscape Plants
-
1Pick out trees that serve a purpose or are aesthetically pleasing. Decide if you want your tree or shrub to provide shade, serve as a fence between a neighbor's house and your own, or simply be aesthetically pleasing. Once you've determined their purpose, you'll be able to narrow down your choices.[1]
- For example, if you want shade in your yard, you might pick out a honey locust or willow oak.
- Crabapples and Japanese maples look beautiful and provide colorful leaves or blooms.
- Check the tree's Zone to see whether it's suitable for your specific climate.
-
2Experiment with different types of annuals to find ones you like. Since annuals will only last for 1 year, if you pick one that ends up not doing well in your yard or that you don't like, you can switch it out next year. Choose annuals with healthy stems and leaves, and whose colors you like.[2]
- You can buy annuals in cells or individualized pots.
- Ask an employee at a garden store which annuals grow best in your specific climate.
Advertisement -
3Choose perennials you'd like in your garden year after year. Perennials are dependable and easy to care for since they regrow every year. Choose perennials that work well in your climate and whose color palette is pleasing.[3]
- Try choosing a perennials in pastel colors, or picking out 1 or 2 main shades to work with.
- The lifetime of each different type of perennial will differ—some may live for 4 years while another lives for 20.
-
4Pick out a tree's spot depending on its purpose. If your trees are going to be serving as a fence, line them up against your property line. If you'd like them to provide shade, place them in spots that you want to be shaded. Just remember to plant smaller trees closer to your house and large trees farther away.[4]
- Planting large trees farther away from your house will prevent them from damaging your home if they happen to fall.
-
5Plant your flowers or shrubs in a border up against a structure. If you're placing your plants along a fence or wall, plant the tallest ones in the back. Plant flowers that are shorter in the middle, with the shortest ones in the very front.[5]
- The tag that came with your plant should tell you how tall your flowers will grow to be.
- Try to get the largest, most mature plant you can afford to make planting easiest.
-
6Place the flowers or shrubs on an island bed to be viewed from every angle. If you're planting flowers in a flower bed that's in the middle of the yard, place the tallest plants in the middle. You can plant other flowers on either side of the tall plants, placing them according to their height.[6]
- Keep in mind that flowers on an island bed will be seen from all sides, not just one.
-
7Situate your plants strategically for a full-looking garden. To make your garden look more full, plant flowers of the same type next to one another. You can also place short-lived plants between plants that grow slowly so that there are more blooms visible.[7]
-
8Choose seedlings for an easier growing experience. It can be more difficult and time-consuming to grow plants from seeds. By purchasing seedlings, you'll be planting tiny plants that have sprouted and already gone through the germination phase.[8]


Preparing the Soil
-
1Test the condition of your soil. To find out if your soil has more silt, sand, or clay in it, do a squeeze test. Dig up some soil and mix it with water in a jar or cup. Take out the wet soil and rub it between your fingers—a gritty feel means it's sandy, a slimy feel means it has lots of clay, and if it's smooth then it's silty.[9]
- You want soil that has a little bit of all three conditions, making it loamy.
- Different plants will like different types of soil, so decide what trees, shrubs, or flowers you'll be planting before determining how to fix up your soil.
-
2Check to see if your soil is well-draining. Most plants need soil that's able to drain water easily. To find out if you have well-draining soil, dig a hole roughly 1 foot (30 cm) in width and depth. Fill the hole with water, and if the water drains out within 2 hours, your soil is good to go.[10]
- You can purchase better soil at a garden store or online that's nutrient-rich and well-draining.
- You can either replace your old soil with the new soil, or mix the new soil in with the old so that your garden adjusts more easily.
-
3Loosen up the soil and remove any rocks. Use a spade, shovel, or rake to de-clump your soil. Move it around so that it's nice and fresh, and take out any large rocks or other things that might get in the way of the roots.
-
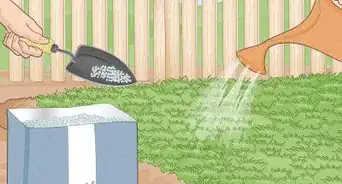
4Add compost to your soil, if desired. You can buy compost from a garden store or website that is nutrient-rich and great for your garden, or you can make your own. Mix the compost into your soil, reading the label on the compost you bought you determine how much to use.
- If you made your compost, go online to find out how much to use for the specific type of plant you're hoping to plant in the soil.
- How you're using the compost will determine in which way you should deposit it—if you want it mixed in with your soil, simply transfer a couple shovelfuls of the compost into the dug hole and mix it around with regular soil.
- If you're using it for mulching, spread it on top of the soil like you would a mulch.
-
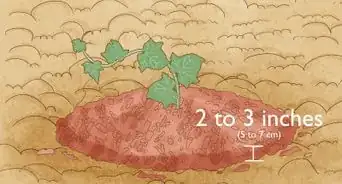
5Dig a hole twice the size of the plant's container. The roots will need plenty of room to grow and expand, which is why the hole needs to be twice the size. Use a shovel to dig the hole, and keep the soil you dig out so that you can refill the hole once the plants are placed.[11]
- The hole should be twice the size in width, not necessarily in depth.
- Make sure you're digging as deep as the root system so that when the plant is placed in the hole it's at the same level as when it was in a container.


Placing the Plants
-
1Place wires and stakes for taller plants into the ground, if necessary. If you're planning on planting super tall plants or young trees that will need help standing up, place the stakes before placing the plant. Use 3 wires and stakes to support the plant evenly.[12]
- Placing the stakes before you plant the tree or other tall plant will prevent you from damaging the roots as you pound the stake into the ground.
-
2Remove the plant from the container. If your plant is in a plastic container, squeeze the edges of the container and push up on the bottom to release the plant. Gently remove any plastic wrapping if necessary, and gently loosen the roots from the ball of soil if they're tightly wound together.[13]
- Always avoid pulling a plant out of a container by pulling on its stem.
- Don't expose the roots until you're ready to put the plant into the soil.
- You don't need to remove burlap from the plant—just loosen the top a bit so that the plant is able to expand.
-
3Put the plant carefully into the hole. Hold the plant by the root ball as opposed to the stem or leaves so that it isn't damaged. Set the plant down in the hole, making sure the top of the root ball is level with the soil.[14]
- If you place the plant in the hole and find out that the hole isn't deep enough, remove the plant and deepen/widen the hole so that it's the right size.
- You can also remove the plant and add soil to the bottom of the hole if it's too deep.
-
4Fill the hole in with soil. Use your shovel to begin shoveling the dirt you dug out back into the hole, mixing the topsoil with the subsoil. Be careful not to plant the flowers, trees, or bushes too deeply—they should never be buried to the point where the leaves connect with the stem.[15]
- You can also add some nutrient-rich soil if your soil isn't super healthy for the plants.
-
5Press down on the soil lightly to remove air pockets. Use your hands to gently pat the soil down into the ground, doing this over the entire area that you've just filled in. You can add a little bit more soil to the patted-down layer, if necessary.
-
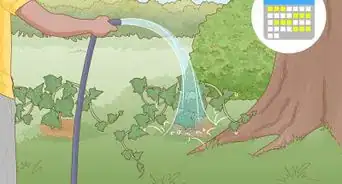
6Water the plant so that it's hydrated right after being planted. Once the plant is in the hole and the soil has been filled in, use a watering can, hose, or a cup of water to water the plant.
- Water the plant slowly, checking to see if the soil is still soaking up the water to know how much water to pour. If the soil remains damp after watering, you've given the plant enough.
- There isn't a specific amount that you should water all plants—how much water a plant needs will depend on factors like the specific type of plant, your climate, and whether it's in the sun.
- Research the specific plant you're watering for information on water needs, or simply feel the soil to see when it's dry.


Caring for Landscape Plants
-
1Use mulch to retain moisture. Putting mulch around your plants is a great way to keep the soil moist while also keeping out weeds. Buy mulch at a garden store or make your own and spread it in a 2–3 in (5.1–7.6 cm) layer on top of the soil.[16]
- Apply the mulch in mid-spring as the soil warms up.
- You can reapply the mulch in the summer to help keep moisture in the soil, as well as right before winter to help protect the soil from the cold.
- Tiny plants or seedlings might have a hard time growing through mulch, so if you apply it, use a thin layer.
-
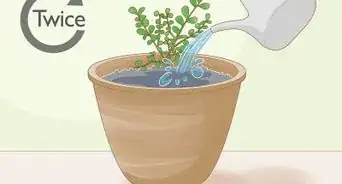
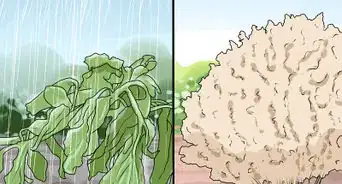
2Water the plants depending on your climate and the specific type. Plants that are in a warmer climate or that are planted during a hot summer are going to need more frequent waterings than plants in a cooler climate. Check on your plants to see if the soil is dry, and water them as needed.[17]
- Keep newly-transplanted plants especially hydrated for the first few weeks.
-
3Fertilize the plants when they're first watered, if desired. Once you've placed the plants into the soil and water them for the first time, you can also use a fertilizer suitable for the plant to help it grow and transition better. Follow the directions on the bag or box to use the correct amount of fertilizer.[18]
- You can find fertilizers at your local garden store or online.
- Do some research about your specific plant type to find the perfect fertilizer to use.
-
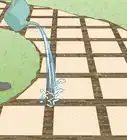
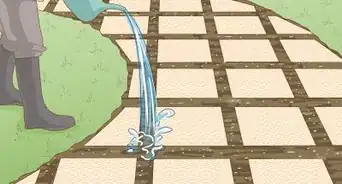
4Create a walkway in your garden to easily care for plants. If you have a large garden or section of plants and you can't reach all of them individually, create a walkway using stones or another material. This will allow you to walk in between the plants to water and prune them as needed, while also providing a decorative aspect.[19]
- You can buy stones for walkways at a home improvement store or online.
-
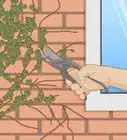
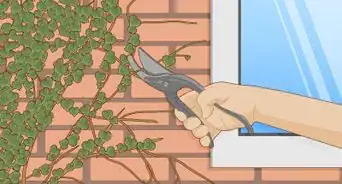
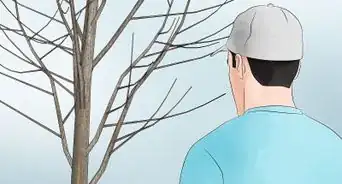
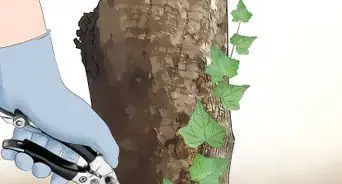
5Snip off blooms when they start to fade or die. This will allow new blooms to take their place and will keep your plants looking healthy and happy. Use sharp pruning shears, or even scissors for smaller plants, to snip off the dead parts of plants.
- If the leaves have withered and browned or the petals have shrunken up and turned a darker color, it's time to prune the dead parts off.


Expert Q&A
-
QuestionWhat are the best plants for landscaping?
 Scott JohnsonScott Johnson is the Owner and Lead Design Consultant for Concrete Creations, Inc., an award-winning landscape and design company based in the San Diego, California metro area. He has over 30 years of experience in the pool and landscape construction industry and specializes in large estate outdoor environment construction projects. His work has been featured in San Diego Home & Garden Magazine and on Pool Kings TV Show. He earned a BS degree in Construction Management with an emphasis in Architecture and CAD design from Northern Arizona University.
Landscape & Design ConsultantIf you're looking for low-maintenance plants, choose a plant that will only grow about an inch a year. For instance, you might choose plants like agaves and succulents, since they'll just remain basically the way they are when you plant them. -
QuestionHow deep do shrubs need to be planted?
 Maggie MoranMaggie Moran is a Professional Gardener in Pennsylvania.
Home & Garden SpecialistDig a planting hole just 2 or 3 feet wider than the shrub's root ball. This hole should be dug deep enough for the root ball to be fully buried. -
QuestionHow do you plant potted plants in the ground?Maggie MoranMaggie Moran is a Professional Gardener in Pennsylvania.
Home & Garden SpecialistFirst, you prepare the soil and dig the hole. Carefully remove the plant from the pot and loosen the edge of the root ball. Once you place the root ball in the ground, be sure to water and take care of the plant.
Warnings
- Do not plant trees or shrubs over the septic field or within 30 feet (9.1 m) of septic tanks, or close to sewer and water lines.⧼thumbs_response⧽
- Mulch deeper than 3 inches (7.6 cm) is generally more detrimental than helpful to plants.⧼thumbs_response⧽
- Do not use weed or vegetation killers on an area shortly before you plant in it. Read pesticide labels to see when it's safe to plant after using such products.⧼thumbs_response⧽
Things You'll Need
- Measuring tape
- Shovel or hand trowel
- Nutrient-rich soil
- Pruning shears or scissors
- Compost (optional)
- Mulch (optional)


References
- ↑ https://www.bhg.com/gardening/trees-shrubs-vines/trees/selecting-trees-for-your-yard/
- ↑ http://extension.illinois.edu/annuals/planting.cfm
- ↑ https://thefrugalchicken.com/10-strategic-tips-for-choosing-the-best-perennial-plants-for-your-garden/
- ↑ https://www.bhg.com/gardening/trees-shrubs-vines/trees/selecting-trees-for-your-yard/
- ↑ https://thefrugalchicken.com/10-strategic-tips-for-choosing-the-best-perennial-plants-for-your-garden/
- ↑ http://www.flower-gardening-made-easy.com/flower-garden-design.html
- ↑ https://thefrugalchicken.com/10-strategic-tips-for-choosing-the-best-perennial-plants-for-your-garden/
- ↑ http://www.differencebetween.net/science/difference-between-seeds-and-seedlings/
- ↑ https://thefrugalchicken.com/10-strategic-tips-for-choosing-the-best-perennial-plants-for-your-garden/
- ↑ http://www.wnit.org/outdoorelements/pdf/1109-tree-planting-tips-from-purdue.pdf
- ↑ http://www.wnit.org/outdoorelements/pdf/1109-tree-planting-tips-from-purdue.pdf
- ↑ http://www.wnit.org/outdoorelements/pdf/1109-tree-planting-tips-from-purdue.pdf
- ↑ http://www.wnit.org/outdoorelements/pdf/1109-tree-planting-tips-from-purdue.pdf
- ↑ http://www.wnit.org/outdoorelements/pdf/1109-tree-planting-tips-from-purdue.pdf
- ↑ http://www.wnit.org/outdoorelements/pdf/1109-tree-planting-tips-from-purdue.pdf
- ↑ https://www.gardeningchannel.com/importance-of-mulch/
- ↑ https://www.epa.gov/watersense/what-plant
- ↑ http://www.finegardening.com/article/fertilizing-basics
- ↑ https://www.thisoldhouse.com/ideas/heres-how-to-build-perfect-path
About This Article