This article was co-authored by Grant Wallace. Grant Wallace is a Landscaper and Owner of Grantlanta Lawn in Atlanta, Georgia. With over seven years of experience, he specializes in lawn maintenance and landscape installation. In 2012, he earned his BA from the University of West Georgia. Grant has been profiled in Shoutout Atlanta, Canvas Rebel, and Voyage ATL.
There are 8 references cited in this article, which can be found at the bottom of the page.
This article has been viewed 47,344 times.
Covering a brick wall in ivy can give it a unique, classy look—there’s a reason many of those universities with old brick buildings on campus are called “Ivy league” schools! Growing ivy on a brick wall is really quite easy and can be done without any expert knowledge of gardening. You can buy young potted ivy plants and simply transplant them to the soil near the wall you want the ivy to climb up. Keep in mind that ivy grows very rapidly once it gets established, after about the first year of growth, so you’ll have to perform some annual pruning to keep it under control. With a little love and care, your brick wall will be covered in lush, colorful ivy for years to come.
Steps
Selecting the Right Ivy and Wall
-
1Plant self-clinging Boston ivy or Virginia creeper. These types of ivy climb up masonry and brick with disc-like suction pads. They are unlikely to damage your brickwork because they just stick on top of the masonry, rather than trying to root into it.[1]
- Boston ivy and Virginia creeper are closely related and are both perennial, meaning that they shed their leaves in the fall. Their leaves change from lush green to different shades of red, crimson, and purple.
-
2Avoid planting invasive, rooting English ivy. English ivy uses aerial roots to support itself and climb up surfaces. These roots aggressively penetrate cracks and joints and can cause structural damage, so avoid planting English ivy on your brick walls.[2]
- English ivy is also the most invasive type of ivy, so much so that it is even banned from planting in certain areas.
Advertisement -
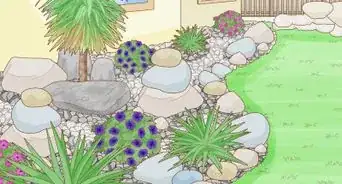
3Choose a sturdy, solid brick wall with no cracks or loose bricks to grow ivy on. Even self-clinging ivy can find its way into cracks, making them wider and allowing moisture to penetrate the brickwork, which can cause structural damage. Inspect any brick wall you want to grow ivy on to ensure that it has no pre-existing structural issues that you might make worse by adding climbing ivy.[3]
- In general, brickwork that was done after 1930 is usually sturdy and sound enough to grow ivy on, as long as it has no visible damage. Brick walls built before 1930 are more likely to have issues, such as crumbling mortar, because traditional lime-based mortar is softer than modern cement-based mortar.
Tip: As long as your brick wall is solid, ivy can actually benefit your home or facility by adding insulation to the wall keeping, which keeps the inside cooler when it’s hot outside and warmer when it’s cold outside.[4]


Planting the Ivy
-
1Purchase a potted ivy plant from a garden center or nursery in spring or fall. Planting ivy in the spring or fall will provide the best results because it grows fastest during these seasons. Visit a garden center or nursery during one of these seasons and buy a pot containing your chosen type of ivy.[5]
- Alternatively, you could plant your own ivy in pots from seeds or cuttings, then transplant them to the ground near your brick wall once they have developed a strong root system in the pots.
-
2Buy multiple ivy plants if you want to cover a brick wall in ivy faster. One ivy plant for every 18–24 in (46–61 cm) of wall width is plenty. Purchase as many ivy plants as you need to cover your whole wall.[6]
-
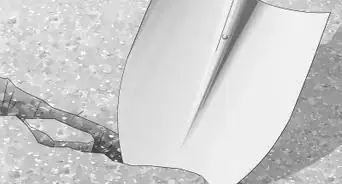
3Dig a hole at least 1 ft (0.30 m) away from the brick wall. Use a garden trowel to dig a hole as deep as the pot that your ivy came in. Planting ivy at least 1 ft (0.30 m) away from the wall will give the roots more space to grow and establish themselves.[7]
- Ivy will grow in pretty much any type of soil, as long as it is well-draining. An example of poor-draining soil is soil with a high concentration of clay. If you can easily dig in your soil, it is probably just fine for your ivy.
- If you don’t want to or aren’t able to plant your ivy in the soil, you can grow it next to the wall in a large pot filled with any type of potting soil.
- Ivy needs something to attach itself to so if you plant it any farther than a foot it won’t be able to find its way to the wall.
- Some ivy species might require a trellis to get started so it has something to climb on.
- Keep in mind that English Ivy are incredibly difficult to remove if you decide to let it grow in or near your house. This species is also very invasive and can grow into the home.
Tip: The direction the wall faces towards and how much sun it gets are not a concern. Ivy will grow in all light conditions, from full sun to heavy shade. However, the more sun it gets, the brighter the ivy’s fall colors will be.[8]
-
4Put holes 18–24 in (46–61 cm) apart if you’re planting multiple ivy plants. This will give each plant room for its roots to spread out and establish themselves. Dig holes about 18 in (46 cm) apart for the ivy to cover your wall faster, or further apart for more distributed coverage.[9]
- Multiple ivy plants will grow faster and healthier when they are not crowded together. Their roots like to spread out a lot underground.
-
5Transfer the ivy from the pot to the hole and angle it towards the wall. Carefully loosen your ivy plant from the pot it came in by sliding a small trowel around the root system, between the pot and the soil. Tilt the pot until you can slide the ivy out in one hand, then gently place the ivy in the hole you dug, so that it is leaning slightly towards the wall.[10]
- If you’re planting more than one ivy plant, repeat this process for each plant and hole.
-
6Pack the soil around the base of the ivy and water it. Fill the hole in around the ivy with the soil you dug up and pack it down firmly around the ivy using a trowel. Water the soil generously until it is fully saturated.[11]
- It’s not necessary to use fertilizer, but you can sprinkle a small amount of all-purpose fertilizer onto the soil before watering if you want to provide some more nutrients for the ivy to get started.
-
7Add a 2 in (5.1 cm) layer of mulch to the soil around the ivy. Spread 2 in (5.1 cm) of mulch on top of the soil in about a 1 ft (0.30 m) radius around the base of the ivy plant. This will keep the root system cool and moist and provide additional nutrients throughout the growing season as the mulch decomposes.[12]
- You can use any type of store-bought mulch or a homemade mulch, such as compost or grass clippings.
-
8Water ivy whenever the topsoil is dry for the first season after you plant it. Stick your finger about 1 in (2.5 cm) into the soil near the ivy to check for moisture. Water your ivy whenever this top layer of soil feels dry during the full season after you plant it.[13]
- For example, if you planted your ivy at the end of spring, water it throughout the summer, until fall begins. If you planted your ivy at the beginning of fall, water it through the end of fall, until winter begins.
- After the first growing season, once the ivy has established itself, you don’t need to water it anymore. The ivy’s root system will be developed enough to get all the water it needs on its own.


Controlling the Ivy
-
1Prune your ivy annually in winter, when there are no leaves. Wait until at least the end of fall, when all your ivy’s leaves have fallen off, and prune the ivy any time before the leaves start growing back in spring. Use pruning shears to cut offshoots off right where they branch out of another shoot.[14]
- It’s much easier to prune ivy when the shoots are not covered by foliage, so you can see what you’re doing and cut back certain shoots to shape the plant and control its direction of growth. This will also ensure you are pruning the ivy before its growing season, so you can influence the direction it grows in.
Tip: You don’t have to do this during the first year of growth, but make sure to do so after the ivy becomes established and starts growing up your wall. Otherwise, ivy can quickly get out of control. It’s much harder to remove ivy after it covers something than to keep it controlled in the first place.
-
2Trim ivy to keep it away from doors, windows, gutters, roofing, and wood trim. Use pruning shears to trim back shoots of the ivy that are going towards these areas. Cut the shoots right where they branch off of other main shoots to ensure that the ivy doesn’t start creeping over your windows, doors, gutters, roof, and wood trim.[15]
- Ivy can easily find small cracks in wood and grow into them, which can damage things like wood siding and trim. It can also become very heavy and pull down things like gutters or damage your roofing.
-
3Cut new side shoots back to the woody main shoots to shape the ivy. Use a pair of pruning shears to trim back younger offshoots of the ivy plant to where they sprout off of the older, thicker shoots. Prune away any shoots that are growing in directions that you don’t want the ivy to grow in.[16]
- For example, if you see a new horizontal shoot going straight towards a window, cut it back to the nearest older vertical shoot.


Warnings
- Don’t plant English ivy, which is highly invasive and can easily damage a building when it starts covering it.⧼thumbs_response⧽
- If you don’t prune your ivy every year, it can easily get out of control. It is harder to remove when it starts covering things like windows, doors, and other places you don’t want it to cover than it is to prune it and keep it under control.⧼thumbs_response⧽
Things You’ll Need
- Potted ivy plant
- Garden trowel
- Mulch
- Water
- Pruning shears


-Step-18.webp)
Expert Interview
Thanks for reading our article! If you'd like to learn more about growing ivy, check out our in-depth interview with Grant Wallace.
References
- ↑ https://www.rhs.org.uk/advice/profile?PID=258
- ↑ https://www.rhs.org.uk/advice/profile?PID=258
- ↑ https://todayshomeowner.com/can-ivy-damage-the-brick-or-wood-on-your-home/
- ↑ https://www.theguardian.com/lifeandstyle/2019/oct/20/dont-bother-with-living-wall-plant-ivy
- ↑ https://www.gardenersworld.com/how-to/grow-plants/how-to-grow-parthenocissus/
- ↑ https://www.gardenersworld.com/how-to/grow-plants/how-to-grow-parthenocissus/
- ↑ https://www.rspb.org.uk/get-involved/activities/give-nature-a-home-in-your-garden/garden-activities/cloakyourwallswithclimbers/
- ↑ https://www.bhg.com/gardening/plant-dictionary/vine/boston-ivy/
- ↑ https://www.naturehills.com/blog/post/the-complete-guide-for-taking-care-of-boston-ivy
- ↑ https://www.rspb.org.uk/get-involved/activities/give-nature-a-home-in-your-garden/garden-activities/cloakyourwallswithclimbers/
- ↑ https://www.rspb.org.uk/get-involved/activities/give-nature-a-home-in-your-garden/garden-activities/cloakyourwallswithclimbers/
- ↑ https://www.bhg.com/gardening/plant-dictionary/vine/boston-ivy/
- ↑ https://www.bhg.com/gardening/plant-dictionary/vine/boston-ivy/
- ↑ https://www.bhg.com/gardening/plant-dictionary/vine/boston-ivy/
- ↑ https://todayshomeowner.com/can-ivy-damage-the-brick-or-wood-on-your-home/
- ↑ https://www.oldhouseonline.com/gardens-and-exteriors/how-to-grow-vines-on-buildings
About This Article