This article was co-authored by Grant Wallace. Grant Wallace is a Landscaper and Owner of Grantlanta Lawn in Atlanta, Georgia. With over seven years of experience, he specializes in lawn maintenance and landscape installation. In 2012, he earned his BA from the University of West Georgia. Grant has been profiled in Shoutout Atlanta, Canvas Rebel, and Voyage ATL.
There are 11 references cited in this article, which can be found at the bottom of the page.
This article has been viewed 19,641 times.
Ground slabs in your patio or garden are a great addition to any property. However, unsightly dirt and weeds can start building up between those slabs over time. The best way to prevent that is to fill the gaps between the slabs. This might sound like a big job, but it’s actually very easy to fill in gaps between slabs using just some simple tools and a few hours of your time. When you’re done, your patio or garden slabs will look good as new.
Steps
Prepping the Slabs and Mortar
-
1Put on goggles and waterproof gloves to protect yourself. Bits of mortar or sand could pop up and poke you in the eye, so always wear goggles while you’re working. Also wear gloves so the mortar doesn’t irritate your skin.[1]
-
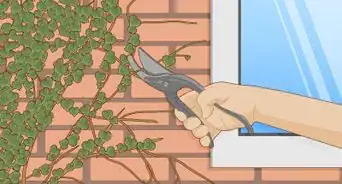
2Clean and dirt or weeds out from between the slabs. Over time, dirt and weeds can build up between slabs, especially if they’re old. Use a scraping tool like a metal putty knife and scrape it between all the slabs to remove debris like this. Then wipe it away from the gaps with a rag.[2]
- If you just laid the slabs, then you probably don’t have to do this. Just make sure there’s no dirt in the gaps.
Advertisement -
3Pour 1 part of cement and 5 parts of building sand into a bucket. This is the normal proportion for simple mortar work like this. Scoop out a trowel-full of normal dry cement, then scoop out 5 trowels of building sand.[3]
- The mixture might be different depending on the product you’re using. Always read and follow the instructions provided.
- The amount of mortar you make depends on how many gaps you’re filling. If you need more, you can always mix it quickly.
-
4Stir the sand and cement until the mixture is even. Use your trowel and mix everything together. Continue until you have a nice, even combination of sand and cement.[4]
- If you’re mixing a lot of mortar for a large area, then an automatic cement mixer will make the job a lot faster. For normal patchwork, mixing by hand with a trowel should work fine.
-
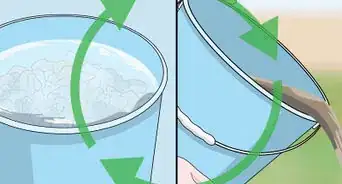
5Wet the mixture lightly. If the mortar is too wet, it will stick to the tops of the slabs and stain them. It should be just wet enough for the sand to stick together. Just scoop in a few trowel-fulls of water to moisten the mixture.[5]
- Don’t use a hose or dump the water in with a bucket. It’s easy to accidentally waterlog the mortar this way.
- If the mixture is too wet, add more cement and sand at a 1:4 ratio to thicken it up.
- Make sure you’ve mixed the sand and cement together before adding water. Otherwise, the mixture will be uneven.
-
6Mix everything until the mortar has a wet sand consistency. Use your trowel and continue stirring. The mortar should stick together, but still have the consistency of slightly wet sand. Add more water if you have to by scooping it in a little bit at a time.[6]
- For a quick test, pick up a bit of mortar and squeeze it in your hand. It should hold its shape when you open your hand.


Spreading the Mortar
-
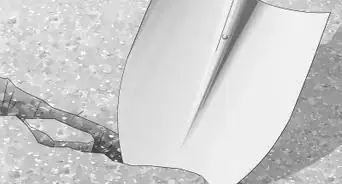
1Scoop some mortar out with a trowel. Slide the trowel into the mortar sideways and try to cover it about halfway with mortar. Lift it out carefully so none of the mortar spills.[7]
- Don’t worry if you scooped out too much. You can always use any excess mortar for the rest of the gaps.
-
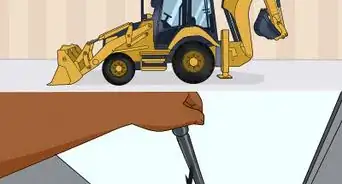
2Spread the mortar along the slab space. Hold the trowel over the gap and tilt it to pour the mortar into the space. Then scrape around the slabs to get any excess mortar into the gap.[8]
- If the mortar overflows, just scrape it forward to fill more of the gap.
- Tap the trowel on the slab if some of the mortar is stuck to it.
-
3Press the mortar into the space lightly with a pointer trowel. A pointer trowel is a thinner type of trowel used to pack mortar into gaps. Press the tool into the mortar gently to pack it down until the mortar is even with the top of the slabs.[9]
- Don’t apply too much pressure. The point is to just flatten the top of the mortar, not pack it in tightly.
- If the slabs aren’t even, then pack the mortar so it’s even with the lower slab.
- Don’t worry if there’s some excess mortar left on the side of the slabs. You can clean that up later.
-
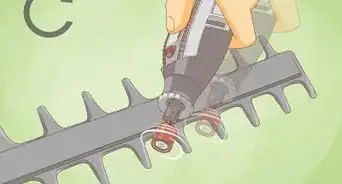
4Run a jointing tool along the gap to smooth the mortar. A jointing tool is a rounded metal tool to finish mortar work. Press the tool down at the back of the mortar you just laid and run it forward with light pressure. This smooths and rounds out the mortar.[10]
- Some masons like to use improvised jointing tools, like a piece of pipe that fits the gap. You could use something like this if you don’t have a jointing tool.
-
5Brush off any excess mortar after 3-4 hours. The mortar will actually be easier to clean after it dries a bit. Leave it alone for 3-4 hours, then wipe it up with a brush or rag.[11]
- Don’t worry about the mortar staining or sticking to the slabs. As long as it wasn’t too wet, this won’t be a problem. If the mortar is watery, scrub it off with a damp sponge.
-
6Let the mortar cure for 28 days. While the mortar will probably dry within 24 hours, it needs longer to fully cure. After 28 days, the mortar should reach its full strength.[12]
- The curing time might vary depending on the product you use. Always read and follow the instructions that come with the cement.


Things You’ll Need
- Building sand
- Cement
- Trowel
- Bucket
- Water
- Gloves
- Goggles
- Pointer trowel
- Jointing tool
- Rags


-Step-18.webp)
Expert Interview
Thanks for reading our article! If you'd like to learn more about filling gaps between slabs, check out our in-depth interview with Grant Wallace.
References
- ↑ https://www.thebalancesmb.com/mixing-mortar-tips-mix-like-a-pro-844820
- ↑ https://youtu.be/vbH9audJtWU?t=173
- ↑ https://www.gardenersworld.com/how-to/diy/how-to-lay-a-garden-patio/
- ↑ https://youtu.be/vbH9audJtWU?t=86
- ↑ https://youtu.be/vbH9audJtWU?t=127
- ↑ https://www.thebalancesmb.com/mixing-mortar-tips-mix-like-a-pro-844820
- ↑ https://youtu.be/vG52cIZNSD8?t=55
- ↑ https://youtu.be/vG52cIZNSD8?t=60
- ↑ https://youtu.be/vG52cIZNSD8?t=68
About This Article