This article was co-authored by Matt Daly. Matt Daly is a Landscape Designer and the Founder of Water & Earth Landscape Design, which is based in both Richmond, Virginia, and San Jose, California. With nearly 10 years of experience, he specializes in designing outdoor living spaces, including patios, pools, and fireplaces. Matt also runs a blog where he educates homeowners about landscaping topics: https://www.liveinyourbackyard.com/. He earned his Landscape Design & Horticulture Certification from The University of Richmond, where he also studied Sustainable Landscape Practices.
This article has been viewed 204,692 times.
Berms are raised mounds of earth, usually forming a long ridge. These attractive landscaping features provide more soil depth for planting and help block sound and wind. Mountain bikers build heavy-duty berms to create banked turns.
Steps
Building a Berm for Your Garden
-
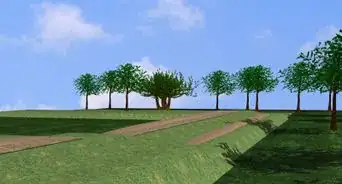
1Plan the shape of your berm. A berm looks most natural when it follows a curve or sinuous shape, blending into other curves in the landscape. As a guideline, keep the berm about 4 to 6 times as long as it is wide.[1]
-
2Determine the slope and height. To minimize problems with erosion, water runoff, and mowing difficulty, keep the maximum gradient below 5:1 (five times as wide as it is tall). 4:1 is possible but risky, and anything steeper requires specialized plants and erosion control. Most berms in home gardens are no taller than 24 inches (61 cm).[2]
- An asymmetric appearance improves the aesthetics, with an off-center peak and a variety of slopes along the berm's length.
Advertisement -
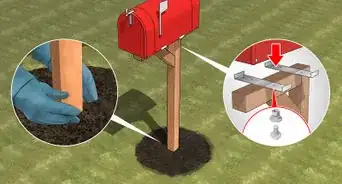
3Consider the drainage. Berms can act as miniature dams, altering the water flow in your garden. You may need to dig swales between the berms, build a culvert running through the berm, or regrade your garden. You may want to discuss this with a professional landscaper if you are building a tall berm (especially above 24 inches / 61 cm), or if you live in a rainy climate.
- A flat top reduces runoff and provides more water to plants growing on the side of the berm.[3]
- While building your berm, do your best to avoid compacting the soil at the base with heavy equipment. If it's already compacted, loosen the soil by digging 8 inches (20 cm) deep to improve drainage.
-
4Break up the soil lightly. Dig into the surface of the area along the path of your berm. This creates a stronger bond with the next layer of soil.
-
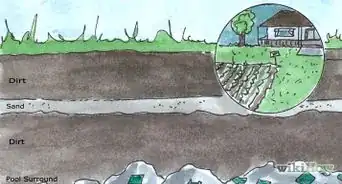
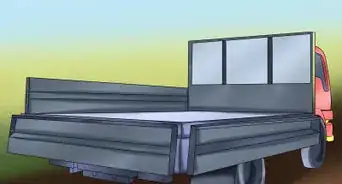
5Build the base from affordable materials . With a shovel or bobcat, pile on fill dirt, compacting it periodically. Shape it according to the layout you decided on, except 1 ft (30 cm) smaller on all sides. Rake it smooth and get all proportions as exact as possible.
- Well-compacted clay soil is recommended for steep or tall berms. Loam will typically collapse at slopes steeper than 35%.
- Gravel is cheaper, but the soil tends to wash through it — and it is not compliant with some local codes. If you use it, cover it with at least 1 inch (2.5 cm) of compacted clay.
-
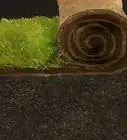
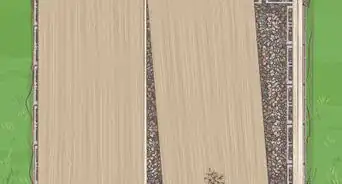
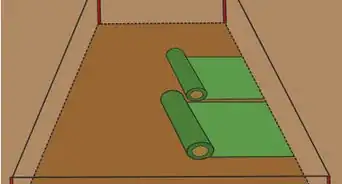
6Add the topsoil layer. Spread out a layer of topsoil over the entire berm, mixing it with the top 2–3 inches (5–7.5 cm) of clay. Pile on more topsoil to form a layer 1 ft (30 cm) thick.
-
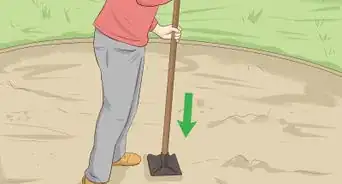
7Compact the soil lightly. Roll an empty lawn roller over the top layer of soil, or tamp it down with your feet or a board. The berm will settle over time as water seeps through it, but a light compaction should be enough to minimize erosion.
-
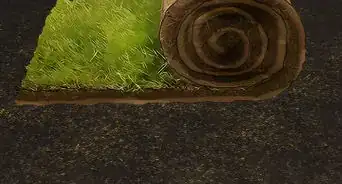
8Plant on the surface. Establish a lawn over the berm, along with shrubs and trees in a pattern that doesn't interfere with mowing or walking. Add mulch while the plants are establishing roots to prevent erosion.


Building a Berm for Mountain Biking
-
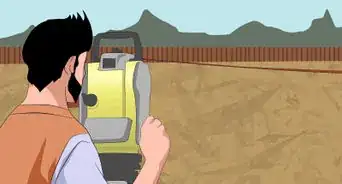
1Plan the shape and location of the berm. Also called an inslope turn, a berm is a turn with a surface tilted toward the inside of the curve, helping bikers navigate it smoothly without losing speed. Whether your berm is a slight curve or a full semicircle, keep the radius between 10 and 15 feet (3–45.m). The slope of the berm can be as gentle as a 7% slope, but steep downhill turns require a steeper angle.[4]
- Building the turn around a tree, large rock, or other obstacle discourages bikers from short-cutting the turn. Make sure the obstacle doesn't block line of sight, and that it's not close enough to hit someone's head when they lean into the turn.
- For your first berm, avoid a sideslope (slope between the two sides of the turn) steeper than a 4:1 gradient (25%). Steeper slopes require a turning platform, which takes a lot more work.
-
2Clear all organic material from the area. This includes topsoil, which will decompose and crumble if used on your trail. Build your berm with bare, mineral soil only.
-
3Build a retaining wall if necessary. Steep berms and berms built onto steep slopes require a retaining wall to prevent collapse. This is a big job, so consider working with experienced builders, or building a berm with a gentle slope instead (10 degrees, for instance). There are two approaches if you decide to go this route:
- Flat, square stones weighing at least 50 lbs (23 kg) make the best retaining walls. Lock the stones together with smaller rocks and "deadmen" logs extending into the bank to prevent wobbling, then backfill each layer with small rocks and mineral soil.[5]
- Wooden retaining walls take less labor, but rot over time. Use pressure treated wood rated for ground contact ("heavy duty" or "extreme" ground contact in wet climates). Lay deadmen logs into the bank, attached to the wall with notched log cabin construction.[6]
-
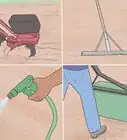
4Tamp down a thin layer of dirt. To support mountain biking without eroding, the berm must be extra sturdy. Lay down 2–4 inches (5–10 cm) along the turn in the trail, and compact it as hard as you can using a McLeod rake or hoe. Trying to compact the whole pile of dirt at once will create a weak berm that won't hold together for long.
- The soil must compact and cohere well. If it is too loose and sandy, mix in clay fill.[7]
- Powered compaction tools are difficult to use for this project, since they flatten the curve of the riding surface.
-
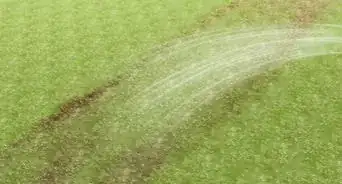
5Direct water off the trail. As you build, incorporate a wide drain at the downhill edge of the turn to direct water off the trail surface. Add a slight grade in the opposite direction before and after your turn for the same reason.
-
6Build the berm up in layers. Rough up the surface of the berm a little, add another 2–4 inches (5–10 cm) of soil, and compact again. Repeat this to build the berm to the desired shape and height.
- The rough surface helps the layers attach to each other, improving strength. A light sprinkle of water also helps.
- You can incorporate small rocks in the lower layers, but the top surface should be pure mineral soil only.
-
7Perfect the surface. Once your berm has reached the desired height and shape, make the surface as smooth as possible, with a constant slope. Give the berm a test ride and make adjustments until the turn feels smooth. For instance, if the turn feels too abrupt, you may need a wider radius, or a longer lead up into the berm.


Expert Q&A
-
QuestionWhere do you put berms in your yard?
 Matt DalyMatt Daly is a Landscape Designer and the Founder of Water & Earth Landscape Design, which is based in both Richmond, Virginia, and San Jose, California. With nearly 10 years of experience, he specializes in designing outdoor living spaces, including patios, pools, and fireplaces. Matt also runs a blog where he educates homeowners about landscaping topics: https://www.liveinyourbackyard.com/. He earned his Landscape Design & Horticulture Certification from The University of Richmond, where he also studied Sustainable Landscape Practices.
Landscape DesignerPut your berm in a place where it can channel the extra water away and guide it in the direction you want it to go. Just make sure that you inspect your yard while it's raining so you know what the water is actually doing—a lot of people troubleshoot their drainage problems after the fact, which isn't helpful. -
QuestionWhat is the maximum height for a berm?
 Community AnswerIt depends on however wide you can make its base. A good base is usually twice as wide as the berm's height. You may want to go wider if you plan on mowing the berm's grass and don't desire flipping the lawn tractor or struggling to keep the push-mower from sliding off its line.
 -
QuestionCan I make a berm on top of small landscape rock?Community AnswerYou could, but it would wash off eventually, and would be almost impossible to mow. You probably couldn't grow much of anything on it, either.


References
- ↑ https://www.landscapingnetwork.com/lawns/berms-mounds.html
- ↑ https://www.landscapingnetwork.com/lawns/berms-mounds.html
- ↑ https://www.landscapingnetwork.com/lawns/berms-mounds.html
- ↑ http://crgov.com/DocumentCenter/Home/View/1430
- ↑ http://crgov.com/DocumentCenter/Home/View/1430
- ↑ http://crgov.com/DocumentCenter/Home/View/1430
- ↑ http://crgov.com/DocumentCenter/Home/View/1430
- ↑ http://bikefat.com/pollards-complete-trail-building-guide/2/
About This Article

To build a berm for biking, start by removing all topsoil from the area, since topsoil will crumble and make the turn unstable. Then, cover the area with a 2 to 4 inch layer of dirt, and use a rake to compact it. You'll also need to incorporate a drain at the downhill end of the turn to allow water to run off. Next, build the berm up in 2 to 4 inch layers until the slope reaches your desired height. If the dirt doesn't stick together, rough up the surface to help the new layer of dirt stay in place. Finish by making the surface as smooth as possible, including by removing any stones or rocks. For tips on how to make a berm for your garden, keep reading!