This article was co-authored by Rob Litman. Rob Litman is a Landscaper, General Contractor, and the CEO of Vitoli Inc., a landscaping, hardscaping, ecoscaping, and swimming pool design company in Los Angeles, California. With over 20 years of experience in construction, Rob specializes in energy-efficient and drought-tolerant landscaping. He holds General Building Contractor (Class B) and Registered Pool/Spa Contractor Licenses. In 2007, Rob won House of the Year in Gardena, California.
This article has been viewed 21,221 times.
Tired of fighting to keep your lawn mowed, watered, and weed-free? Our guide will show you how to pick the perfect ground cover to create a gorgeous, low-maintenance outdoor space.
Steps
Choosing Groundcovers That Meet Your Needs
-
1Choose durable plants that can tolerate foot traffic. Before replacing your lawn with groundcovers, make sure your new plants can handle some foot traffic. If the space needs to be durable enough for rougher activities, like your children or pets playing, a hard packed area might be your best bet.[1]
- Pacific beach strawberry, for instance, is a hardy perennial groundcover native across nearly the entire North American Pacific coast. It’ll tolerate being walked on, but isn’t great for recreational activities.[2]
- Dymondia and ice plants are both good options that will grow tight to the ground.[3]
- If you need spots for heavy foot traffic or outdoor playing, consider utilizing border edging and putting weed fabric underneath permeable hardscapes, such as decomposed granite, mulch, or gravel.
-
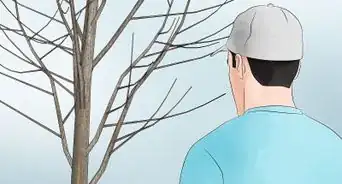
2Go with plants suitable for your light exposure and climate. Observe your yard over the course of the day, and note which areas receive the most sun and which remain shaded. Choose plants that are marked best for full sun, partial sun, or shade for the appropriate areas.[4]
- For example, Moss phlox loves sunlight and, as a bonus, produces flowers that attract butterflies. For shaded areas, consider a vine or ivy native to your location, like Virginia creeper, which is native from Quebec and Ontario to Central America.
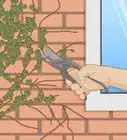
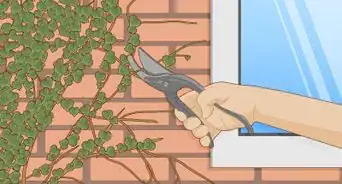
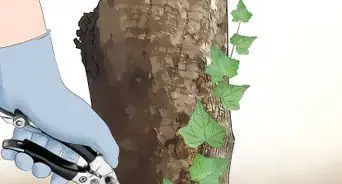
- Keep in mind that some types of vines and ivies are very aggressive in growth, and can spread quickly up and into trees or onto buildings.
- Your local home improvement store or nursery will carry groundcovers with various light preferences that thrive in your climate. If you have any questions, ask them about the best perennial choices for your sunlight exposure and hardiness zone. You can also, if applicable, refer to the Sunset Western Garden book or your State Landscape and Nursery Association for suggestions.
Advertisement - For example, Moss phlox loves sunlight and, as a bonus, produces flowers that attract butterflies. For shaded areas, consider a vine or ivy native to your location, like Virginia creeper, which is native from Quebec and Ontario to Central America.
-
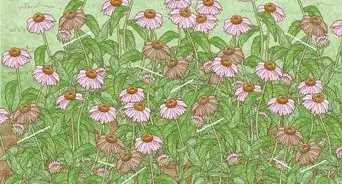
3Mix up your selections for healthier, more beautiful landscaping. Choosing various species will help you fill areas that receive various levels of sunlight. You can also add interest by mixing low growing plants with taller bushes, and by mixing plants that have different blooming cycles for a constant show of color. In addition to improving aesthetics, planting various species of groundcover will help reduce the risks of pests, diseases, and weeds.[5]
-
4Avoid invasive and aggressive plants. Consult your local nursery or home improvement store’s garden section about plants that are considered invasive in your area. You can also search online for your State University Extension service, State Department of Agriculture, Landscape Nursery Association or similar relevant websites applicable to where you are, to find out where a particular species is native and where it’s invasive.
- For example, Creeping Jenny and English Ivy are both considered invasive in locations across the eastern United States. They might grow quickly and provide quick coverage, but they’ll push out your other groundcover choices and change your native soil’s chemistry.


Preparing Your Space for Planting
-
1Remove all grass from the planting area. When you’ve chosen your groundcovers, prepare your planting area by first getting rid of anything growing in your existing lawn. Use a grub hoe to strip away any grass or weeds. Shovel the plant matter into lawn bags and discard.[6]
- Kill the vegetation by either using a chemical herbicide or complete vegetation killer. Closely follow the directions that come with the product and use it with caution.
- To kill your vegetation organically, cover the area with black plastic to block out the sunlight. This will effectively kill the vegetation over a long period of time.
-
2Loosen up the existing soil. Use a roto-tiller to work through and loosen the soil. Dig through your yard in strips and loosen the topsoil about 10 inches (25 cm) deep.
- A power roto-tiller is your best option. If you don’t have one, the most affordable choice would be to rent one from your nearby home improvement store.
-
3Test and till the soil. After you’ve loosened the top 10 inches (25 cm) of soil, test the soil at several different depths between 2 inches (5.1 cm) and 10 inches (25 cm) and in several different locations. Add any needed amendments to the soil for tilling so that it can be incorporated into planting beds. Improve its quality by mixing in a layer of peat moss. Use a shovel to spread 1–2 inches (2.5–5.1 cm) of peat moss across the planting area. Then use the roto-tiller to blend it with the existing soil.[7]
-
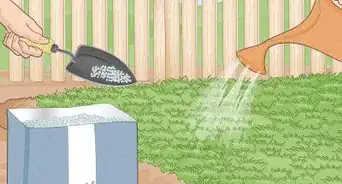
4Spread low-nitrogen fertilizer over the planting area. Spread a thin layer of fertilizer by hand onto your planting area. Sprinkling a thin, consistent dusting will do just fine; you don’t have to pack on a thick layer. Most groundcovers will grow best in low-nitrogen conditions, but you should double check your selected plants’ labels to be sure.[8]


Planting Groundcovers
-
1Create a three-foot wide planting strip using bark mulch. Use a rake to spread out mulch of your choice in a three-foot wide strip across your yard. Go for a depth between one and two inches. If your planting area has any incline, it’s best to work from the top of the incline first and proceed downhill.[9]
- Mulch will help the soil retain moisture and discourage weed growth.
-
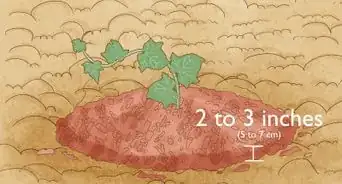
2Space each plant at recommended intervals. Use a trowel to dig a hole just large enough to accommodate a seedling. Your selected plants’ labels will recommend a distance to keep between each plant. A typical distance will be between six and ten inches, but you can modify your interval based on your budget and expectations.
- If you want to keep cost low, purchase fewer plants and increase the distance between seedlings. For instant coverage, a 15 by 20 foot space (4.6 by 6 meters) requires about 300 plants planted only a few inches apart. If you can wait a year or two, you can use a fraction of that number, plant seedlings ten to twelve inches apart, and wait for them to develop coverage.[10]
- Often, bedding plants are spaced for planting in a triangular pattern for faster fill in.
- You can make your own spacing tools with PVC pipe or lumber.
- Use marking paint, highly visible tape, or permanent marker to mark the measured distance of desired planting.
-
3Continue planting in three-foot strips to fill the planting area. Once you’ve finished planting across the first strip, start the next one using the same sequence. Shovel mulch around where the first strip left off and use a rake to spread it in an even three-foot strip an inch or two in depth. Plant your seedlings in this strip, then continue repeating the process until you’ve completed your planting area.[11]
-
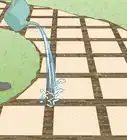
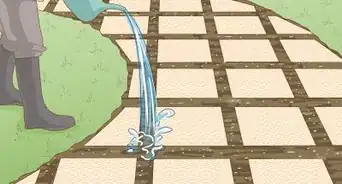
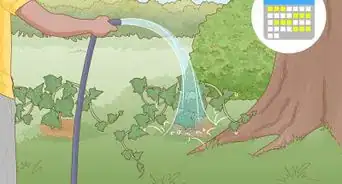
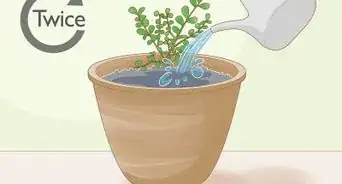
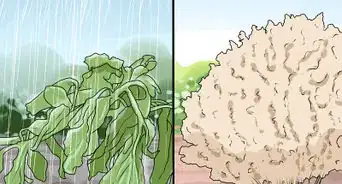
4Care for your groundcovers. General care for your plants should be minimal, but will depend on the species you choose. For example, the seedlings' information sticks or labels will let you know how often they'll need to be watered. Typically, your new plants will need a thorough watering two or three times a week for the first several weeks, or until they start to develop coverage and establish themselves.
- Choosing plants native to your location will decrease the need for watering. Since they're adapted for your location's climate, rainfall will be enough to sustain them once they’re a year old and have established their roots.


Expert Q&A
Did you know you can get expert answers for this article?
Unlock expert answers by supporting wikiHow
-
QuestionWhat plants are good to use as ground cover?
 Rob LitmanRob Litman is a Landscaper, General Contractor, and the CEO of Vitoli Inc., a landscaping, hardscaping, ecoscaping, and swimming pool design company in Los Angeles, California. With over 20 years of experience in construction, Rob specializes in energy-efficient and drought-tolerant landscaping. He holds General Building Contractor (Class B) and Registered Pool/Spa Contractor Licenses. In 2007, Rob won House of the Year in Gardena, California.
Licensed Landscaper & General ContractorI recommend using either dymondia or ice plants—those both grow tight to the ground. That's important because each season, a new layer of ground cover grows, and the layer underneath it becomes bare. Over time, that creates a space that can provide shelter for rodents.
Support wikiHow by unlocking this expert answer.


References
- ↑ http://www.finegardening.com/low-maintenance-alternatives-lawns
- ↑ https://plants.usda.gov/core/profile?symbol=FRCHP
- ↑ Rob Litman. Licensed Landscaper & General Contractor. Expert Interview. 13 October 2020.
- ↑ http://smsf-mastergardeners.ucanr.edu/Elkus/ground_cover/
- ↑ https://www.houselogic.com/by-room/yard-patio/low-maintenance-lawn-alternatives-ground-cover/
- ↑ https://www.thisoldhouse.com/how-to/how-to-plant-ground-cover
- ↑ https://www.thisoldhouse.com/how-to/how-to-plant-ground-cover
- ↑ https://www.thisoldhouse.com/how-to/how-to-plant-ground-cover
- ↑ https://www.thisoldhouse.com/how-to/how-to-plant-ground-cover
About This Article