This article was co-authored by wikiHow Staff. Our trained team of editors and researchers validate articles for accuracy and comprehensiveness. wikiHow's Content Management Team carefully monitors the work from our editorial staff to ensure that each article is backed by trusted research and meets our high quality standards.
This article has been viewed 13,412 times.
Learn more...
If you have ever wanted an indoor garden, growing herbs in water is one way to get started. Many different herbs survive well in water. Find some suitable jars, then plant fresh stem cuttings in each one. When you slice the bottom off the stem, it is able to absorb water and even grow new roots. With regular watering and pruning, your herb plants can last all winter. Once the herbs have grown roots, you could also pot them to ensure they continue growing long-term.
Steps
Selecting and Trimming Herb Stems
-
1Choose water-resistant herbs that survive well in water. Most herbs grow well in water, so you could potentially create a varied herb garden. Soft-stemmed herbs like basil, oregano, mint, lemon balm, and stevia are a good place to start. You could also try growing thyme, rosemary, sage, tarragon, chives, lavender, and marjoram.[1]
- Annual herbs, plants that die within a year, don’t do well in water and should be avoided. Dill, coriander, and cilantro are a couple of examples. They usually don’t have enough time to establish roots.
-
2Get stems by purchasing them or taking them from grown herbs. If you already have healthy herb plants around your home, you can take some cuttings from them. Select stems that look green and healthy. Pick young stems that are already at least 6 in (15 cm) long and still growing. Older stems are less likely to sprout roots or even survive in water.[2]
- If you’re buying herbs, choose carefully. Select quality stems that look long and green. Avoid ones that have been cut short or have begun to decay.
- Grocery stores and farmer’s markets sell bundles of herbs that are good for water-growing. You could also buy established plants from a gardening center and then take cuttings from them.
Advertisement -
3Clip the stem to make it about 6 in (15 cm) long. Plan on cutting the stem underneath one of the leaves. Use something sharp that can slice cleanly through the stems, such as pruning shears or a cutting knife. If you’re trimming fresh cuttings from your garden, try cutting the stem upward at a diagonal angle to help encourage new roots to grow.[3]
- If you’re working with store-bought herbs that have already been cut to size, don’t worry about cutting at an angle. Snip the bottom off each stem so they can grow new roots.
-
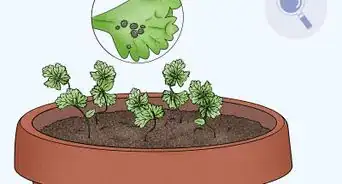
4Remove any leaves near the bottom of the stem. Clear off anything within 4 in (10 cm) of the cut you made. Slice the leaves off with shears or a knife, cutting as close to the stem as possible. The stem may still have several leaf clusters on top, and you can leave them so they continue to grow.[4]
- If the cutting has any flowers on it, consider removing them too. They won’t be useful. Instead, they divert nutrients from the roots.
- The removed leaves are edible. If you wish to reuse them, wash them in cold water, wrap them in paper towels, then store them in a refrigerator. They can last at least 1 week this way.


Planting the Herbs
-
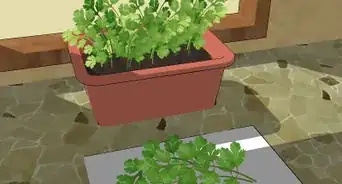
1Select a large, deep jar to put the herb in. Mason jars work very well for growing herbs indoors. If that isn’t an option, select a small vase or another container that can support the fresh cutting. Pick something with a narrow neck that prevents the herb stem from falling over. Make sure it is also deep enough to cover the part of the stem you stripped the leaves from earlier.[5]
- If you are having trouble keeping a stem upright, find something that can hold it in place. You might try punching a hole in a Mason jar top, for example, or fitting chicken wire over the jar.
- Get a separate container for each herb you wish to grow so the roots have plenty of room to spread out. If you need to take the herbs out later, you won’t have to deal with tangled roots.
-
2Cover the jar with paper if it is clear-colored. Wrap a few pieces of construction paper around the jar, then tape them in place. Make sure the sides are well-covered by the paper. Leave the top exposed so the herb is able to grow up from there. Since roots aren’t normally exposed to sunlight, doing this can help the herbs grow better.[6]
- If you’re able to get a colored jar, you won’t need to worry about covering up. Try using tinted Mason jars, for instance.
- Even if you don’t cover the jar, the herb may still grow. However, keep a close eye on the water quality. The extra sunlight may cause algae to grow more quickly.
-
3Fill the jar about ⅔ of the way full with lukewarm tap water. Let the water run for a few seconds to ensure it is clear and at the right temperature. Then, add enough water to the jar to cover the stripped portion of the stem. Make sure it won’t submerge the upper part of the stem and any leaves still on it.[7]
- Bottled water is also safe to use. Avoid distilled water, since it lacks nutrients the herbs need.
-
4Put the cut end of the stem into the water. Set the herb down, resting it against the side of the jar. Make sure it stays standing so the leafy top doesn’t get submerged. If the water level is too high, pull out the stem before pouring out some of the water.[8]
- Make sure the cut end is in the water, or else the herb won’t be able to grow.


Caring for the Herbs
-
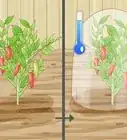
1Place herbs in a spot that receives 6 hours of sunlight a day. Herbs grow best in warm, sunny areas like a windowsill. Instead of placing them directly in the center of the windowsill, protect them from drying out by keeping them out of direct sunlight. If you’re uncertain about which spots in your home receive the most sunlight, check everywhere throughout the day. Note which spots look bright and which ones look shady as the day goes on.[9]
- Most herbs can grow in partial shade as long as they receive at least some sunlight for a few hours each day.
- Herbs don’t hold up well in cold weather, but this shouldn’t be an issue as long as your home is well-heated. If you’re growing herbs outdoors, bring them indoors during the winter to prevent frost damage.
-
2Change out the water every 2 to 3 days as it becomes cloudy. Check up on the growing herb every day. Over time, the water will fill with algae, bacteria, and other contaminants. After pouring out the old water, refill the jar with clean, cold water from the tap or a bottle. Between changings, refill the jar as the water level decreases.[10]
- At a minimum, change the water out at least once a week. If you let it get too dirty, it could prevent the herb from growing.
- Once the herb sprouts roots, the water most likely won’t need to be changed as often. The roots help keep it clean.
-
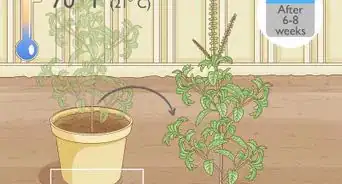
3Watch for roots to grow after 2 to 3 weeks. Over time, expect to see little white or brown strands spreading from the cut at the bottom of each stem. It is a sign that the herbs are strong and healthy. If the herbs don’t sprout roots, they may not be doing well. Check them over for brown discolorations, soft spots, and other signs of rotting.[11]
- If an herb has begun to rot, throw it away. Sometimes cuttings don’t take to water even when you do everything right.
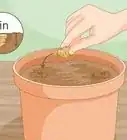
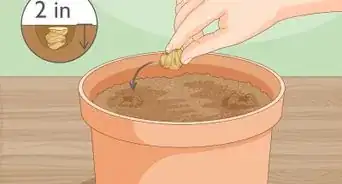
- Once the herbs grow roots about 2 in (5.1 cm) long, you can transplant them to a more permanent home. Try putting them in pots filled with a quality potting soil.
-
4Clip leaves off the herbs as they grow to full size. Trim each leaf close to where it connects to the herb’s stem. Use pruning shears or a sharp knife to ensure you are able to cut cleanly through each leaf stem. However, take caution to avoid pruning too much. Remove only bushy leaves, saving younger ones so they have a chance to continue to grow.[12]
- Plucking off the adult leaves forces the plant to develop new ones. By doing this, you can keep water-grown herbs going all winter.
- Try to avoid taking more than ⅓ or ¼ off of an herb at any time. If you prune it too much, it may not be able to continue growing.


Things You’ll Need
- Herb plants or cuttings
- Pruning shears or scissors
- Mason jar or another container
- Water
- Tape (optional)
- Construction paper (optional)


References
- ↑ https://www.mnn.com/your-home/organic-farming-gardening/stories/how-to-grow-herbs-indoors-this-winter
- ↑ https://indianapublicmedia.org/eartheats/diy-grow-herbs-cheap.php
- ↑ https://www.gardeningknowhow.com/edible/herbs/hgen/grow-herbs-in-water.htm
- ↑ https://balconygardenweb.com/growing-basil-in-water-how-to/
- ↑ https://indianapublicmedia.org/eartheats/diy-grow-herbs-cheap.php
- ↑ https://www.gardeningknowhow.com/edible/herbs/hgen/grow-herbs-in-water.htm
- ↑ https://balconygardenweb.com/growing-basil-in-water-how-to/
- ↑ https://morethanoregano.com/herb-starters-propagating-cuttings/
- ↑ https://morethanoregano.com/herb-starters-propagating-cuttings/
- ↑ https://www.gardeningknowhow.com/edible/herbs/hgen/grow-herbs-in-water.htm
- ↑ https://deepgreenpermaculture.com/diy-instructions/rooting-edible-plant-cuttings-in-water/
- ↑ https://www.mnn.com/your-home/organic-farming-gardening/stories/how-to-grow-herbs-indoors-this-winter
- ↑ https://morethanoregano.com/herb-starters-propagating-cuttings/
About This Article