This article was co-authored by wikiHow Staff. Our trained team of editors and researchers validate articles for accuracy and comprehensiveness. wikiHow's Content Management Team carefully monitors the work from our editorial staff to ensure that each article is backed by trusted research and meets our high quality standards.
There are 9 references cited in this article, which can be found at the bottom of the page.
This article has been viewed 100,072 times.
Learn more...
Morel mushrooms are good to eat, fun to look for, and even better to grow. Buying morel mushrooms can be rather expensive so a cheaper alternative is to hunt for them in the wild. However this can pose a risk to the uninitiated as there are poisonous mushrooms that can be picked by mistake. That is why growing them is not only a safer option, it’s cheap too.
Steps
Using a Growing Kit
-
1Buy a morel mushroom kit online. A morel mushroom kit is pre-packaged with spawn seed as well as a set of instructions to help you get started. A growing kit will typically cost you only a little over $30.
- Spawn seed is what makes the mushrooms grow and can come in several varieties such as woodchips, grain, and sawdust.[1]
- Using growing kit is more forgiving to beginners than doing the whole process from scratch because the spawn seed is specifically catered to helping your morel mushrooms grow.
-
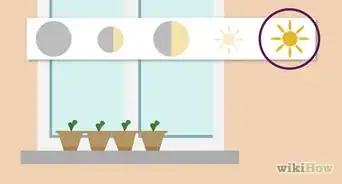
2Prepare to plant between summer and autumn. This will give it time to grow over the next couple of seasons. Morel mushrooms typically sprout around spring.[2] Morel mushroom hunters usually seek them out during the spring time because that’s when they grow naturally in the wild which is a useful reference point for when yours should start sprouting.[3]Advertisement
-
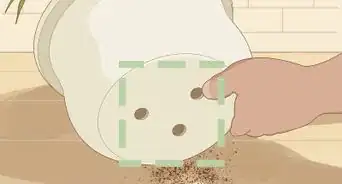
3Pick a spot in the shade that is 4x4 feet in size. It’s good to have a pre-determined portion of your garden organised for where you want to plant your mushrooms because most growing kits require a specific set of dimensions.[4] Most growing kits need 4x4 feet but check the specifications of your growing kit to make sure how much your one asks for.
-
4Create your spawn bed with a mixture of peat moss and gypsum. Concoct a blend that includes 10 gallons of peat moss as well as 1 gallon of gypsum and insert it on your 4x4 garden space.
-
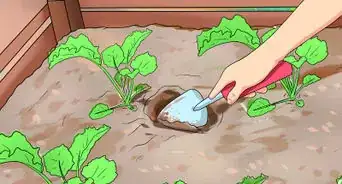
5Apply the spawn seed from your growing kit. When you spread the spawn seed over the soil, make sure you do it evenly to give the morel mushrooms more chance to grow. The instructions that came with your kit will give you appropriate directions on how to do this.[9]
-
6Add hardwood chips to finish the spawn bed. You don’t have to be meticulously tidy when you do this, simply tossing it on top of the spawn bed will do the trick.[10]
- Much like how planting by an ash or an elm tree is useful, it is also beneficial to use woodchips from these trees as well. They will give your morel mushrooms even more incentive to grow.
- Woodchips can found for purchase online.
-
7Wait for your morel mushrooms to grow. Be aware this can sometimes take up to two years. The good news is that once they sprout, the morel garden can continue to provide mushrooms for several years after.[11] To guarantee that it does, remember to reapply fresh compost bi-annually.
- If growing your morel mushrooms doesn’t work out the first time around, don’t hesitate to try again. For most people this is a long-term endeavour.


Growing Morel Mushrooms Without a Kit
-
1
-
2Start by boiling 1 gallon of tap-water and placing it in a food-safe container. Make sure the water is filtered because the chlorine from un-filtered tap-water will falter the growth of your morel mushrooms.
- Making sure the container is clean is especially important in order to ensure the mixture doesn’t become contaminated.
-
3Add 1 tablespoon of molasses to the water. This will give it energy for your morel mushrooms to grow. It will also provide sugar to allow the spores to germinate.[14]
-
4Apply a pinch of salt to prevent the spread of bacteria. Not much is needed but it is still necessary to help avoid your morel mushrooms from getting tarnished.
- If you want to be specific in your measurement, use one-quarter tablespoon to be more precise.
-
5Insert the morel mushrooms in the mixture and stir it. Make sure you only put in the spores. Just a few will be sufficient.
-
6Put the mixture aside and let it settle for up to 44 hours. Make sure it’s covered and out of the way. If you leave it for any longer than 44 hours the mixture runs the risk of getting bacteria.[17]
-
7Spread the mixture over your 4x4 feet garden space. Exactly like the spot that you would setup for your growing kit, pour the mixture over your sandy soil. Afterwards, cover it with hardwood chips as described in Method 1 – Step 6.[18]
-
8Wait and watch your morel mushrooms grow. Remember that the homemade way is less reliable than the growing kit. The growing kit has mycelia spawn that has a higher chance of success. If your homemade version doesn’t work out, consider trying the growing kit.[19]


Community Q&A
-
QuestionMy shady spot is under pine trees. Do you think morels will grow well around these trees?
 Community AnswerDepending on where you live, yes. Morels (and fungi in general) do not need sunshine to grow and grow in conditions about 40 to 50 degrees.


References
- ↑ https://www.mushroom-appreciation.com/growing-morel-mushrooms.html
- ↑ https://www.mushroom-appreciation.com/growing-morel-mushrooms.html
- ↑ https://www.fieldandstream.com/articles/hunting/2013/04/finding-cooking-morel-mushrooms#page-2
- ↑ https://www.mushroom-appreciation.com/growing-morel-mushrooms.html
- ↑ http://www.wideopenspaces.com/10-tips-hunting-morel-mushrooms-pics
- ↑ https://www.mushroom-appreciation.com/growing-morel-mushrooms.html
- ↑ https://www.ncbi.nlm.nih.gov/pubmed/21917642
- ↑ https://www.mushroom-appreciation.com/growing-morel-mushrooms.html
- ↑ https://www.mushroom-appreciation.com/growing-morel-mushrooms.html
- ↑ https://www.youtube.com/watch?v=lTFugHA2WaI
- ↑ https://www.mushroom-appreciation.com/growing-morel-mushrooms.html
- ↑ https://www.mushroom-appreciation.com/growing-morel-mushrooms.html
- ↑ http://www.gorsky.com/~pdilley/Grow_Morel_Mushrooms/Online_instructions.html
- ↑ https://www.mushroom-appreciation.com/growing-morel-mushrooms.html
- ↑ http://homeguides.sfgate.com/harvest-mushroom-spores-47693.html
- ↑ https://www.finecooking.com/article/picking-the-proper-mixing-tool-for-every-job
- ↑ https://www.mushroom-appreciation.com/growing-morel-mushrooms.html
- ↑ https://www.mushroom-appreciation.com/growing-morel-mushrooms.html
- ↑ https://www.mushroom-appreciation.com/growing-morel-mushrooms.html
About This Article

If you want to grow morel mushrooms, look online for a morel mushroom kit that includes spawn seed. In late summer or early fall, find a shady spot that’s about 4 sq feet and cover the ground with a mixture of peat moss and gypsum. Apply the spawn seed from your growing kit, then add hardwood chips to finish the spawn bed. Then, be patient, as it can sometimes take up to 2 years for morel mushrooms to grow. If you’d like to learn how to grow morel mushrooms without a kit, read on!