This article was co-authored by Monique Capanelli. Monique Capanelli is a Plant Specialist and the Owner and Designer for Articulture Designs, an innovative design firm and boutique in Austin, Texas. With over 15 years of experience, Monique specializes in interior botanical design, living walls, event decor, and sustainable landscape design. She attended the University of Texas at Austin. Monique is a Certified Permaculture Designer. She provides plant and botanical design experiences, from small gifts to entire transformations, to shoppers as well as commercial clients including Whole Foods Market and The Four Seasons.
There are 14 references cited in this article, which can be found at the bottom of the page.
wikiHow marks an article as reader-approved once it receives enough positive feedback. This article received 29 testimonials and 96% of readers who voted found it helpful, earning it our reader-approved status.
This article has been viewed 559,882 times.
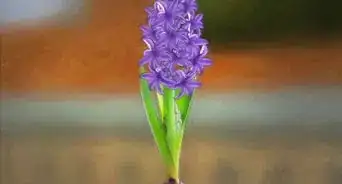
Plumeria is a beautiful tropical flowering plant that comes in a variety of different colors and can be kept indoors or outdoors if the conditions are right. If you want your own plumeria plant, you can grow it from cuttings, or severed branches from a mature plant. First, you’ll have to cut, strip the branch of most of its leaves, and dry the branch, then plant it in the proper potting medium. If you follow the correct steps and use the right materials, you can grow your very own plumeria plant from cuttings.
Steps
Stripping and Drying the Cutting
-
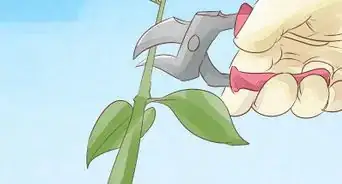
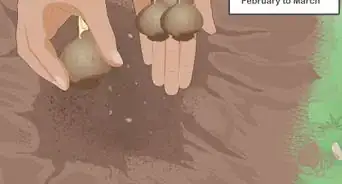
1Use thick, healthy cuttings that are least 12 inches (30 cm) or longer. To take a cutting, use a pair of garden shears or saw to cut off a thick, healthy-looking branch from a mature plumeria plant. Target branches that are brown or darker green because it’s a sign that the branches are mature. If you making the cuts yourself, it’s best to take the cuttings in the spring or early summer.[1]
- Clean your garden shears with rubbing alcohol so that you don’t spread any bacteria or disease to your plumeria cuttings.
- You can also purchase cuttings from certain garden stores or online.
-
2Cut the flowers and leaves off the branch. Flowers and leaves will compete with new root growth, which will inhibit the growth of your cutting. To prevent this, use sterilized hand shears or scissors to cut off any leaves or flowers from your cutting.[2]
- Wear gloves because plumeria has a sticky sap that can get on your hands.
Advertisement -
3Store the cuttings in a shady area for 1-2 weeks. Drying out the cuttings is necessary before you plant the plumeria. Letting the cuttings sit for 1-2 weeks will allow the freshly cut end to callous over and for the rest of the cutting to dry out.[3]
- Leave the cuttings in a warm or humid area for the best results.
-
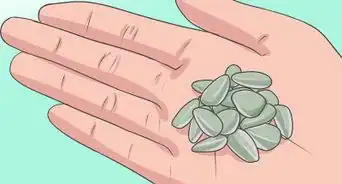
4Plant or store the plumeria cuttings. Once the plumeria has calloused and dried, the cuttings are ready for planting. If you plan to store the cuttings before planting them, wrap and secure the cut end of the cutting with plastic wrap and a rubber band. You can store dried cuttings for 2-3 months.[4]
- Discard any cuttings that show signs of disease or mold.


Planting the Plumeria Cutting
-
1Purchase a 1 gallon (3.8 l) or larger pot for each cutting. The pot size will limit how large your plumeria can grow. Your pot will also need drainage holes on the bottom so that water doesn’t pool on the bottom and rot your cutting.[5]
- Even if you plan on transplanting the plumeria outdoors, you should start the cutting in a pot indoors.
- Each plumeria cutting will need a separate pot.
-
2Fill a pot with 2 parts perlite and 1 part fast-draining potting soil. Look for a potting soil that is labeled as fast-draining online or at a gardening store. Thoroughly mix the perlite and potting soil together so that they are well incorporated. Fill the pot 1 inch (2.5 cm) from the brim to give the cutting enough medium to grow in and to prevent overflow when you water.[6]
- Fast-draining potting mix will prevent mold and fungus from forming on your cutting.
-
3Pour water on the soil to dampen it. The water that you put in the pot should drain out of its drainage holes on the bottom. If the water doesn’t drain, you’ll need to use a lighter, more porous potting mixture.[7]
- If you want, you can add 1 part vermiculite to the potting mixture to aid with drainage.
-
4Dip the tip of the cutting into root growth hormone, if desired. While not necessary, root growth hormone will help initial roots grow from your cutting. You can purchase powdered rooting hormone online or at a gardening store. Dip the cut end of the cutting into a cup of water first, then dip it into the root growth hormone powder so that 1–2 inches (2.5–5.1 cm) of the cutting is covered in the powder.[8]
- Dipping the cutting in water first will help the growth powder stick to your cutting.
-
5Push the cutting 3–4 inches (7.6–10.2 cm) into the soil in the pot. Push the cut end of the cutting into the soil in the center of the pot. Add more potting mix to the top of the soil to help hold the cutting in place. Pack the soil down around the cutting to make sure that it doesn't move or shift as the roots grow.[9]
- Pushing the cutting 3–4 inches (7.6–10.2 cm) into the soil will give the roots enough room to grow.
-
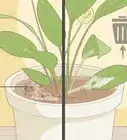
6Add stakes to support large cuttings. If your cutting is too large and falling over, you can use a stake to keep it straight in the pot. Plant a stake deep into the soil in the pot. Then, attach the stake to the cutting with wire or string. This will help hold the cutting in place as the roots form.[10]
-
7Put the plumeria in a warm place and wait for it to take root. It typically takes a plumeria 4-8 weeks to take root. Place the pot on a seedling mat to increase soil temperature and encourage the roots to grow. You’ll know that it’s growing when you start to see new buds grow on the top of the cutting.[11]
- Plumeria should be kept in temperatures above 60 °F (16 °C).


Caring for Plumeria
-
1Water your plumeria with at least 1 inch (2.5 cm) of water per week. If it regularly rains and you’re keeping the plumeria outside, you don’t need to water it. However, if your area is suffering from a drought or the plumeria is indoors, thoroughly soak the top of the soil and let the water drain out of the bottom of the pot once a week.[12]
- Do not overwater your plumeria because it will kill it. If the soil 1 inch (2.5 cm) deep feels moist, it does not need water.
-
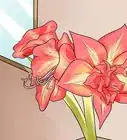
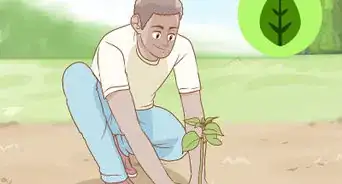
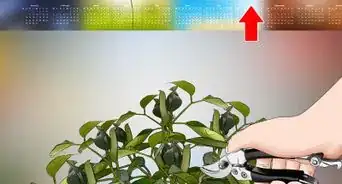
2Place your plant in an area where it will get 6-8 hours of sunlight per day. If your plumeria doesn’t get enough sunlight, flower buds will not form. If outside, place the pot in direct sunlight.[13]
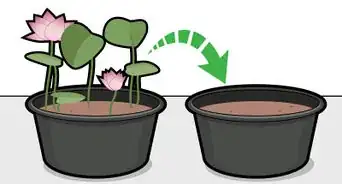
- Keep the plumeria in the pot if you decide to put it outside.
-
3Bring your plumeria inside if it drops below 50 °F (10 °C). Plumeria doesn’t fare well in the cold. While plumeria can grow perfectly fine in room temperature conditions, frost and cold can kill the plant or cause it to go into dormancy. To prevent this, bring your plant inside when it becomes too cold.[14] [15]
- If your plumeria has been transplanted into the ground, it will go through a normal 3-month dormancy phase when the temperature gets cold.[16]
-
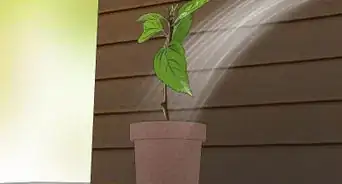
4Spray fertilizer on the plant every 1-3 weeks during the growing season. Purchase an organic plant-based fertilizer made specifically for plumeria or tropical plants. You can purchase liquid fertilizer at a gardening store or online. Thoroughly spray down the leaves and stem of the cutting during the spring and summer, then stop fertilizing the plant in the fall and winter.[17]
- Mix or dilute the fertilizer according to the instructions on the label.
- Spritzing the liquid fertilizer on the plumeria during the growing season will encourage the flowers to bloom.
- Watering with diluted fertilizer will also encourage healthy growth. Avoid over-fertilizing, but a regular feeding every 1-3 weeks is necessary for flowers to form.
-
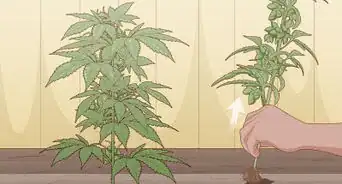
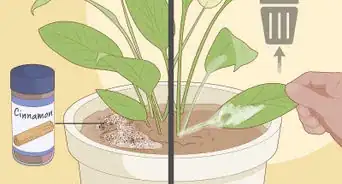
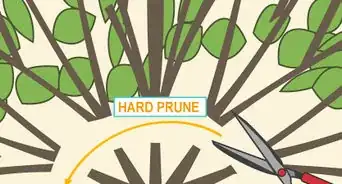
5Prune your plumeria to shape it or to remove dead branches. Sterilize your pruning shears with alcohol. Then, cut the branch off 1 inch (2.5 cm) from the main stem of the plant and compost or discard the branches. You can prune your plumeria to prevent a disease from spreading or to stop branches from growing in an undesired direction.[18]
-
6Spray the plant with a light horticultural oil if it’s infested. If your plumeria is suffering from mites or flies, a light horticultural oil spray (1% solution) can keep them at bay. Spray the leaves and main stem with the horticultural oil.
- Spray the plant with a Malathion solution if the leaves curl, as this is a sign of an aphid infestation.[19]
- Do not expose your plant to excess heat prior to or after you spray it.
- Insecticidal soap can also be used to prevent infestations but will have to be reapplied every week.


Expert Q&A
Did you know you can get expert answers for this article?
Unlock expert answers by supporting wikiHow
-
QuestionWhen is the best time to do cuttings from Plumeria?
 Lauren KurtzLauren Kurtz is a Naturalist and Horticultural Specialist. Lauren has worked for Aurora, Colorado managing the Water-Wise Garden at Aurora Municipal Center for the Water Conservation Department. She earned a BA in Environmental and Sustainability Studies from Western Michigan University in 2014.
Professional GardenerThe best time to take cuttings from your plumeria is during the late spring or early summer.
Support wikiHow by unlocking this expert answer.
-
QuestionI rooted my plumeria cutting, after it sprouted leaves I planted it several weeks ago. There are no leaves; however the cutting is still firm. How long should it take before producing leaves?
 Community AnswerPlumeria are sensitive to the number of hours of sunlight each day. You can "force" them with a grow light in northern latitudes but it will start growing when it gets about 10 - 12 hours of light per day. It will be fine while there are long summer days, but may lose its leaves when the days get too short. Don't panic it will grow again the next summer. It is not uncommon to have to wait two years for flowers in northern latitudes.
 -
QuestionWhat if my plumeria starts getting soft in the middle of the stem?
 Community AnswerThis probably means that your cutting has started to rot from the inside. Some other visual signs of rotting are wrinkled grey sections that are easy to press and mold.
Things You’ll Need
Stripping and Drying the Cutting
- Garden shears
- Rubbing Alcohol
- Hand shears or scissors
- Gloves
- Plastic wrap (optional)
Planting the Plumeria Cutting
- Large pot
- Perlite
- Potting soil
- Water
- Growth hormone (optional)
- Vermiculite (optional)
Caring for Plumeria
- Water
- Horticultural oil (optional)
- Sterilized gardening shears
- Liquid spray fertilizer for tropical plants

References
- ↑ http://www.schneordesign.com/Avi/Plumeria/how_to_grow_Plumeria_by_Avi_EN.htm#pruning
- ↑ https://youtu.be/-vLCq3usd0U?t=2m36s
- ↑ http://www.schneordesign.com/Avi/Plumeria/how_to_grow_Plumeria_by_Avi_EN.htm#pruning
- ↑ http://www.schneordesign.com/Avi/Plumeria/how_to_grow_Plumeria_by_Avi_EN.htm#pruning
- ↑ https://tropicsathome.com/start-plumeria-indoors-containers/
- ↑ http://www.tropicalflowers-and-plants.com/plumeria-cutting.html
- ↑ https://youtu.be/-vLCq3usd0U?t=4m15s
- ↑ https://youtu.be/-vLCq3usd0U?t=4m35s
- ↑ https://tropicsathome.com/start-plumeria-indoors-containers/
- ↑ https://youtu.be/-vLCq3usd0U?t=6m33s
- ↑ http://www.socalplumeriasociety.com/plumeria-care
- ↑ https://garden.org/plants/group/plumerias/
- ↑ http://www.socalplumeriasociety.com/plumeria-care
- ↑ https://tropicsathome.com/flowering-plumeria-frangipani-indoors/
- ↑ Monique Capanelli. Plant Specialist. Expert Interview. 22 September 2020.
- ↑ http://www.socalplumeriasociety.com/winter-care
- ↑ https://getbusygardening.com/plumeria-plant-care/#plumeria-fertilizer-types
- ↑ https://youtu.be/q5-qNXu58uU?t=27s
- ↑ http://www.socalplumeriasociety.com/plumeria-care
About This Article

To grow plumeria from a cutting, start by cutting the flowers and leaves off of a thick, healthy cutting that's at least 12 inches long. Then, dry the cutting in a warm, shady spot for 1-2 weeks. Once the cutting has dried out, fill a 1-gallon pot with 2 parts perlite and 1 part fast-draining potting soil. Next, water the soil and push the cut end of the cutting 3-4 inches into the soil. If the cutting won't stay up on its own, insert a stake into the soil to support it. Finally, place the pot in a warm, sunny area and wait 4-8 weeks for the roots to establish. To learn how to care for your plumeria, scroll down!