This article was co-authored by Lauren Kurtz. Lauren Kurtz is a Naturalist and Horticultural Specialist. Lauren has worked for Aurora, Colorado managing the Water-Wise Garden at Aurora Municipal Center for the Water Conservation Department. She earned a BA in Environmental and Sustainability Studies from Western Michigan University in 2014.
There are 12 references cited in this article, which can be found at the bottom of the page.
This article has been viewed 21,373 times.
Purple asparagus is a tender, very sweet variety of asparagus with large spears. You can grow purple asparagus from seeds or by transplanting year-old crowns. Growing from seeds isn’t recommended because it delays your harvest by an entire calendar year and it’s difficult to control for weeds during the germination period. Instead, start your plants with a year-old crown. With proper planting, sound harvesting techniques, and attentive care, you can enjoy this perennial vegetable that will produce for many years.[1]
Steps
Preparing the Soil
-
1Choose an area for establishing your purple asparagus bed. Find an area in your garden where you can cultivate asparagus for many years. Choose an area with good drainage and preferably with light, sandy soil. Make sure that it is fully in the sun with at least 6 hours a day of sun exposure. Avoid areas with poor air flow or where asparagus has been planted before.[2]
-
2Test the soil. Have your soil tested for pH levels and acidity. Alternatively, purchase a soil testing kit to do this yourself. Purple asparagus needs soil with a pH level between 6.5 and 7.0. Repeat the tests every three years to see if you need to make any changes to your asparagus bed.
- Amend the soil with lime if the pH level is too low. Till the lime deeply into the soil.
Advertisement -
3Plant a cover crop to keep the weeds down. A year before you plant your purple asparagus, grow buckwheat on the site in the summer. Grow rye or wheat on the site in the fall and winter. This will also increase the organic matter in the soil.
-
4Raise the organic matter in the soil. Begin preparing the asparagus bed in late fall. Spread a three inch (7.62 cm) layer of mulch, manure, leaf mold, wood shavings, or compost into the bed. Dig or till it down to about 10-12 inches (25.4-30.48 cm) below the surface. Turn the soil so it covers all of your organic matter.[3]
-
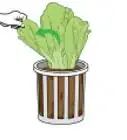
5Do companion planting. Plant asparagus with basil, beets, lettuce, parsley, spinach, strawberries, and tomatoes. Maximize the nutrient levels in your garden by planting purple asparagus with strawberries, which root on different levels. Don’t rotate asparagus onion, leeks, chives or garlic, which can transmit diseases to your asparagus planting.[4]


Transplanting Crowns
-
1Plant in trenches. Dig your trenches about 8-10 inches (20.32-25.4 cm) deep in sandy soil. If you have more clay in your soil, dig the trenches about 6 inches (15.24 cm) deep. Lay down some phosphate fertilizer prior to planting.
- Start planting when temperatures are between 75 and 85 degrees Fahrenheit (23.88 and 29.44 Celsius) during the day and around 60 degrees Fahrenheit (15.55 degrees Celsius) in the evenings.
-
2Put the crowns in the trench. Plant the crowns between 8 and 12 inches (20.32 and 30.48 cm) apart in the center of the trench. Prior to planting, put 2 inch (5.08 cm) mounds of soil in the spots where you will place the crowns. Put the crowns above the roots. Be sure to remove any rotten roots before you plant the crowns.[5]
-
3Fill in the trenches. Don’t fill in the trenches completely unless you have very sandy soil. Cover the crowns with about 3 inches (7.62 cm) of soil. After six weeks, cover them with another 3 inches (7.62 cm) of soil. Fill in the trenches completely after the plants have gone dormant in the late fall or spring.[6]


Caring for Your Plants
-
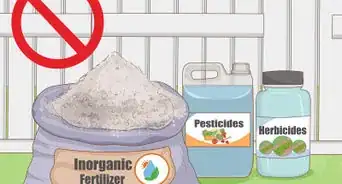
1Weed carefully. Hand weed and hoe to remove weeds during the planting year. There aren’t really safe herbicides for purple asparagus in its first year. Pull out weeds early and often. Also mulch your asparagus bed to prevent weeds.[7]
-
2Control for insects. Check your plants regularly for insects. The most prevalent pest is the asparagus beetle. Look for its dark, slug-like larvae on the ferns. Other signs to look for include insect bites and brown stems. Hand pick the larvae off of the ferns. Spray with an approved pesticide to get rid of adult asparagus beetles or hand pick them off one-by-one.[8]
- Adult asparagus beetles are red with black spots or metallic-colored with yellow spots.
-
3Fight diseases. Look for signs of diseases like wilting and yellowing mature ferns in hot summer weather or light green oval lesions on the shoots that eventually appear as dark blisters. Don’t over harvest the plants and make sure you plant in soil that has good drainage and high pH levels to prevent crown rot. Prevent asparagus rust by removing infested ferns. Remove the tips of the plants before winter so rust cannot overwinter in the foliage.[9]
- You can apply an approved fungicide on a seven to ten day cycle starting when the ferns are about 3 feet (0.9 m) (0.914 m) high. Stop using the fungicide in mid-September.
-
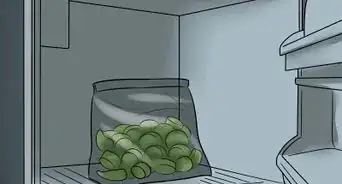
4Water the plants. During the first year, water your purple asparagus during dry spells. Avoid overwatering because the plants can’t tolerate water-logged soil. Overwatering can also contribute to crown rot and rust. Mulch your asparagus beds well during the summer months to retain moisture in the soil. Use straw, hay, or grass clippings and be sure that your mulch doesn’t contain weeds or weed seeds.[10]


Harvesting Your Plants
-
1Plan your harvest. Start harvesting your purple asparagus three years after planting the crowns. Only harvest for one month at first. This will let the plant establish its strong root system, which harvesting can weaken. After this, harvest the purple asparagus spears from early spring through May or June for about eight weeks each season.[11]
-
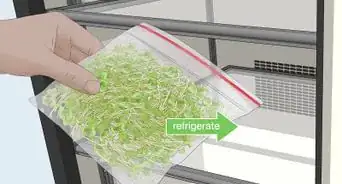
2Harvest daily when the spears are about 6-8 inches (15.24-20.32 cm) high. Don’t let the asparagus get much taller or the stalks will be very tough and difficult to harvest. Snap the stalks at the soil surface to harvest. Avoid cutting the stalks, which can injure the crown buds that will produce the next spears.[12]
-
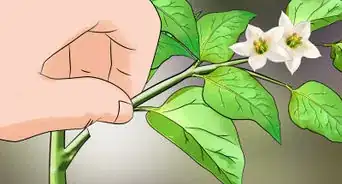
3Encourage fern growth. This will help retain moisture in the asparagus bed and allow the plants to grow extensive storage root systems. Allow the asparagus to continue growing after your harvesting season is over. Fertilize after the last harvest with a balanced fertilizer to encourage fern growth. If necessary, stake your plants and tie them with strings for extra support. Plant the rows parallel to your garden’s prevailing wind patterns so the plants can support each other.[13]


Expert Q&A
-
QuestionHow to get purple- and pink-colored asparagus?
 Lauren KurtzLauren Kurtz is a Naturalist and Horticultural Specialist. Lauren has worked for Aurora, Colorado managing the Water-Wise Garden at Aurora Municipal Center for the Water Conservation Department. She earned a BA in Environmental and Sustainability Studies from Western Michigan University in 2014.
Professional GardenerPlant varieties that mature into asparagus with purple and pink stalks. You can find these are your local garden store.
Warnings
- Do not eat the berries of the asparagus plant; they are toxic.⧼thumbs_response⧽


References
- ↑ https://extension.tennessee.edu/publications/documents/SP291-R.pdf
- ↑ https://extension.umaine.edu/publications/2071e/
- ↑ http://aggie-horticulture.tamu.edu/vegetable/files/2010/10/E-503_asparagus.pdf
- ↑ http://www.ufseeds.com/Vegetable-Companion-Planting-Chart.html
- ↑ https://extension.umd.edu/growit/vegetable-profiles-asparagus
- ↑ http://msue.anr.msu.edu/resources/growing_asparagus_at_home
- ↑ http://www.motherearthnews.com/organic-gardening/growing-asparagus/growing-asparagus-zmaz10djzraw?pageid=1#PageContent1
- ↑ https://extension.unh.edu/resources/files/resource000603_rep625.pdf
- ↑ https://extension.umaine.edu/publications/2071e/
About This Article