This article was co-authored by wikiHow Staff. Our trained team of editors and researchers validate articles for accuracy and comprehensiveness. wikiHow's Content Management Team carefully monitors the work from our editorial staff to ensure that each article is backed by trusted research and meets our high quality standards.
There are 7 references cited in this article, which can be found at the bottom of the page.
This article has been viewed 14,082 times.
Learn more...
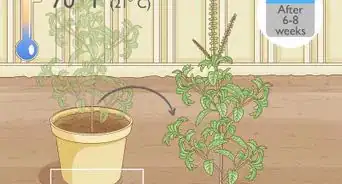
Growing stevia is a fun and easy process. Purchase seedlings from a nursery and plant them in a warm and well-drained area. The plants are fairly low maintenance and only need to be watered when the soil is dry. Watch your stevia transform from a seedling into an 18 in (46 cm) bush!
Steps
Planting the Seedlings
-
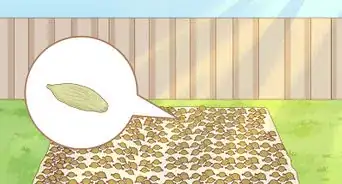
1Purchase stevia seedlings from a nursery or herbalist. Stevia is very difficult to grow from seeds. Contact your local nursery to purchase a seedling.[1]
- If you have trouble finding stevia plants in your local area, search online for stevia growers who are willing to ship their seedlings.
- Purchase 3-5 stevia plants if you want a full year's supply of stevia.[2]
-
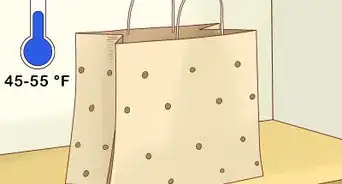
2Leave the seedling inside until the evening temperatures are at least 50 °F (10 °C). Small stevia seedlings are easily damaged by frosts and low temperatures. Leave the stevia seedlings in their small pots until the nighttime temperatures are consistently above 50 °F (10 °C) for a week.[3]
- If you don’t have a thermometer at home, check a news report for the daily temperatures in your area.
Advertisement -
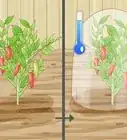
3Choose an area to plant the stevia that gets full sun. Stevia grows best in areas that have good drainage and receive full sun. Choose a place that doesn’t have puddles of water after rain as this indicates that there isn’t good drainage. Avoid choosing an area that is mostly shaded.[4]
- If you live in a hot climate, it is fine to plant the stevia in an area that receives slight afternoon shade.
- If the temperatures in your area fall below 32 °F (0 °C) at any point during the year, plant each stevia seedling in a pot that is 18 inches (46 cm) wide and 18 inches (46 cm) long rather than outdoors.
-
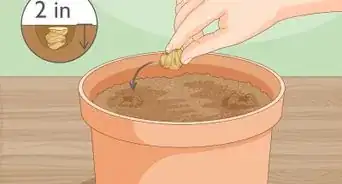
4Turn the pot upside down to remove the stevia plant. Place one hand over the soil and around the stevia to support the plant. Tip the pot over and gently use your other hand to pull the pot away from the soil and roots.[5]
- If the stevia plant isn’t coming out, try gently tapping on the base of the pot to release the soil.
-
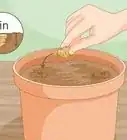
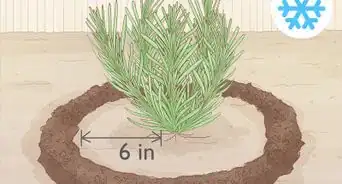
5Plant your stevia seedlings 18 inches (46 cm) apart. Use a trowel to dig a hole into your soil that is slightly bigger than the roots of your plant. Place the stevia in the hole and push soil around the roots so that it sits upright. Leave about 18 inches (46 cm) between your plants to give the seedlings room to grow.[6]
- If you are planting rows of stevia, leave about 22 inches (56 cm) between each row to give room for the plants to grow to their full size.


Caring for Stevia
-
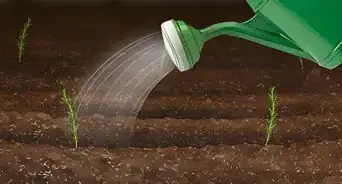
1Water the plant when the soil feels dry. It is really important not to over water the stevia plant as this can kill it. Touch the soil around the roots of the plant and if it feels dry, lightly water it. Avoid creating puddles of water in the soil.[7]
- If you live in a hot climate, you will need to dampen the soil every few days.
-
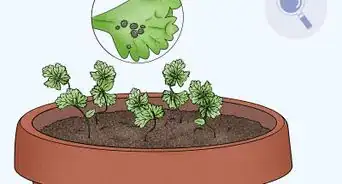
2Add organic fertilizer or compost to the soil once per year. Stevia plants grow best when they are given plenty of nutrients. Follow the instructions on the packet and add the amount of fertilizer or compost suggested around the base of your plants. It is important not to add more fertilizer to the soil than the instructions suggest as this can harm the stevia. [8]
- Purchase organic fertilizer and compost from your local gardening store. Organic fertilizers work best because they release nitrogen slowly.
- If the instructions tell you to mix the fertilizer or compost into the soil, use a trowel or spade to combine it into the soil.
-
3Bring the pots of stevia inside if the temperature falls below 32 °F (0 °C). Stevia plants grow best if they are in warm temperatures. If the outside temperature falls to freezing point, carry your pots inside and place them by a sunny window. Once the temperatures are consistently above 32 °F (0 °C), shift the pots back outside.[9]


Harvesting and Pruning Stevia
-
1Harvest the stevia in late summer if you like extra sweet leaves. The stevia leaves are usually at their sweetest just before the plant blossoms. This is usually at the end of summer or in early fall. Pick off the leaves and use them as desired.[10]
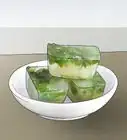
- Fresh stevia leaves are delicious in teas, smoothies, or as a sweet snack.
-
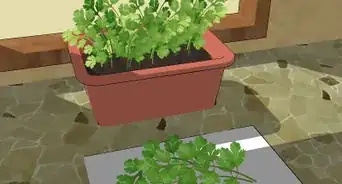
2Leave at least two-thirds of the leaves when you pick the stevia. While you can harvest the stevia leaves at any time, if you want the plant to continue growing, don’t pick more than one-third of the leaves at one time.[11]
- If you are cutting branches, apply the same principle. Only cut off ⅓ of the branches.
-
3Trim the top 6 inches (15 cm) of the bush in spring. Pruning your stevia will encourage it to grow more branches and leaves. Use secateurs to cut off the top 6 inches (15 cm) of the bush. Leave the sides of the bush to continue growing.[12]


Community Q&A
-
QuestionCan you tell me the health benefits of stevia?
 Community AnswerStevia may help control blood sugar and insulin levels, lower blood pressure, fight cavities, prevent ear and upper respiratory infections, and strengthen bone.


References
- ↑ http://www.stevia.net/growingstevia.htm
- ↑ https://www.motherearthnews.com/organic-gardening/herbs/stevia-plant-zm0z13fmzkin
- ↑ http://herbgardening.com/growingstevia.htm
- ↑ https://www.motherearthnews.com/organic-gardening/herbs/stevia-plant-zm0z13fmzkin
- ↑ https://www.finegardening.com/article/how-to-repot-container-plants
- ↑ http://www.stevia.net/growingstevia.htm
- ↑ https://www.easytogrowbulbs.com/pages/stevia-planting-guide
- ↑ http://herbgardening.com/growingstevia.htm
- ↑ http://mikesbackyardnursery.com/2015/03/how-to-grow-a-stevia-plant/
About This Article