This article was co-authored by wikiHow Staff. Our trained team of editors and researchers validate articles for accuracy and comprehensiveness. wikiHow's Content Management Team carefully monitors the work from our editorial staff to ensure that each article is backed by trusted research and meets our high quality standards.
This article has been viewed 249,524 times.
Learn more...
Incubating a duck egg is a cool, hands-on way to hatch a cute baby Mallard duckling. Caring for the egg can seem a little complicated at first, but we'll be here to show you how simple it can be every step of the way!
Steps
Setting Up the Incubator
-
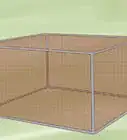
1Look for an incubator with a fan. Using an incubator will ensure the egg stays at the right temperature for hatching. You can get a small incubator for eggs with a fan at your local pet store or online.[1]
- The incubator should also come with a wet bulb thermometer to allow you to monitor the relative humidity.
- You can sometimes find used incubators online for a lower price. Make sure the incubator’s fan and temperature gauge works properly before you buy it used.
-
2Place the incubator on a table away from direct sunlight. Make sure the table is indoors and sturdy. Pick a spot by an inside wall that does not get any direct sunlight via a window, or heat from other sources like an oven. This will ensure the temperature and humidity of the incubator are undisturbed.[2]
- Make sure the ventilation holes on the incubator are not covered or obstructed by anything around it.
Advertisement -
3Start the incubator one to two days early. Set the temperature to 99.5 degrees Fahrenheit (37.5 degrees Celsius). Put the relative humidity to 84.5 degrees Fahrenheit. Allow the incubator to warm up one to two days before you put the egg in.
- Make sure you set the ventilation in the incubator based on the manufacturer’s recommendations.
-
4Use a broody chicken hen or duck if you do not have an incubator. A broody duck or chicken hen can be used as a live incubator if you have access to one. Place the egg under a broody duck or chicken hen and wait 27 to 29 days. Use a muscovy duck, as they are able to hatch 12-15 duck eggs at a time.
- Put the nest box in a clean dry shelter. Provide feed and water for the broody duck while it incubates the egg.


Maintaining the Egg in the Incubator
-
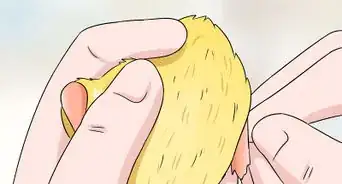
1Use an egg that has been laid within one to three days. This will ensure you get the best results. Check that the egg is not cracked or misshapen. If the egg is dirty, use room temperature water to carefully wash off the dirt on the egg.
- If you find the egg, try to guess how long since it has been laid. If it is warm to the touch, it may have been laid within one to three days.
- Make sure the egg is at room temperature before you put it in the incubator. An egg that has been kept in the fridge will need to be left out to warm up before it goes in the incubator.
-
2Place the egg small end down in the incubator. You may mark the top of the egg with an “x” and the bottom of the egg (the small end) with an “o.” This way, when you turn the egg, you can keep track of how often it is turned.
- Close the doors of the incubator once the egg is inside. This will keep the humidity inside the incubator.
-
3Maintain the correct temperature and humidity in the incubator. It takes around 26 to 29 days total for Mallard duck eggs to hatch. From day 1 to day 25, the temperature in the incubator should be 99.5 degrees Fahrenheit (37.5 degrees Celsius). The relative humidity should be 86 degrees Fahrenheit (55%).[3]
- On the first day of incubation, check the incubator regularly to ensure it is at the right temperature and humidity. The first few days are crucial for proper incubation.
-
4Turn the egg three to seven times a day. Turning the eggs is a key step in the incubation process. Use your hand to turn the egg so it is on a different side. Then, wait a few hours and turn the egg so it is on its other side. Do this three to seven times a day to keep the eggs at the right temperature.[4]
- The more often you turn the egg, the better it will hatch. Get into the habit of turning it an odd number of times each day for the 25 days of incubation. You may write down the times you turn the egg in a log for reference.
- Do not leave the eggs in the same position every night. Try to turn them during the night or right before you go to bed.
-
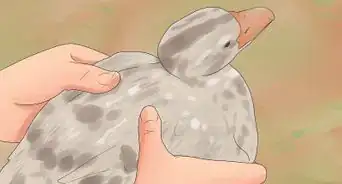
5Candle the egg with a flashlight after seven days. Touch the top of the egg with a small bright flashlight. This is called "candling the egg." Use the flashlight to check if the egg is growing and progressing. It should not appear clear or cloudy when you touch the flashlight to the top of it. If this is the case, it may not be progressing well. Check the temperature and humidity in the incubator to ensure it is correct.
- If the egg looks solid in the light, it is fertile and doing well.
- You can candle the egg again at the end of week 3 of the incubation to make sure it is still growing properly.
-
6Lower the temperature on day 25 for hatching. Put the egg in a hatching tray. Adjust the temperature of the incubator to 99 degrees Fahrenheit (37.2 degrees Celsius). The humidity should be set to 88 degrees Fahrenheit (65%). Make sure the ventilation holes on the incubator are open to their maximum setting to allow the eggs to cool.
- At day 26 and 27, increase the humidity to 93 degrees Fahrenheit (80%).
- At day 28 and 29, lower the temperature so it is at 97 degrees Fahrenheit (36.1 degrees Celsius) and the humidity is at 90 degrees Fahrenheit (70%).
-
7Let the duckling hatch on its own. You do not need to help the duckling emerge from the egg. Let the duckling hatch itself by breaking through the shell on its own.[5]
- If the ducking makes a hole in the egg and cannot progress because it gets stuck, carefully help the duckling out with clean hands.


Caring for the Hatched Duckling
-
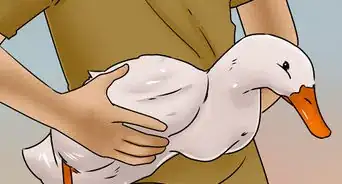
1Keep the duckling warm and dry. Put the hatched duckling in a box with high sides. Place a hot water bottle under a towel at one end. Keep the box in a shaded area indoors. Make sure the duckling is dry by wiping it gently with a clean towel.[6]
- If the duckling appears to be very cold or shivering, you can snuggle the duckling close to you to keep it warm.
-
2Provide fresh water and feed for the duckling. Place a small amount of hard boiled egg or crushed dried mealworms in the lid of a jar. Give it to the duckling in the box. You should also give the duck a shallow dish of water filled with medium-sized pebbles. The pebbles will prevent the duckling from drowning in the water.[7]
- Always offer the duckling fresh water with any food.
-
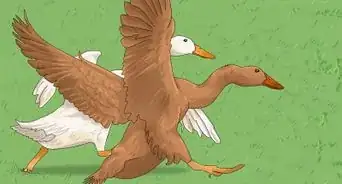
3Release the duckling near a water source. Ducklings can be released after they are six weeks old and fully feathered. Pick a pond or lake that has other ducks in it. If possible, release the duckling in the original water source where you found it.[8]
- Release the duckling early in the morning. Let the duckling make its own way into the water and into the company of other ducks in the area.


Community Q&A
-
QuestionOur mallard trio (2 males, 1 female) have nested by the small pond in our backyard. Every day they return and the female lays an additional egg, but isn't she supposed to stay on the nest to incubate?
 Amy HarrisonTop AnswererFemale ducks will not incubate their eggs until they have a clutch (normally 12 - 15 eggs). From the sounds of it, she might be already forming a clutch of eggs. She will visit every day to lay a single egg until she is happy with her collection of eggs.
 -
QuestionWhat is the lifespan of a mallard duck?
 Community Answer7 - 12 years in the wild, 15 - 20 in captivity.
 -
QuestionDoes this method work for other kinds of ducks too?
 Community AnswerYes, but some species of ducks take a shorter or longer amount of time to hatch.
Things You’ll Need
- An incubator
- A flashlight
- Water and feed for the duckling


References
- ↑ http://www.metzerfarms.com/IncubatingAndHatching.cfm
- ↑ https://joybileefarm.com/hatching-duck-eggs/
- ↑ http://www.metzerfarms.com/IncubatingAndHatching.cfm
- ↑ http://www.metzerfarms.com/IncubatingAndHatching.cfm
- ↑ http://www.metzerfarms.com/IncubatingAndHatching.cfm
- ↑ https://poultrykeeper.com/duck-keeping/how-to-care-for-wild-baby-ducks/
- ↑ https://poultrykeeper.com/duck-keeping/how-to-care-for-wild-baby-ducks/
- ↑ https://poultrykeeper.com/duck-keeping/how-to-care-for-wild-baby-ducks/
About This Article

To hatch a mallard duck egg, start by setting up an incubator on a flat surface away from direct sunlight and turning it on 1-2 days in advance. Then, place the small end of the egg in the incubator, and wait 26-29 days for it to hatch. Keep the temperature in the incubator at 99.5 degrees Fahrenheit and the relative humidity at 55 percent, and turn the egg over 3-7 times every day. On the 25th day, start lowering the temperature and humidity in preparation of the egg hatching. To learn how to care for a hatched mallard duckling, scroll down!