This article was co-authored by wikiHow staff writer, Hunter Rising. Hunter Rising is a wikiHow Staff Writer based in Los Angeles. He has more than three years of experience writing for and working with wikiHow. Hunter holds a BFA in Entertainment Design from the University of Wisconsin - Stout and a Minor in English Writing.
There are 10 references cited in this article, which can be found at the bottom of the page.
This article has been viewed 39,296 times.
Learn more...
Chick brooders help young birds feel comfortable as they grow up. While you can buy pre-made brooders, it's easy building a small cage container yourself! You can use either a plastic tote or make your brooder out of wood using a few simple tools. No matter what you use to build your chick brooder, make sure to provide bedding, heat, as well as food and water for your chicks!
Steps
Using a Plastic Tote Bin
-
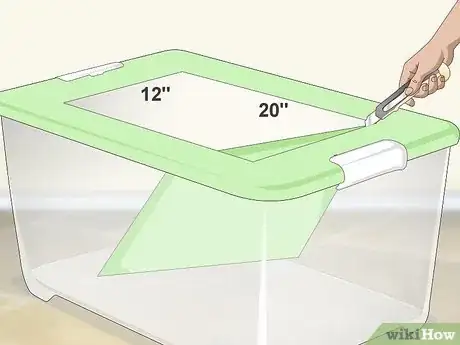
1Cut a 12 in × 20 in (30 cm × 51 cm) hole in the lid of a large plastic tote. Use a plastic tote bin that's at least 25 × 16 × 14 in (64 × 41 × 36 cm) in size. Make your measurements in the middle of the lid and use a utility knife to cut your hole. The hole will provide fresh air for your new chicks.[1]
Tip: Each new chick needs 6 sq in (39 cm2) of space in the brooder. If you plan on having over 50 chicks, get a larger tote bin.[2]
-
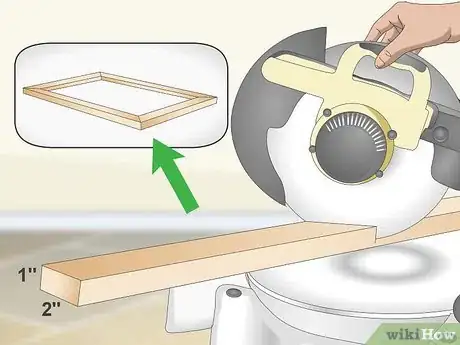
2Saw 1 in × 2 in (2.5 cm × 5.1 cm) wood strips to make a border around your hole. Use a saw to cut 1 in × 2 in (2.5 cm × 5.1 cm) wood posts into 2 pieces that are 24 in (61 cm) long and 2 pieces that are 12 in (30 cm) long. These pieces will create a border around your hole that holds the chicken wire.[3]
- Wear safety glasses while working with a saw.
Advertisement -
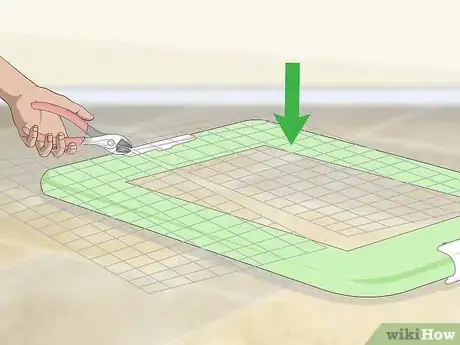
3Cut a piece of chicken wire large enough to cover the hole in the lid. Use a pair of scissors to cut a piece of chicken wire that's 13 in × 21 in (33 cm × 53 cm). The chicken wire prevents anything from getting in or out of your brooder. Once the piece is cut to size, set it aside for now.[4]
- Chicken wire can be purchased from yard care stores.
-
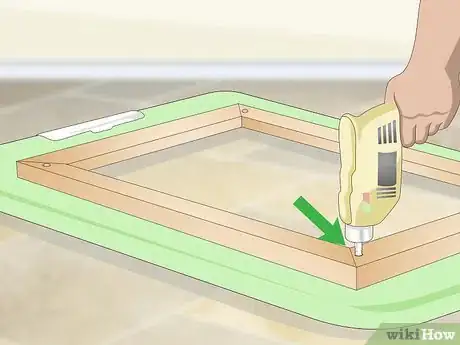
4Drill 1 hole through each end of the wood strips and the tote lid. Clamp the wooden pieces around the hole in your lid so they are held tightly together. Drill a hole through the end of each board so the hole goes through the lid. When you're finished, your lid should have 8 holes.[5]
-
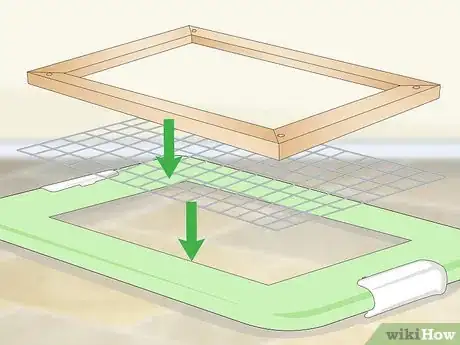
5Sandwich the chicken wire between the lid and the wood. Put the chicken wire over the hole so they overlap the top of the lid by 1 in (2.5 cm). Then set the boards on top so they line up with the holes in the lid.[6]
-
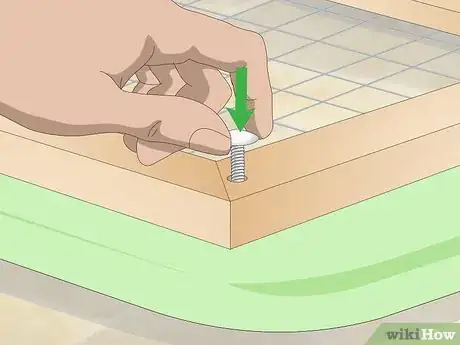
6Feed bolts through the holes in your wood and lid. Slide a bolt through each hole so they go through the boards and lid. Make sure the chicken wire doesn't move or shift when you place the bolts. If the wire blocks the bolt from going through, bend it with your fingers until it's out of the way.[7]
- Make sure the bolts have a blunt end so they don't hurt your chicks if they jump or fly near them.
-
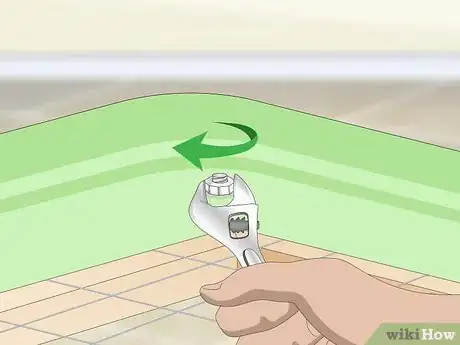
7Tighten nuts on the bottom of the lid to secure it. Slide a washer onto the bolts from the bottom of the lid. Thread the nuts onto the bolts and tighten them by hand. When you get near the lid, use a wrench to tighten them so the boards hold the chicken wire in place. Click the lid onto the tote bin to finish your brooder.[8]
- Adding washers helps prevent any damage to the wood or lid as you tighten the nuts.
Building a Wooden Brooder
-
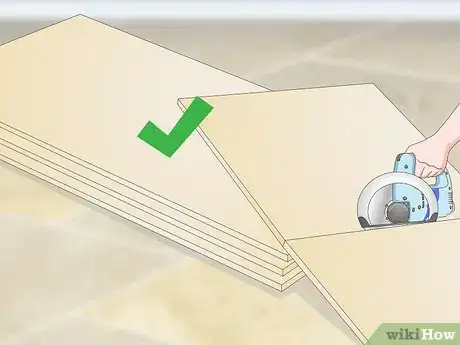
1Cut your plywood to size with a saw. Purchase 1 sheet of 1⁄2 in (1.3 cm) plywood that's 4 ft × 8 ft (1.2 m × 2.4 m). Use a circular saw to cut your plywood into 3 pieces that are 2 ft × 4 ft (0.61 m × 1.22 m) and 2 pieces that are 2 ft × 2 ft (61 cm × 61 cm).[9]
- The final dimensions of this brooder are 2 × 2 × 4 ft (0.61 × 0.61 × 1.22 m) and it can hold up to 100 chicks. If you are brooding less chicks, then you can adjust the dimensions so there is 6 sq in (39 cm2) of floor space for each chick.
-
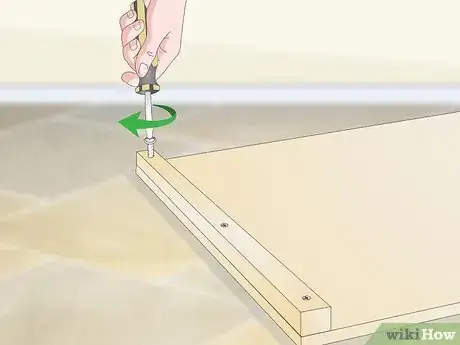
2Attach 2 in × 2 in (5.1 cm × 5.1 cm) wood pieces to the ends of the long wall pieces. Cut 4 pieces of 2 in × 2 in (5.1 cm × 5.1 cm) wooden posts so they're 2 ft (0.61 m) long with your circular saw. Place each of the posts on the short ends of 2 of your 2 ft × 4 ft (0.61 m × 1.22 m) wall pieces. Use 1 5⁄8 in (4.1 cm) screws and a drill to secure the posts to the walls.[10]
- The posts make it easier to attach the other wall pieces and bottom to your brooder.
-
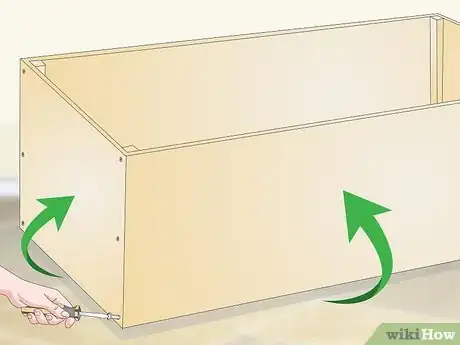
3Screw the wall pieces and bottom together. Start by assembling all of the walls before attaching the bottom. Attach the 2 ft × 2 ft (61 cm × 61 cm) pieces into the posts on your 2 ft × 4 ft (0.61 m × 1.22 m) pieces with screws. Make sure your corners are flush as you assemble all the walls. Once the 4 walls are assembled, set the last 2 ft × 4 ft (0.61 m × 1.22 m) piece on top and screw it every 6 in (15 cm) along your walls.[11]
-
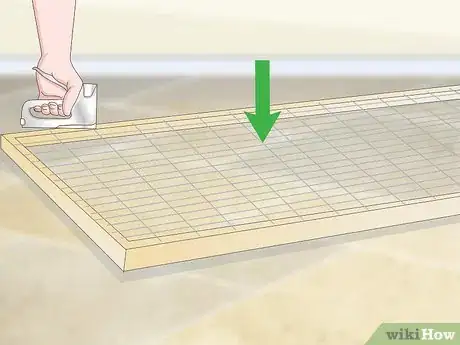
4Make a top piece with 2 in × 2 in (5.1 cm × 5.1 cm) and chicken wire. Cut 2 pieces of 2 in × 2 in (5.1 cm × 5.1 cm) wooden posts so they're 4 ft (1.2 m) long and 2 pieces that are 2 ft (0.61 m) long. Assemble the frame together so it fits perfectly on top of your brooder. Use 2 screws on each end to attach the posts together. Staple chicken wire every 4–5 inches (10–13 cm) along the top so the entire top is covered.[12]
- Never leave the top uncovered since your chicks may be able to jump or fly out at an early age.
-
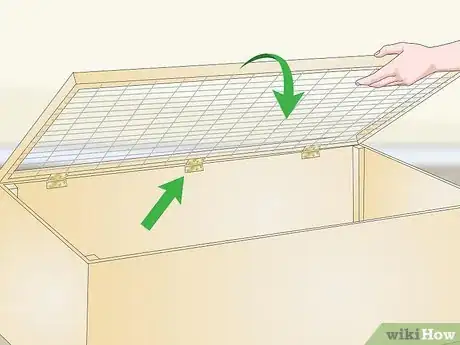
5Attach the top piece of your brooder with hinges so you can open it. Set your top piece on your brooder so the edges are flush. Put 3 hinges along one of the long sides of the top so they're 1 1⁄2 ft (46 cm) apart. Screw the hinges into the top piece as well as the plywood walls so you can easily open and close your brooder.[13]
Tip: If you don't have hinges, you can also use heavy-duty nylon lashing to hold your top on. Put 3-4 screws into each end of the nylon.
Setting up the Brooder
-
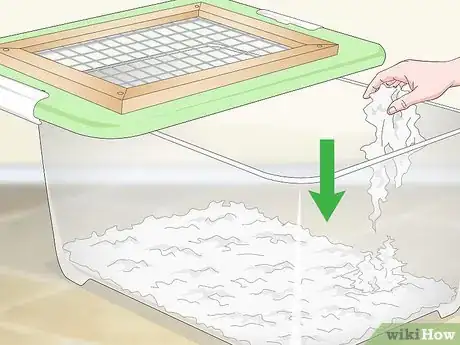
1Fill the bottom of your brooder with paper towels and pine shavings. Put 2-3 layers of paper towel on the bottom of your brooder to absorb your chick's waste. After your chicks are in the brooder for about 5 days, put in a 1–2 in (2.5–5.1 cm) layer of pine shavings on the bottom to make a comfortable bedding.[14]
- You can also use absorbent puppy training pads to line the bottom of your brooder to the chick's waste is absorbed.
- Never use newspaper or hay for bedding since it could cause injury or give your chicks diseases.
-
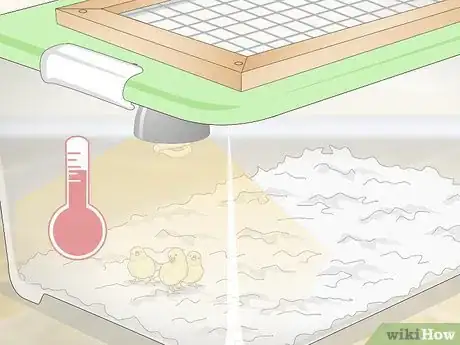
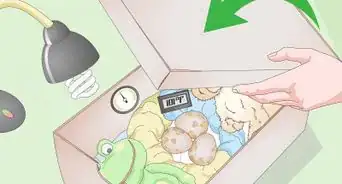
2Point a heat lamp on one side of your brooder to keep the chicks warm. It's important for chicks to stay warm while they're young so they can survive. Use a ceramic heat lamp that doesn't emit any light to warm one side of your brooder. This way, your chicks can go to a cooler area of the brooder if they start to overheat.[15]
- Keep the lamp above the chicken wire so your chicks don't fly into it or burn themselves.
- Make sure the wire doesn't hang into the brooder or else the chicks may try to peck it.
Tip
If your brooder is about 2 ft × 2 ft (0.61 m × 0.61 m), use a 40-watt heat bulb.
If your brooder is 2 ft × 4 ft (0.61 m × 1.22 m), opt for a 65-watt bulb.[16]
-
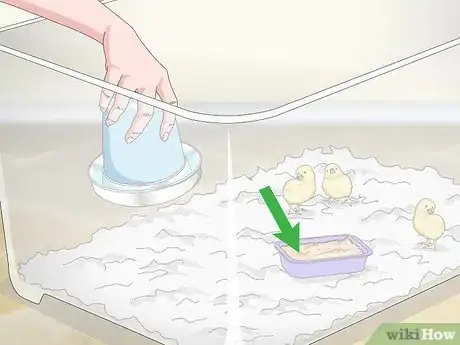
3Provide food and water for your chicks. Don't use a dish or saucer for your water since it will get dirty quickly. Instead, use a bottle waterer so the water is stored off of the ground. Set out a dish of specialty chick feed so they can eat whenever they want.[17]
- Chick feed can be purchased from a farm or animal care store.
- Check food and water levels daily so your chicks always have access to it.
-
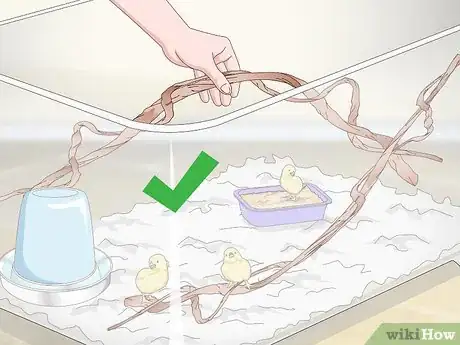
4Put a branch in the brooder to create a roost. Lay a branch on one side of your brooder so it's 2–3 in (5.1–7.6 cm) off of the floor. This gives your chicks a place for them to roost together and an area to play.[18]
- If you do not have a branch, you can also use a wooden dowel in its place.
Community Q&A
-
QuestionHow do I know what type of heat lamp to use?
 Amy HarrisonTop AnswererYou can purchase a brooder heat lamp designed for baby chicks from a farm supply store or pet shop. These specific heat lamps are easier to use and more accurate when it comes to setting the temperature. It isn't recommended to use any light bulb unless you know what you're doing at what temperature to keep your chicks at.
 -
QuestionCan I use a 25 watt bulb like the one used with the homemade incubator?
 Community AnswerIf the bulb emits a steady heat without overheating the brooder, then a 25 watt should be acceptable.
 -
QuestionCan we use sand as a base instead of wood shavings?
 Community AnswerNo, because the sand would be rough on the chicks' feet and it can harden if it becomes wet.
Warnings
- Always wear safety glasses when you're working with power tools.⧼thumbs_response⧽
- Make sure your heat lamp is outside of the brooder so it doesn't break or burn your chicks.⧼thumbs_response⧽
Things You'll Need
Using a Plastic Tote Bin
- 25 × 16 × 14 in (64 × 41 × 36 cm) plastic tote with lid
- 1 in × 2 in (2.5 cm × 5.1 cm) wood strips
- Utility knife
- Saw
- Chicken wire
- Scissors
- Drill
- Clamps
- Nuts and bolts
- Washers
Building a Wooden Brooder
- 4 ft × 8 ft (1.2 m × 2.4 m) plywood sheet
- 2 in × 2 in (5.1 cm × 5.1 cm) wooden posts
- Saw
- Electric screwdriver
- Screws
- Chicken wire
- Hinges
Setting up the Brooder
- Paper towel
- Pine shavings
- Heat lamp
- Chick feed
- Water
- Branch or dowel
References
- ↑ https://farmingmybackyard.com/chick-brooder-box/
- ↑ https://www.hobbyfarms.com/build-a-better-brooder-for-your-chicks/
- ↑ https://farmingmybackyard.com/chick-brooder-box/
- ↑ https://farmingmybackyard.com/chick-brooder-box/
- ↑ https://farmingmybackyard.com/chick-brooder-box/
- ↑ https://farmingmybackyard.com/chick-brooder-box/
- ↑ https://farmingmybackyard.com/chick-brooder-box/
- ↑ https://farmingmybackyard.com/chick-brooder-box/
- ↑ https://youtu.be/AhnjD7h_CqY?t=48
- ↑ https://youtu.be/AhnjD7h_CqY?t=94
- ↑ https://youtu.be/AhnjD7h_CqY?t=148
- ↑ https://youtu.be/AhnjD7h_CqY?t=296
- ↑ https://youtu.be/AhnjD7h_CqY?t=281
- ↑ https://www.hobbyfarms.com/build-a-better-brooder-for-your-chicks/
- ↑ https://www.hobbyfarms.com/build-a-better-brooder-for-your-chicks/
- ↑ http://www.plamondon.com/wp/build-200-chick-brooder-two-hours-20/
- ↑ https://www.thehappychickencoop.com/how-to-prepare-for-chicks/
- ↑ https://www.hobbyfarms.com/build-a-better-brooder-for-your-chicks/
About This Article
To build a small chick brooder, start by cutting a 12- by 20-inch hole in the lid of a large plastic tote. Then, cut 4 strips of wood to make a border, and cut a piece of chicken wire that's big enough to cover the hole you cut. Next, arrange the strips of wood around the hole, and drill a hole through each strip and through the tote lid underneath. Finally, sandwich the chicken wire between the wood and the lid, and insert bolts and nuts through the holes to hold everything in place. To learn how to build a wooden brooder, scroll down!
