This article was co-authored by wikiHow Staff. Our trained team of editors and researchers validate articles for accuracy and comprehensiveness. wikiHow's Content Management Team carefully monitors the work from our editorial staff to ensure that each article is backed by trusted research and meets our high quality standards.
wikiHow marks an article as reader-approved once it receives enough positive feedback. In this case, 81% of readers who voted found the article helpful, earning it our reader-approved status.
This article has been viewed 356,913 times.
Learn more...
A heat press is a special tool that allows you to press images onto various items, including t-shirts. You can use it with iron-on transfers and appliqués. It works much like an iron, except that it offers much more consistent heat and pressure, leading to higher quality results. A heat press is a great idea if you print t-shirts regularly to sell. This wikiHow will teach you how to use one.
Steps
Preparing Your Transfer Paper
-
1Choose your transfer. There are lots of different types of transfers you can press onto a t-shirt. You can print your own or buy a pre-printed one. You can even use iron-on appliqués! Listed below are the types of transfers that work with heat presses and t-shirts:[1]
- Ink jet transfers are translucent and work best on white or light-colored shirts. You can print your own using an ink jet printer and special transfer paper. This won't work with a laser printer.
- Laser copier/printer transfers are also translucent. You can create them on a laser copier or printer using special transfer paper.
- Supplier and store-bought transfers are pre-printed. They are opaque and suitable for colored shirts, including dark colors (unless otherwise noted).
- Embroidered appliqués and patches also work with heat presses. They must have a heat activated adhesive on the back, however.
- Die cut vinyl lettering also work. You can layer them on top of each other to create different designs. This is especially common on sports apparel.
-
2Print the transfer, if needed. Choose an image that you like, then reverse it using an image editing program. Print it out on special transfer paper using an ink jet printer. Make sure that you are printing on the film side of the paper.
- If you only have a laser printer, you will need to use transfer paper labeled for laser printers.
Advertisement -
3Trim the transfer down, if needed. This is only necessary for printed, supplier, and store-bought transfers. When you use the transfer, the film coating will be printed onto the shirt—including the parts that are not colored. You will need to trim around your image so that the blank parts of the film are not transferred.
- Focus on the main shape. You don't necessarily have to trim inside the shapes, like the holes in "O" and "D".
- You can leave a small border around the shape.


Setting the Heat Press Up
-
1Open the press. Lift up the handle to open the press. Move the heat platen away from the silicone pad. Keep the press open while it heats up during the next step. The following instructions should work for most models of heat presses.
-
2Adjust the temperature. Read the instructions on your transfer paper to find out what temperature you should be using. Turn the thermostat knob clockwise. Wait for the press to heat up; a light will flash on. Once the desired temperature is reached, turn the knob counterclockwise until the light turns off.[2]
- In most cases, you will need to set the temperature to 350 to 375°F (177 to 191°C).[3]
-
3Adjust the pressure. Twist the pressure knob clockwise to increase pressure, and counterclockwise to decrease pressure. The pressure will be based on the thickness of your project; the thicker it is, the less pressure you will need. Be careful not to twist it too far, or the swivel arm may come off.[4]
- In most cases, you will need to use medium to high pressure.
-
4Set the timer. Hold down the minute and second buttons to increase or decrease the times. When you press the start button, the timer will start—but don't press it yet! Listed below are the recommended times based on the type of transfer you may be using. If your paper lists a different time, use that instead:[5] [6]
- Ink-Jet transfer paper: 14 to 18 seconds
- Laser copier/printer transfer paper: 18 to 25 seconds
- Sublimation transfer: 25 to 30 seconds
- Embroidered appliqués: 20 to 30 seconds
- Die cut vinyl lettering: 45 to 60 seconds


Pressing the Shirt
-
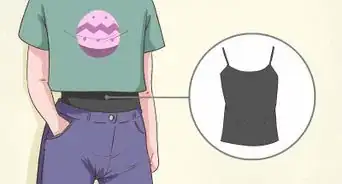
1Place your t-shirt onto the plate. Make sure that the side you want to be printed on is facing up. Most transfers are translucent, so it would be best to use a white, solid-colored shirt. If your transfer is labeled as "opaque" or suitable for colored shirts, you can use any color of shirt you want.
-
2Set the transfer face-down on top of the shirt. Make sure that the transfer paper is inside the pressing area, including the silicone pad and heat pad.
- If you are pressing an embroidered appliqué, set it down embroidered-side-up, adhesive-side-down.
- If you are pressing heat transfer vinyl, set it matte-side down, shiny-side-up.
-
3Cover the transfer, if necessary. Some types of heat presses already have a protective silicone pad. If yours does not, or if you are pressing an appliqué or heat transfer vinyl, you will need to lay down a thin cloth on top of your shirt and transfer. This will protect the transfer. A handkerchief, tea towel, or thin piece of cotton fabric will work great for this.
-
4Close the press. Pull down on the handle, clamping the press shut. You may need to adjust the pressure, especially if you are pressing an embroidered appliqué or patch.
-
5Press the start button. The handle will most likely lock into place, depending on the specific model you have. When the timer goes off, press the start button again. This will stop the press and reset the timer.
-
6Open the press and remove the shirt. Peel the paper off of the fabric while the paper is still hot.[7] The image should now be printed onto the shirt.
-
7Press more shirts, if desired. If you need to press another design onto the back of your shirt, insert a piece of cardboard inside the shirt first. Adjust the plate height so that there is less pressure, then press the shirt again. This way, you won't accidentally reheat the first image.[8]


Community Q&A
-
QuestionWhat kind of printer should I use to print to a heat-transfer sheet?
 Community AnswerInkjet is ideal as the ink easily transfers, but laser jet works, too. It will take a little longer, but there's not a big difference in quality.
 -
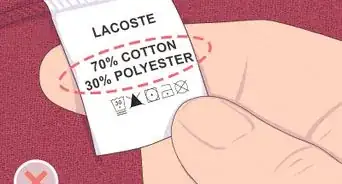
QuestionCan I use a 100% polyester shirt for printing? If so, at what temperature?
 Mohammed SuhelCommunity AnswerYou can print on polyester with normal InkJet transfer paper. The normal temperature range for polyester is 170 - 200 degrees Celsius depending on the transfer paper. You can also try dye sublimation, which is made for polyester materials; it gives a permanent transfer that will last forever.
 -
QuestionCan I use a flat iron for this?Community AnswerLay your t-shirt flat and put your iron on low to medium heat. If the iron is too hot, it may burn the cloth. Don't press the iron into the shirt too hard.
Warnings
- Heat transferred artwork will always be a little stiff due to the transfer paper's film.⧼thumbs_response⧽
- Never leave the heat press unattended while it is heating up.⧼thumbs_response⧽
- Never let the cable touch the heat platen.⧼thumbs_response⧽
- Do not print a transfer page from a printer different from that it is designed for. Using inkjet transfer paper in a laser printer will damage the printer.⧼thumbs_response⧽
Things You'll Need
- T-shirt
- Heat press
- Heat transfer paper


References
- ↑ https://www.heatpress.com/learn.php
- ↑ http://www.dharmatrading.com/heat-press.html
- ↑ http://www.silhouetteschoolblog.com/2016/08/printable-heat-transfer-paper-silhouete-cameo.html
- ↑ http://www.dharmatrading.com/heat-press.html
- ↑ http://www.dharmatrading.com/heat-press.html
- ↑ http://www.silhouetteschoolblog.com/2014/04/silhouette-heat-transfer-vinyl-tips-for.html
- ↑ http://www.silhouetteschoolblog.com/2016/08/printable-heat-transfer-paper-silhouete-cameo.html
- ↑ http://www.dharmatrading.com/heat-press.html
About This Article

If you're ready to print onto a t-shirt using a heat press, open the press and set it to the temperature recommended by your transfer paper. Next, turn the nob clockwise to adjust the pressure according to the thickness of your t-shirt. To use the press, put the t-shirt on the panel with the side facing up you want to print on. Finally, place the transfer face down on top of the t-shirt, close the press, and press the t-shirt for the length of time recommended for the type of transfer you're using. To learn how to use different kinds of transfers, including ink jet transfers and laser copier transfers, read on!