This article was co-authored by Kpoene Kofi-Bruce. Kpoene Kofi-Bruce is a tailor, couture wedding gown designer, and the Creative Director of Mignonette Bridal and Ette the Wedding Tailor in Chicago, Illinois. With nearly two decades of experience as a wedding gown designer, small business owner, and vintage sewing enthusiast, Kpoene specializes in wedding gown design and the social history of wedding dresses. She received a BA in Creative Writing from Middlebury College and studied the business of fashion at the Fashion Institute of Technology. She is also a graduate of the Goldman Sachs 10KSB program and the Chicago Fashion Incubator and has written about wedding fashion for Jezebel, Catalyst, the Sun Times, and XO Jane.
This article has been viewed 89,684 times.
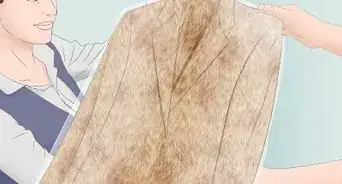
Chiffon is light, delicate, and slippery so it can be a very difficult material to hem. You can hem chiffon by hand or by machine but, either way, you should work slowly and carefully to create as smooth a seam as possible.
Steps
Hem Chiffon by Hand
-
1Sew straight across the raw edge. Thread your needle with matching, lightweight thread, and sew straight across your hem roughly 1/4 inch (6 mm) away from the raw edge.
- After sewing this line, trim the edge so that there is only 1/8 inch (3 mm) between the thread line and the raw edge.
- This stitch will end up being on the bottom of your hem. It should help you maintain an even, consistent roll.
-
2Fold in the raw edge. Fold the raw edge toward the wrong side of the fabric and press in place using an iron.
- While not entirely necessary, pressing the fold in place will make the hem less likely to unroll as you stitch.
- Fold the fabric so that the bend falls just past your initial row of stitching. You should see your initial stitching along the underside of the fabric but not from the front.
Advertisement -
3Pick up a few threads with your sewing needle. Pick up one thread from the fabric and a small stitch from the edge of your fold. Pull the needle through, but do not pull it taut just yet.
- Use a small, sharp needle for best results. Doing so will make it easier to pick up single threads along your hem.
- The stitch made into your fold should be as close to the actual fold as possible. Position it in between your initial line of stitching and the fold itself.
- The threads you pick up from the front of the actual fabric should be directly above the stitch made into your fold. These threads should also be right above the raw edge.
- Make sure that you only pick up one or two threads from the fabric. Picking up more will cause the hem to be more visible from the front of the fabric.
-
4Make a few more stitches in the same manner. Each stitch should only pick up one or two threads from the fabric, and the stitches should be spaced roughly 1/4 inch (6 mm) apart.
- Repeat this until you have 1 to 2 inches (2.5 to 5 cm) of hem stitching.
-
5Pull the thread through. Lightly pull on the thread in the direction of your stitching. The raw edge should roll itself down into your hem, disappearing from sight.
- Use firm pressure, but do not pull tightly. Pulling too tightly can cause the fabric to bunch up.
- Smooth out any bubbles or bumps with your fingers.
-
6Repeat along the length of the hem. Continue stitching along the rest of the hem in the same manner until you reach the end. Knot off the end and cut off any excess thread.
- As you get better at the process, you can pull the thread after 4 to 5 inches (10 to 13 cm) of stitching rather than every 1 to 2 inches (2.5 to 5 cm).
- If completed correctly, the raw edge should be hidden along the wrong side of the fabric and the hem stitching should be barely visible from the front.
-
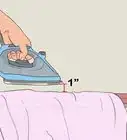
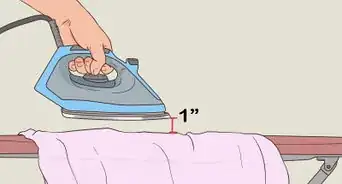
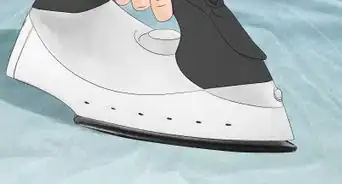
7Iron press when finished. The hem may already be smooth enough, but if desired, use an iron to press it further.
- This step completes the process.
Hem Chiffon with a Sewing Machine
-
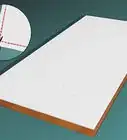
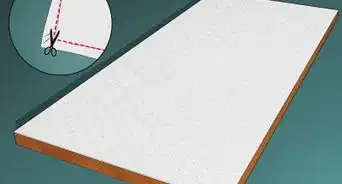
1Sew a basting line around the raw edge. Use your sewing machine to sew an even line 1/4 inch (6 mm) in from the raw edge of your chiffon.[1]
- This line will give you a guide, making the hem easier to fold. It also eases the edge in a bit, making it tighter and easier to fold under later on.
- Consider increasing the thread tension by one place further than necessary for this basting line. Restore the setting to normal once this line is complete.
-
2Fold and press. Turn the raw edge in toward the wrong side of the material, folding it along the basting line. Press it in place with a hot iron.
- Holding the fabric somewhat taut along the basting line can help you fold the edge while pressing it in place.
- Move the iron up and down, rather than moving it side to side, to prevent the material from stretching or shifting as you press it.
- Use plenty of steam as you press the fold in place.
-
3Sew to the inside of the folded edge. Use your sewing machine to sew another line around the edge of the chiffon. This one should be 1/8 inch (3 mm) in from the folded edge.
- This line of stitches will act as another guide, making it easier to fold in the hem once more.
-
4Trim back the raw edge. Use sharp scissors to trim back the raw edge as close to the new sewing line you just created in the previous step.
- Make sure that you do not cut beneath or into the stitches as you complete this step.
- You need special scissors to cut chiffon and other flimsier fabrics, and those scissors shouldn’t be used for anything else.
-
5Fold over the hemline. Turn the material in toward the wrong side again, just enough to fold the raw edge under. Press this fold in place with an iron.
- The second line of stitching you made should be folded in during this step. Your initial line of stitching will still be visible.
-
6Sew through the center of the rolled hem. Slowly stitch around the hem, working along the edge of your hemline, until you reach the end of the hem.
- You should have to visible lines of stitches from the back and one visible line from the front.
- You can either use a straight stitch or an edgestitch for this step.
- Do not back tack your hem in place. Leave enough thread at the beginning and end of the seam to knot it by hand.[2]
-
7Press the hem. Iron the hem one last time to flatten it out as much as possible.
- This step completes the process.
Hem Chiffon with a Rolled Hem Presser Foot
-
1Attach a rolled hem presser foot to your machine. Follow the instructions provided with your sewing machine to change out the presser foot, replacing the standard one with a special rolled hem presser foot.
- Choose your rolled hem presser foot carefully if you do not already own one. The best and most versatile kind will allow you to make rolled hems using a straight stitch, zig zag stitch, or decorative stitch. For this project alone, however, you only need one that will allow you to make a standard straight stitch.
-
2Sew a small line of basting stitches.[3] Lower the presser foot onto the material without feeding the material into the guide. Sew a line of standard stitches 1/2 to 1 inch (1.25 to 2.5 cm) long, 1/4 inch (6 mm) above the raw edge.
- Leave long tails of thread after stitching this line. Both the line of stitches and the attached threads will help you guide the fabric into the presser foot.
- Do not fold your fabric in yet during this step.
- Stitch along the wrong side of the material.
-
3Feed the edge of the material into the presser foot. Note the guide along the front of your special presser foot. Feed the edge of your material into this guide, bending the raw edge over from one side and under the opposite side.
- Keep the presser foot lifted as you feed the material in, then lower the presser foot when finished.
- Feeding the material into the presser foot can be difficult. Use the threads attached to your small set of basting stitches to help lift, guide, and maneuver the edge into the presser foot.
-
4Sew along the hem. With the edge guided into the presser foot and the presser foot lowered onto the fabric, sew slowly and carefully along the entire edge of the chiffon, stopping only once you reach the end.
- If the edge has been fed into the presser foot guide correctly, the presser foot should continue to roll it under as you work. No further effort on your part should be required.
- Using your right hand, hold the remaining raw edge taut as you sew, allowing it to feed into the presser foot evenly.
- Work slowly and carefully to prevent bubbles or bumps from forming. When finished, your hemmed edge should be smooth.
- Do not back tack the material in place. Instead, leave a long tail of thread at the start and end of the seam and knot the thread in place by hand.
- You will only see one line of stitching from both the front and back of the material.
-
5Press in place. Once your hem is finished, take the chiffon to an iron and gently press it down, flattening the fold as much as possible.
- This step should complete the process.
Community Q&A
-
QuestionOn the machine hemmer foot, how much fabric is allowed initially for the hem?
 Community AnswerOne-quarter inch is allowed. The line of basting stitches sewn in Step 2 is where the fabric gets folded, similar to the other methods.
 -
QuestionHow far from the floor should the dress be?
 T. ChinsenTop AnswererA lot depends on the heel height of the shoe that will be worn with the garment. Ideally it should be set so that you do not catch the hem while walking. Keeping it 2"/5 cm off the floor is enough for the shoe to move forward and be seen without catching the hem.
Things You'll Need
Hem Chiffon by Hand
- Iron
- Lightweight thread
- Sharp, small sewing needle
- Scissors
Hem Chiffon with a Sewing Machine
- Sewing machine
- Lightweight thread
- Small, sharp machine needle
- Iron
- Scissors
Hem Chiffon with a Rolled Hem Presser Foot
- Sewing machine
- Rolled hem presser foot
- Lightweight thread
- Small, sharp machine needle
- Iron
- Scissors


References
About This Article