This article was co-authored by Ryaan Tuttle. Ryaan Tuttle is a Home Improvement Specialist and the CEO of Best Handyman, Inc. in Boston, Massachusetts. With over 17 years of experience, he specializes in building home service businesses, focusing on creating scalable and efficient brands. With the help of his global team, the companies have achieved over 10+ million in sales and received recognition through magazine features, and enjoy partnerships with wikiHow and Jobber field service software. Boston Magazine and LocalBest.com have named Best Handyman Boston the Best Handyman in Boston. Ryaan holds Construction Supervisor and Home Improvement Contractor Licenses.
There are 7 references cited in this article, which can be found at the bottom of the page.
This article has been viewed 80,257 times.
Installing aluminum siding may be the most eye-catching home improvement that you can make. The change can be remarkable, and is sure to turn heads and impress your neighbors. With a little know-how and a few simple pieces of equipment, this is a task that you can easily accomplish yourself. Here are some steps to guide you as you learn how to install aluminum siding.
Steps
-
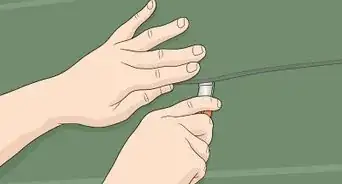
1Prepare the area. Once the old siding has been removed, clean the exterior walls thoroughly, removing any old paint, putty or caulking. Any stray nails should be hammered flat or removed. Fill any dents or depressions left in the wall with wedges (small pieces of scrap material).[1]
-
2Install the underlayment. Foam board is the most commonly recommended underlayment application for aluminum siding. Install each sheet with nails, laying every sheet straight and being sure to leave no gaps between the sheets.Advertisement
-
3Add the corner posts. At each corner, suspend the posts, using two nails in each of the upper nail slots. If you have to use more than one post (referred to as stacking) in a single corner, be sure that there is an overlap of 1 inch (2.54 cm).
-
4Install the footer. This refers to the piece of trim that is placed at the bottom of each of the exterior walls. This is where the starter strip will be installed.
-
5Place a strip of F-channel trim under the eaves. The top sheets of siding will be installed to slide under this piece.[2]
-
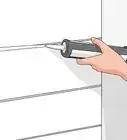
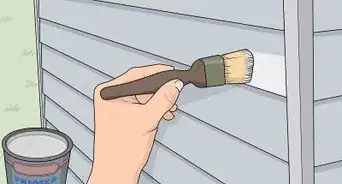
6Apply caulk around any openings, such as doors and windows, to create an airtight seal.
-
7Prepare the window and door trim. This is referred to as a J-channel. Measure each piece of trim so that it will be two channel widths longer than the opening itself. Cut notches in the ends of each section of J-channel, so that they will fit together.[3]
-
8Install the trim so that it buts up against the tops and sides of the doors, and surrounds each window frame. Nail it at 12 inch (30.48cm), increments.
- When installing the trim at the windows, start at the bottom, then move to the sides and install the top portion last. This will help control water flow and prevent leakage.
- Each sheet of siding has a nail strip at the top. Attach the siding to the wall with a nail in each section of the nail strip. Siding is intended to hang from the nails, not to be nailed flat.
-
9Add your starter sheet of siding. Slide the bottom of the siding into the footer, being sure to leave enough space to allow for expansion. Slide the end, that meets the corner, in the same way.[4]
-
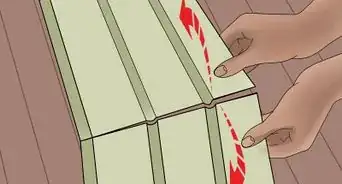
10Continue up the wall, interlocking the bottom of each sheet with the tops of the previous sheets.[5]
- Always be sure to complete one wall before moving on to the next.
- When it is necessary to use more than one sheet of siding to complete a row, be sure to overlap successive panels by 1 inch (2.54 cm). For the best results, try to create seams as far away from the focal point of the wall as possible.
-
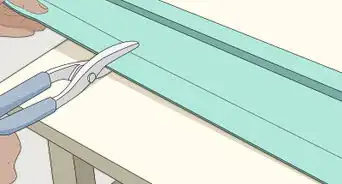
11Use a circular saw to trim the siding panels that will be installed at windows, doors, and corners. Use gutter-seal adhesive to finish the installation at window sills and at sections of soffit.
-
12Install the top panels of siding by cutting any extra width from the top of the sheet. Lock the bottom into place at the top of the preceding panel, and slide it under the trim that you've installed under the eave.


Expert Q&A
-
QuestionHow can I install vinyl siding myself?
 Ryaan TuttleRyaan Tuttle is a Home Improvement Specialist and the CEO of Best Handyman, Inc. in Boston, Massachusetts. With over 17 years of experience, he specializes in building home service businesses, focusing on creating scalable and efficient brands. With the help of his global team, the companies have achieved over 10+ million in sales and received recognition through magazine features, and enjoy partnerships with wikiHow and Jobber field service software. Boston Magazine and LocalBest.com have named Best Handyman Boston the Best Handyman in Boston. Ryaan holds Construction Supervisor and Home Improvement Contractor Licenses.
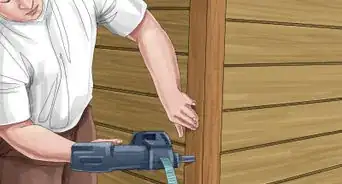
Home Improvement SpecialistUse a siding gun! Siding guns make it easy to install siding without having to hand-nail every single nail in. You can also adjust it so all of the nails are inserted at the same depth. Always leave the nail 1/8 in (0.3 cm) out of the plywood so the vinyl siding has a little room to breathe and move. -
QuestionHow do I attach two pieces of aluminum if I do not have anything to nail them to?
 Community AnswerAdd wood backing behind the aluminum for a place to nail onto, or drill a hole in the aluminum and use a pop rivet to attach the two pieces of aluminum.


References
- ↑ https://thehousingforum.com/how-to-install-aluminum-siding/
- ↑ https://www.familyhandyman.com/roof/how-to-install-aluminum-soffits-that-are-maintenance-free/
- ↑ https://www.youtube.com/watch?v=EplVUONQD60
- ↑ https://www.yourepair.com/2014/how-to-work-with-and-repair-aluminum-siding.html
- ↑ https://www.yourepair.com/2014/how-to-work-with-and-repair-aluminum-siding.html
- http://www.doityourself.com/stry/how-to-install-aluminum-siding
- http://thehousingforum.com/how-to-install-aluminum-siding/
- http://www.hometips.com/diy-how-to/siding-vinyl-aluminum-installation.html
About This Article