This article was co-authored by Tony Hoang. Tony Hoang is a Landscaper and the Principal at H&J Landscaping & Concrete Contractor in Newark, CA. With over six years of experience, he specializes in designing the perfect concrete driveways & backyard patios for homes. H&J Landscaping & Concrete Contractor is a 4.5-star business on Yelp.
There are 7 references cited in this article, which can be found at the bottom of the page.
wikiHow marks an article as reader-approved once it receives enough positive feedback. This article received 12 testimonials and 100% of readers who voted found it helpful, earning it our reader-approved status.
This article has been viewed 553,343 times.
Installing a patio in your yard can transform an ordinary outdoor space into a wonderful gathering area. Using pavers to create your patio is economical and allows you to build an endless variety of shapes, sizes and colors. It will take work on your part to install a patio made of pavers, but you can easily do it yourself from start to finish.
Steps
Preparing the Surface
-
1Check for underground utilities. Before digging up the backyard, have your utility companies locate and mark underground lines. Local agencies vary but information on who to call in your specific area is usually available by calling 811. This will connect you to your local agencies.[1] Don't make the mistake of assuming that there are no utilities in the area you are digging! It's better to be safe than sorry.
-
2Mark off the patio area. Measure your patio dimensions and mark them on the ground with stakes at each corner of the plot.[2] Wrap a string or thin rope around the stakes to outline the patio's perimeter. This will give you a good idea of how the patio will fit into the yard and it will make sure that you are only prepping the ground where the patio will actually be.
- To keep your patio level from the start, it's a good idea to make sure your perimeter string is level (they sell little levels that hang from these strings at any home improvement store).[3] If all of your strings are level, then you can measure down from the string at every step and your measurements will be based on the same starting point.
- You can also use a laser level, which saves you the time and energy of setting up the strings by using laser light to check that everything is level.
- It's also important to mark the area to make sure your measurements are accurate so you know how the pavers will fit.[4]
Advertisement -
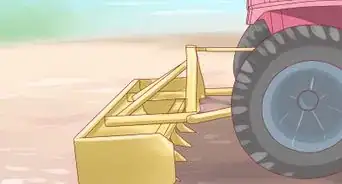
3Dig up the ground. Excavate 6 to 8 inches by digging up and removing all the soil in the marked area. The depth you dig down will vary depending on how thick your pavers are and how much gravel you put down.[5] This excavation should allow room so you can install paver edging on the perimeter of your patio.[6]
- Most pavers are about 3- to 3 1/2-inches thick, so you'll need to dig a hole that's about 12 inches deep depending on the local soil.[7]
- Slope the entire area slightly toward the direction in which you want water to run off the patio pavers. Lay a board across the area, and place a level on top the board to get the desired slope.
- A level perimeter string will come in handy here. Measure down from the string all around the patio space, to make sure you have dug down a consistent depth. You can even stretch a temporary string across the area to determine whether the middle is level as well.
-
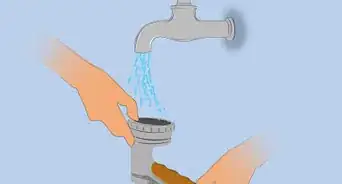
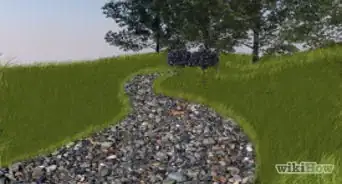
4Add a gravel base to the area. Pour a 4 to 6 inch layer of gravel into the patio trench and compact it using the ground compactor, also called a plate compactor.[8] Spray water over the gravel to wet it down so the stones compact better.[9]
- If you don't own a compactor, you may be able to rent one at a local home improvement store. You can also use a hand tamper to get edges and corners that might be missed by the compactor.
- Once again, measure off your level perimeter string to make sure your gravel is relatively even across the whole patio area. This does not need to be perfect, and in fact should slope a little bit away from any house it's next to, but it should give you a good idea if you are in the right ballpark.
- If you plan to use a weed barrier, now is the time to lay it down. Make sure you have chosen a biodegradable and porous fabric so that it does not add toxins to the soil or interfere with drainage.[10]
-
5Add a layer of fine sand over the gravel and compact it. The sand layer should be about an inch thick and follow the same grade as the gravel.[11] This is the last layer you install before laying paver blocks, so make sure it is smooth. After laying down the sand and compacting it, lay down two pieces of round level piping more than 5 feet (1.5 m) apart, pushing them down into the sand. To make sure your surface is level, then take a 2 x 4 and pull it across the top of the two pieces of pipe, which will level out the sand underneath. Once the area is level, remove the pipes from the sand. You will be left with two indentations where the pipes were but the rest of your patio area will be ready for pavers. [12]
- You may need to move your leveling pipes to several locations, depending on how big your patio is going to be. Just remember that you need to make the whole patio to be level overall.


Laying the Pavers
-
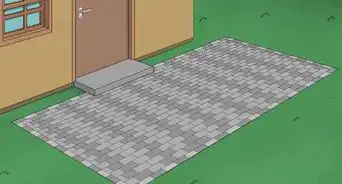
1Lay the pavers in the pattern you desire. Start at one corner and keep the blocks as close to each other as possible. As you lay each paver down, tap it a bit with a rubber mallet so it is nicely seated in the sand.
- Check your level as you work. The patio should keep the same level as you go along. If one paver is off, tap it with a rubber mallet to get it into place. If a paver is too low, don't be afraid to pull it up, put some more sand under it, and put it back in place. It's easier to get it right now instead of later. This is another point at which the level perimeter string may help you out. While you can use a level across the pavers themselves, measuring their distance away from the string will help keep everything aligned as well.
-
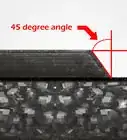
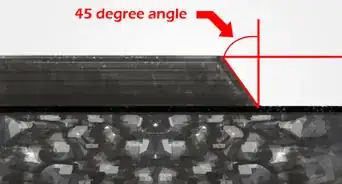
2Cut paver blocks to fit around obstacles. If the patio needs to fit around trees or fencing, cut paver blocks using a saw with a diamond paver blade.[13] These are available for rent from your local home improvement store and are a good investment if you have a lot of obstacles.
- If you only have a bit of an obstacle in your way try creative fixes. If there is a spot that requires a small piece of paver, consider simply filling the space with pea gravel or a ground cover plant instead. This will save you time and energy that you will need for the rest of the project. You may also have a small piece of paver that was cut off, and you may be able to use it in these tight areas.
-
3Install edging around the patio perimeter. Patio edging comes in a variety of materials, including metal, plastic, and wood. Once all pavers are installed, secure the edging tightly against the outer edge of the pavers using spikes placed 2 feet (0.61 m) apart or closer. Whatever type of edging you choose, it will keep the pavers in place, preventing them from slowly creeping out of alignment.


Finishing the Surface
-
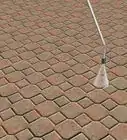
1Fill the cracks with sand. Cover the entire paved patio with a thin layer of polymeric sand. Use a broom to sweep the sand back and forth until it fills all the spaces between the pavers. If you notice that there are still gaps in-between pavers, add more sand and sweep it into the cracks. This may take a few passes.
-
2Compact the patio. Attach a thick towel or piece of cardboard to the base of the compactor and go over the entire patio. As you go, make sure that the patio is staying relatively level. You want the pavers to be set well into the sand and that as little settling as possible will take place in the future. Don't be afraid to give a little force when compacting. While you don't want to break your freshly set pavers, they can take a good amount of force from a compactor with a cushioning cover over it.
-
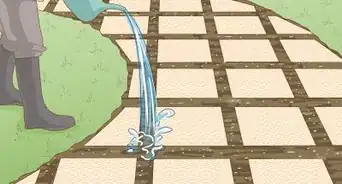
3Finish off the edges of the patio. Fill in any areas along the patio edging with soil, gravel, grass, or ground cover. Basically you should fill the space at the edge of your patio with whatever material matches the rest of your yard.
-
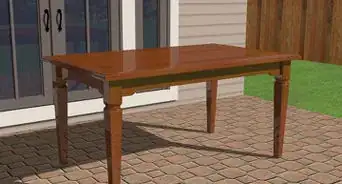
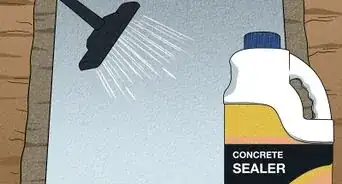
4Seal your pavers. While pavers will last a very long time without sealing, taking the time to seal your pavers every few years will make them look better, preventing staining and deterioration. Use a sealer that is recommended by your paver manufacturer. [14]


Buying the Supplies
-
1Measure the area where you want your patio. This allows you to determine how many pavers to buy, as well as how much of the other supplies you will need. You need to have a clear idea of what you want your patio to look like so you can ensure you buy enough materials. Measure the length and width of the area you want to cover. Multiply the length times the width. This will give you the square footage of your future patio.
- If the shape of your patio is not square but you will use square pavers, you will need to estimate the square footage. Another option is to use pavers that are designed to be laid in round shapes. These type of pavers will require you to take different types of measurements to determine the amount of pavers needed.
- If you are building stairs on your patio, you may need to subtract the square footage of the bottom stair and purchase some retaining blocks.
-
2Decide on the pavers to use for your patio. Pavers come in a multitude of shapes, sizes, colors, and prices, so you have decisions to make. When determining which pavers to use, compare how much it will cost you to cover the whole patio area. Some pavers are sold by the square foot and some are sold as individual blocks. Small pavers may be cheaper individually but they could end up costing you more in the end to cover your square footage. They are also much more labor-intensive, which can cost you in terms of time and effort.
- To figure out how many pavers you will need, multiply the square footage of your patio by the stones per square foot of the pavers you are considering (a number that should be on price labels or listed on product specs), this will give you the number of stones needed. For example, if you are making a 100 square foot patio and the pavers you are using are listed as 4 square feet per piece, multiply 100 by 4 and the total number of pieces you will need is 400. Once you have that number, you can figure out how much specific pavers will cost you overall by multiplying the number of pavers needed by the price per paver.
- Remember, pavers can be arranged in a multitude of different patterns; a sales associate at your home improvement store should be able to make suggestions if you can't decide.
- Make sure you discuss delivery options with the sales associate. A large number of pavers will weigh quite a lot, and you will likely need them to deliver a pallet to your home.
-
3Purchase pavers and other supplies. You will need more than pavers to install a patio. The patio should include a layer of gravel and a layer of sand below the pavers, as well as a barrier to keep the pavers in place. All of these supplies should be purchased before you start your project.
- To determine the amount of gravel and sand you will need to buy, determine the volume of the space you are filling or the cubic feet and cubic yards.[15] The gravel should be at least 4 inches deep, but this will be compacted, so you will want to add another 1.5 inches to your calculation.[16] The sand should be over 1 inch (2.5 cm) thick, so these measurements should be multiplied by the square footage of the patio. This will give you the cubic feet you need. You can also use an online calculator, such as the one here: http://www.calculatorsoup.com/calculators/construction/
- If all else fails, consult a sales associate at your home improvement store. They should be able to help you figure out how much sand and gravel you will need for the square footage of your patio. Talk to them about your options for buying supplies like sand in bulk to save money.
- Make sure you buy polymeric sand to fill in the spaces or joints between the pavers. Regular washed sand will not bind together well and your pavers will become loose.
- Decide if you want to lay a fabric weed barrier between the gravel and the pavers. The sand and gravel are usually enough to keep weeds from growing between your pavers, but this added layer provides additional blockage. Make sure the barrier is porous so that you still get proper drainage through the gravel.[17]
- When you purchase pavers makes sure you buy at least 10 percent more than you plan to use. Paver blocks can break or you may need to cut some to fit around obstacles.
- You may also need to rent a gas powered plate compactor as well as a paver wet saw with diamond blade and stand if you need to trim or shape the pavers.


Expert Q&A
Did you know you can get expert answers for this article?
Unlock expert answers by supporting wikiHow
-
QuestionWhat do you put under pavers?
 Scott JohnsonScott Johnson is the Owner and Lead Design Consultant for Concrete Creations, Inc., an award-winning landscape and design company based in the San Diego, California metro area. He has over 30 years of experience in the pool and landscape construction industry and specializes in large estate outdoor environment construction projects. His work has been featured in San Diego Home & Garden Magazine and on Pool Kings TV Show. He earned a BS degree in Construction Management with an emphasis in Architecture and CAD design from Northern Arizona University.
Landscape & Design ConsultantYou need a road base, like crushed gravel, at the very bottom. That layer needs to be at least 3-4 inches under the pavers. On top of the road base, you need sand. Your pavers go on top of the sand. The biggest mistake that most people make is that they only excavate like an inch or 2 and then call it a day. You really need to excavate like 6 inches to get deep enough for the road base and sand.
Support wikiHow by unlocking this expert answer.
-
QuestionCan you use limestone that packs for a base instead of gravel?
 Anthony "TC" WilliamsAnthony "TC" Williams is a Professional Landscaper in Idaho. He is the President and Founder of Aqua Conservation Landscape & Irrigation, an Idaho Registered Landscape Business Entity. With over 21 years of landscaping experience, TC has worked on projects such as the Idaho Botanical Garden in Boise, Idaho. He is a Idaho Registered Contractor and a previously Licensed Irrigator in the State of Texas.
Experienced LandscaperIf that is what is available, it is fine. Make sure it is crushed to 3/4 or less so that water will pass through it.Support wikiHow by unlocking this expert answer.
-
QuestionHow soon can I park a car on my new paved driveway?Anthony "TC" WilliamsAnthony "TC" Williams is a Professional Landscaper in Idaho. He is the President and Founder of Aqua Conservation Landscape & Irrigation, an Idaho Registered Landscape Business Entity. With over 21 years of landscaping experience, TC has worked on projects such as the Idaho Botanical Garden in Boise, Idaho. He is a Idaho Registered Contractor and a previously Licensed Irrigator in the State of Texas.
Experienced LandscaperYou can park your car on a newly paved driveway only after the sealer is dry.Support wikiHow by unlocking this expert answer.


Expert Interview
Thanks for reading our article! If you'd like to learn more about installing pavers, check out our in-depth interview with Tony Hoang.
References
- ↑ http://www.call811.com/default.aspx
- ↑ Tony Hoang. Landscaping Manager. Expert Interview. 1 November 2022.
- ↑ Tony Hoang. Landscaping Manager. Expert Interview. 1 November 2022.
- ↑ Tony Hoang. Landscaping Manager. Expert Interview. 1 November 2022.
- ↑ Tony Hoang. Landscaping Manager. Expert Interview. 1 November 2022.
- ↑ Scott Johnson. Landscape & Design Consultant. Expert Interview. 8 April 2020.
- ↑ Tony Hoang. Landscaping Manager. Expert Interview. 1 November 2022.
- ↑ Tony Hoang. Landscaping Manager. Expert Interview. 1 November 2022.
- ↑ Scott Johnson. Landscape & Design Consultant. Expert Interview. 8 April 2020.
- ↑ http://homeguides.sfgate.com/diy-weed-barrier-under-pavers-63388.html
- ↑ Scott Johnson. Landscape & Design Consultant. Expert Interview. 8 April 2020.
- ↑ http://www.todayshomeowner.com/video/paver-patio-sand-base-leveling-tip/
- ↑ Tony Hoang. Landscaping Manager. Expert Interview. 1 November 2022.
- ↑ http://www.thisoldhouse.com/toh/article/0,,20293442,00.html
- ↑ http://www.lowes.com/cd_Build+a+Paver+Patio_486093984_
- ↑ Scott Johnson. Landscape & Design Consultant. Expert Interview. 8 April 2020.
- ↑ http://homeguides.sfgate.com/diy-weed-barrier-under-pavers-63388.html
About This Article

To install patio pavers, dig up the first 6 to 8 inches of soil. Then, lay down 4 to 6 inches of gravel in that hole and compact it using a plate compactor. Add a layer of fine sand over the gravel and compact it as well. Next, start at one corner of the project and lay the pavers down as close together as possible. If one sticks up, tap it with a mallet to level it. Finally, use a broom to spread sand into the cracks of the pavers and compact it one last time. Keep reading for advice from our reviewer about what supplies you will need!