This article was co-authored by Jesse Kuhlman. Jesse Kuhlman is a Master Electrician and the Owner of Kuhlman Electrician Services based in Massachusetts. Jesse specializes in all aspects of home/residential wiring, troubleshooting, generator installation, and WiFi thermostats. Jesse is also the author of four eBooks on home wiring including "Residential Electrical Troubleshooting" which covers basic electrical troubleshooting in residential homes.
There are 7 references cited in this article, which can be found at the bottom of the page.
wikiHow marks an article as reader-approved once it receives enough positive feedback. In this case, 90% of readers who voted found the article helpful, earning it our reader-approved status.
This article has been viewed 534,509 times.
Installing a circuit breaker is sometimes considered the most intimidating part of home electrical work. In fact, most people choose not to do it themselves out of fear of being shocked. However, installing circuit breakers into most residential electrical panels doesn’t have to be dangerous or overly complicated. By understanding the layout of your electrical panel and taking adequate precautions during the installation process, you can safely install a circuit breaker in your home.
Steps
Determining Where to Install the Circuit Breaker
-
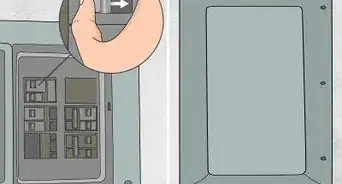
1Turn off the power supply to the electrical panel. Locate the Service Disconnect or Main circuit breaker in the panel and set it to the "Off" position. This circuit breaker is likely to have the largest amp value and will be located either at the top or bottom of the panel.[1]
- If you don’t see a circuit breaker labeled “Service Disconnect” or “Main” in the panel, it is likely in another panel in the building or in the meter socket enclosure (a separate, usually gray box that houses the utilities meter for many houses and mobile homes and that is connected to various circuit breakers throughout one section of a building). Look for other panel(s) as needed until you find this main circuit breaker.
- Turn off all computers in your home before switching off the power, as they may be damaged by suddenly losing power.
-
2Inspect the circuit breaker arrangement for unused locations. Look for a blank area on the electrical panel that could accommodate a circuit breaker, paying particular attention to unused spaces at the top and bottom of the cover. Some manufacturers of electrical panels have removable knockouts or plates at these locations, but the panel itself lacks provisions to mount a circuit breaker.[2]
- If the unused location has a knockout plate over it, you’ll have to eventually remove it before completing the installation process. For now, you simply need to identify a space where you can install the circuit breaker.
Advertisement -
3Remove the electrical panel cover. Use a screwdriver to remove 3 of the screws supporting the cover. Then, use 1 arm to hold the panel cover in place as you unscrew the last screw. Finally, pull the cover away from the panel.[3]
- Be sure to hold the panel cover tightly in place as you remove the screws; if the cover slips and falls, it could damage the breaker handles.
- If you’re unable to hold the panel cover in place with 1 hand, ask a friend to help you.
-
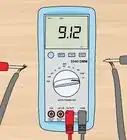
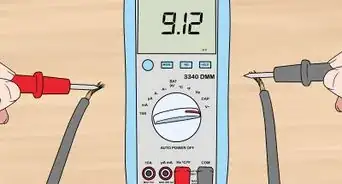
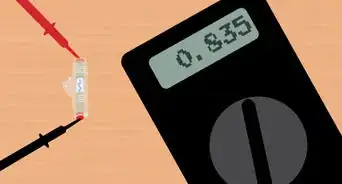
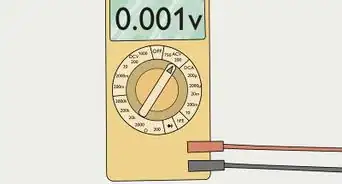
4Test the panel to make sure the power is off. Use a test light or meter set to check for the presence of power. Touch 1 probe to ground (the bar that has bare or green and white wires connected) or neutral (the bar that has just white or just bare or green wires connected) and touch the other probe to the screw terminal of a circuit breaker that has a black, red, or blue insulated wire connected. If 120 (or more) volts is indicated, the panel is still being powered and will need to be turned off before proceeding.[4]
- Make sure your test light is set to the highest AC voltage range available (and is set at minimum to 120 volts).
- If the Service Disconnect or Main circuit breaker is in this panel, it will always indicate power on the terminals that have cables connected. The output of the Main or Service Disconnect when located in the panel, connects to the bus bar. The bus bar should have no power present when this breaker is OFF. Testing at the Service Disconnect or Main circuit breaker is not recommended due to this "seemingly conflicting" information.
- It is not safe to install a circuit breaker in an electrical panel that still has power flowing to it. Do not continue if power is present on a circuit breaker other than Service Disconnect or Main circuit breaker, until the power source has been shut off.
-
5Find an unused space next to or between existing circuit breakers. The new circuit breaker you install will need to be placed next to a circuit breaker already in place. Carefully compare this location to the cover that was removed earlier to make sure it aligns with an unused location on the cover.[5]
- It’s very important that the cover has provisions for exposing the new circuit breaker by removal of the knockout plate. If there’s no plate to be removed, the circuit breaker will have to be located in a different place on the panel.


Placing the Circuit Breaker in the Panel
-
1Make sure you have the correct circuit breaker. The panel label will list all the approved types of circuit breakers that can be installed in the panel. Deviating from the list is a code violation and voids any UL, FM or other listing services’ approval. For maximum safety, use only those circuit breakers that are allowed to be installed in the panel.[6]
- Typically, the only breakers allowed to be installed are from the same manufacturer of the panel - even if other brand breakers are labeled as "fits (brand name here) panels".
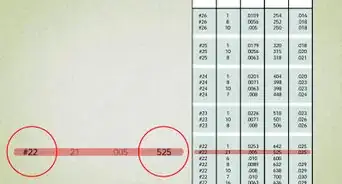
- The breaker should be of an ampacity that does not exceed the circuit conductor's rating. This is typically 15 amps for #14 copper, 20 amps for #12 copper and 30 amps for #10 copper conductors or wires. Consult the code book to determine sizes for other circuits.
- The terminal size should be large enough for the wire to fit. The need to remove strands of wire to fit the terminal is an indication of an error somewhere along the line.
-
2Set the circuit breaker handle to the OFF position. The circuit breaker has 3 possible positions: ON and OFF and a mid position when TRIPPED. Push the handle towards the OFF position before installing the breaker to ensure your own safety during the installation process.[7]
-
3Align the circuit breaker with the bars in the panel. Tilt the circuit breaker so that the hold-on clip on the bottom of the breaker is attached to the plastic “grab” bar in the panel. Once attached, pivot the circuit breaker on the mechanical contact and roll towards the center of the panel - making sure the bus bar of the panel is still aligned with the slot or opening on the circuit breaker case.[8]
- You may have to apply pressure to the breaker for it to become attached to the plastic bar.
-
4Firmly press on the circuit breaker to seat it onto the bus bar. Use your thumb to press firmly but gently on the circuit breaker until it snaps into place on the bus bar. You don’t have to screw the breaker into place; it’s held in place by spring clips and the panel cover.[9]
- While it will require firm even pressure to be seated, it should not have to be forced.
-
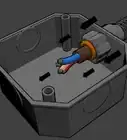
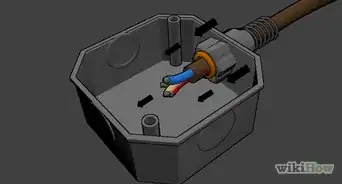
5Connect the circuit wiring to the electrical panel. After making sure the circuit breaker is still in the OFF position, connect the white neutral wire and the black hot wire to the breaker. Loosen the screw over the breaker’s connection terminal, insert the wires into the appropriate terminal locations, then tighten the screw until snug.[10]
- Your circuit breaker should have a label that indicates where to insert the neutral and hot wires.
- If you're installing a double pole breaker, you'll connect it to both the black and red hot wires. Just make sure you're using a switch that's designed to be used as a double breaker.[11]
- Note that there’s no need to bend the end of the wire into a hook; it just needs to be straightly inserted into the connection terminal.


Finishing and Testing the Installation
-
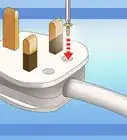
1Remove knockout plates from your cover as needed. Bring the cover up to the panel to compare the new circuit breaker location to the cover openings. Use a pair of pliers to remove any knockout plates on the cover location where the circuit breaker will be located.[12]
- To remove the knockout plate, simply grip with the pliers and move the metal back and forth until it comes away.
-
2Clean all foreign objects out of the panel and reinstall the cover. Remove any tools, wire scraps, or other foreign objects that could cause a short circuit from the interior of the panel. Then, place the cover on the panel to check that the circuit breaker has fully been seated at both contact points and fits through the cover. Finally, rescrew the cover onto the panel.[13]
-
3Turn on the main breaker and test your new circuit breaker. Standing to the side of the panel, restore power to the panel by setting the Service Disconnect or Main to "On" and then set the new circuit breaker to "On". Check for correct operation of the new circuit (light, outlet, etc.) with a test light or meter.[14]
- Clear any short circuit before attempting a reset if circuit breaker instantly trips.
-
4Label the circuit breaker. Locate the panel's circuit directory on the inside of the panel door. Determine the circuit breaker location (or "circuit number") and write a description of the circuit (load type such as "refrigerator" or a location such as "living room") in the space provided. Be sure to edit the directory if any circuits were moved to install the new circuit.[15]


Expert Q&A
Did you know you can get expert answers for this article?
Unlock expert answers by supporting wikiHow
-
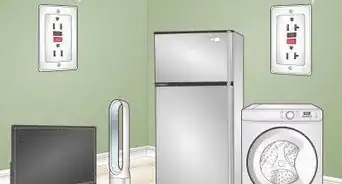
QuestionShould I install an additional circuit breaker in my home?
 Jesse KuhlmanJesse Kuhlman is a Master Electrician and the Owner of Kuhlman Electrician Services based in Massachusetts. Jesse specializes in all aspects of home/residential wiring, troubleshooting, generator installation, and WiFi thermostats. Jesse is also the author of four eBooks on home wiring including "Residential Electrical Troubleshooting" which covers basic electrical troubleshooting in residential homes.
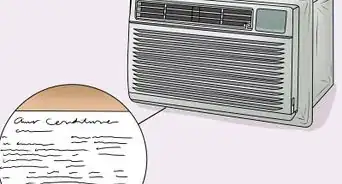
Master ElectricianThe only reason you'd really need an additional circuit breakers is if one of your circuits is overloaded. For instance, if you have an AC in your bedroom window and you put one in another bedroom and those rooms are tied on the same circuit, that breaker will likely be overloaded and trip.
Support wikiHow by unlocking this expert answer.
Warnings
- Voltage levels as little as 50 volts can be lethal under the right conditions. Most residential electrical systems are 2 to 5 times this value. Shut off power whenever working on circuits and never proceed if unsure or uncomfortable performing the steps above.⧼thumbs_response⧽
- Always stand to the side of an electrical panel when turning circuit breakers "on". The amount of energy being transferred is directly proportional to the amperage value rating on the circuit breaker. While a single pole 15 or 20 amp short circuit would probably not cause catastrophic damage, a double pole 100 or 200 amp short circuit certainly could. Standing off to the side takes a person largely (though not completely) "out of harms way".⧼thumbs_response⧽
- Never install a circuit breaker into a panel for which it was not designed. Many circuit breakers will physically fit into different panels, however only those identified on the panel's label are approved for use. Using improper circuit breaker causes forfeiture of UL, Factory Mutual and all other "listings". Use of unlisted devices is a code violation and in extreme cases, may result in denial of a claim to the insurance company in the event of a loss.⧼thumbs_response⧽
- Prior to using any tester or meter, be sure it works by first checking on a known live circuit. If the device fails to indicate properly, do not use until repaired or replaced.⧼thumbs_response⧽
- In the US, 120/240 systems (the type most often found in a residence or dwelling) use a color code for wiring; Black, Red, Blue "hot wires" and White neutral wires. In addition to 120/240 volt systems that appear in residences, many commercial and industrial settings also have 277/480 systems. These higher voltage systems use a different color scheme to immediately alert the electrician of the higher voltage panel. The color scheme used for these systems is Brown, Orange, Yellow (think "BOY") "hot wires" and Gray neutral wires. Be sure new wiring is installed in the correct panel.⧼thumbs_response⧽
Things You'll Need
- Screwdriver
- Voltage Tester or Meter
- Pliers


References
- ↑ http://www.hammerzone.com/archives/elect/panel/breaker/install.htm
- ↑ https://www.bobvila.com/articles/bob-vila-radio-removing-the-knockouts-in-electrical-boxes/
- ↑ https://www.familyhandyman.com/electrical/breaker-box/breaker-box-safety-how-to-connect-a-new-circuit/view-all/
- ↑ https://www.familyhandyman.com/electrical/breaker-box/breaker-box-safety-how-to-connect-a-new-circuit/view-all/
- ↑ https://www.sikana.tv/en/diy/access-to-electricity/how-to-add-a-circuit-breaker-to-an-electrical-panel
- ↑ https://www.youtube.com/watch?v=rXciWsys6Nw#t=49s
- ↑ https://www.youtube.com/watch?v=235UCFnKE2o#t=09m14s
- ↑ http://www.hammerzone.com/archives/elect/panel/breaker/install.htm
- ↑ https://www.familyhandyman.com/electrical/breaker-box/breaker-box-safety-how-to-connect-a-new-circuit/view-all/
- ↑ https://www.familyhandyman.com/electrical/breaker-box/breaker-box-safety-how-to-connect-a-new-circuit/view-all/
- ↑ Jesse Kuhlman. Master Electrician. Expert Interview. 29 April 2020.
- ↑ http://www.hammerzone.com/archives/elect/panel/breaker/install.htm
- ↑ https://www.familyhandyman.com/electrical/breaker-box/breaker-box-safety-how-to-connect-a-new-circuit/view-all/
- ↑ https://www.familyhandyman.com/electrical/breaker-box/breaker-box-safety-how-to-connect-a-new-circuit/view-all/
- ↑ https://www.familyhandyman.com/electrical/breaker-box/breaker-box-safety-how-to-connect-a-new-circuit/view-all/
- ↑ Jesse Kuhlman. Master Electrician. Expert Interview. 29 April 2020.
- ↑ Jesse Kuhlman. Master Electrician. Expert Interview. 29 April 2020.
About This Article

To install a circuit breaker, start by turning off the power supply to the electrical panel and removing the cover over it. Make sure you use a test light or meter to verify that the power is off since it's dangerous to install a circuit breaker in a panel that still has power. Once you've verified that the power is off, find an unused space next to or between existing circuit breakers and press the new circuit breaker into the space, making sure the circuit breaker is in the "off" position beforehand. Finally, connect the circuit wiring to the electrical panel. To learn how to choose the right circuit breaker for your installation, scroll down!