This article was co-authored by wikiHow staff writer, Hannah Madden. Hannah Madden is a writer, editor, and artist currently living in Portland, Oregon. In 2018, she graduated from Portland State University with a B.S. in Environmental Studies. Hannah enjoys writing articles about conservation, sustainability, and eco-friendly products. When she isn’t writing, you can find Hannah working on hand embroidery projects and listening to music.
There are 9 references cited in this article, which can be found at the bottom of the page.
The wikiHow Culinary Team also followed the article's instructions and verified that they work.
This article has been viewed 28,091 times.
Learn more...
Pears are a great snack on their own and a sweet treat to add to any recipe. However, they have a tendency to turn brown super quickly, often changing color minutes after you slice them open. Whether you’re freezing, canning, or refrigerating your cut pears, there are a few different things you can do to keep them fresh to preserve the best texture and flavor.
Steps


How do you store cut pears in the fridge?
-
1Wrap the slices individually using plastic wrap. You can also use tinfoil or a plastic bag. Make sure your package is airtight to stop the slices from browning over time.[3]
- You can also put your pear slices into a plastic container with a lid.
-
2Eat the pears within 3 to 4 days. After that, pears start to lose their texture and flavor. They’ll also start to brown, even if you used lemon juice on them.[4]
- If the pear slices look brown, soft, and squishy, they may have gone bad.
Can you freeze fresh cut pears?
-
1Yes, if you pack them in syrup. Peel, halve, and core the pears, then soak them in a 1:1 ratio of lemon juice and water. Mix 1 2/3 cups (158 g) of granulated sugar with 4 cups (950 mL) of water in a large saucepan, then heat the mixture until the sugar dissolves. Pour your pear slices and syrup mixture into canning jars, leaving 1⁄2 in (1.3 cm) of room at the top of the jar.[5]
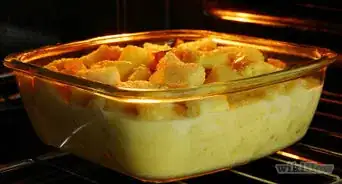
- The syrup will help maintain the color and the texture of the pears. It will make them taste slightly sweeter, so they’ll be good for pies and other baked goods.
- Since you’re freezing your pears, you don’t have to boil and seal your canning jars like you would in traditional canning.
-
2Eat the pears within 10 to 12 months. Write a label on your canning jars so you can remember when you put them in the freezer. After about a year, the pears will start to lose their flavor and texture.[6]
- Make sure your freezer stays at or below 0 °F (−18 °C) so your pears stay good to eat.
- Frozen pears will never go bad, but they probably won’t taste great after more than a year in the freezer.
How do you keep pears from browning while canning?
-
1Add ascorbic acid to your canning syrup. For every 1 quart (32 USoz) of cold syrup you’re using, add in 1500 mg (1/2 tsp) of ascorbic acid. You can find ascorbic acid at most grocery stores in the canning section.[7]
- Ascorbic acid is the best ingredient to use for long-term canning. Lemon juice and citric acid are fine too, but they aren’t as good as ascorbic acid.
- If you can’t find ascorbic acid, use Vitamin C pills instead. Crush up the pills and mix them in with the syrup at the same ratio as you would with ascorbic acid.
-
2Mix lemon juice or citric acid with water if you don’t have ascorbic acid. For every 1 quart (32 USoz) of water, add in 3 tablespoons (44 mL) of lemon juice or citric acid. Dip your pear slices into the water mixture for 1 to 2 minutes before you can them.[8]
- Drain your pear slices, but don’t rinse them. That way, they’ll keep some of the acidity in the can so they don’t turn brown.
How do you use Ball Fruit-Fresh Produce Protector on pears?
-
1Sprinkle 1/2 tsp (2.8 g) on 1 cup (128 g) of pears. If you’ve sliced your pears already, you can sprinkle a little bit of the produce protector on to keep them from browning. The product will help keep your pears fresher for up to 8 hours.[9]
- The ingredients in Ball Fruit-Fresh Produce Protector are Dextrose, Ascorbic Acid (Vitamin C), Citric Acid, and Silicon Dioxide.
-
2Mix 2 tsp (8.4 g) with 3 tablespoons (44 mL) of water for 4 cups (512 g) of pears. If you have a lot of pear slices, mix your Produce Protector with water. Put your pear slices in a bowl with the mixture, then let them soak for 1 to 2 minutes.[10]
- You can use Produce Protector before freezing, refrigerating, or canning.
-
3Add 1 tsp (4 g) to every 1 c (240 mL) of liquid when canning. To stop your pears from turning brown while in storage, skip soaking them in citric acid and just add some Produce Protector to the mix. It won’t add any flavor, and it will help your pears maintain their color until you’re ready to eat them.[11]
When are pears ripe?
-
1If the neck of the pear is squishy, it’s probably ripe. Hold a pear in your hand and apply gentle pressure on the base of the stem with your thumb. If your thumb makes an indent, the pear is ready![12]
- If your pear isn’t ripe, put it in a paper bag and leave it on your counter for 1 to 2 days to speed up the ripening process.
-
2Most pears are ready to harvest in October. However, this can vary from type to type. Some pears can be picked as early as August, while others need to stay on the tree until November or December.[13]
- It also depends on the weather. If it’s warmer out, the pears will be ready sooner; if it’s colder, they might need a few more weeks.
How do you store pears for the winter?
-
1Stack whole pears into crates or wooden boxes. Try to find a container that will allow air in instead of keeping it out. Put the pears in the container in a single layer, trying not to let them touch each other.[14]
- Only store blemish-free, medium-sized fruits. Anything else could ripen too quickly or go bad.
- If you've already sliced your pears, freeze them or they won't last more than a few days
-
2Keep the pears between 37 and 45 °F (3 and 7 °C). You can put your pears in your cellar or in your garage. Make sure the air isn’t super humid, and watch out for pests and insects that might eat your fruit.[15]
- Pears are more tolerant to cold temperatures than other fruits, so you can keep them in the salad drawer of your fridge if you need to.
-
3Store the pears for 2 weeks to 3 months. The timeline varies greatly depending on where you’re keeping your pears and how fast they ripen. Fruit can get ripe super quickly, so check on your pears every day to make sure they haven’t gone bad.[16]
- To check if a pear is ripe, press gently on the stem end. If it’s slightly soft, then it’s ready to eat.


References
- ↑ https://usapears.org/pear-ripening-and-handling/
- ↑ https://www.stilltasty.com/fooditems/index/17933
- ↑ https://www.stilltasty.com/fooditems/index/17933
- ↑ https://www.eatbydate.com/fruits/fresh/pears/
- ↑ https://foodsafety.wisc.edu/assets/preservation/B3278_Freeze_FruitVege.pdf
- ↑ https://www.stilltasty.com/fooditems/index/17933
- ↑ https://foodsafety.wisc.edu/assets/preservation/B0430_Can_Fruits_08.pdf
- ↑ https://foodsafety.wisc.edu/assets/preservation/B0430_Can_Fruits_08.pdf
- ↑ https://www.allamericancanner.com/Opcb24100.htm
- ↑ https://www.allamericancanner.com/Opcb24100.htm
- ↑ https://www.allamericancanner.com/Opcb24100.htm
- ↑ https://usapears.org/pear-ripening-and-handling/
- ↑ https://www.theorchardproject.org.uk/guides_and_advice/when-should-you-pick-apples-pears/
- ↑ https://www.rhs.org.uk/advice/profile?pid=595
- ↑ https://www.rhs.org.uk/advice/profile?pid=595
- ↑ https://www.rhs.org.uk/advice/profile?pid=595
- ↑ https://foodsguy.com/what-to-do-with-overripe-pears/
- ↑ https://www.eatbydate.com/fruits/fresh/pears/
About This Article