This article was co-authored by wikiHow Staff. Our trained team of editors and researchers validate articles for accuracy and comprehensiveness. wikiHow's Content Management Team carefully monitors the work from our editorial staff to ensure that each article is backed by trusted research and meets our high quality standards.
This article has been viewed 12,962 times.
Learn more...
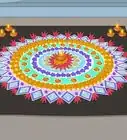
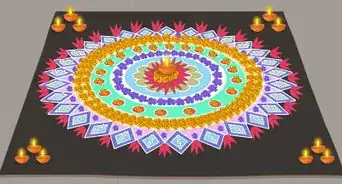
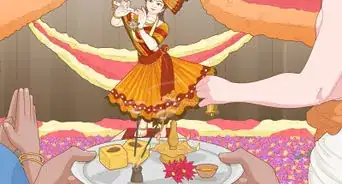
Diwali is the Hindu festival of lights and it is widely celebrated across the world for 5 days during either October or November. Part of the celebration includes making special cards to give to your family and friends, wishing them good fortune and blessings over the coming year. Make the most of your creativity and imagination to make Diwali cards out of scrap craft paper or using Diwali-themed stickers. Alternatively, try your hand at iris folding to make an intricate Diwali card.
Steps
Making a Card with Scrap Paper
-
1Fold the cardstock in half crosswise to make a card. Take each corner of the short edge of the cardstock and line it up with the opposite corner. Firmly press the cardstock down along the fold, so that the cardstock is folded in half crosswise.[1]
- Check that the edges line up once you have folded your card. If the edges overlap or are mismatched, simply create a new crease and fold the card again.
-
2Glue a rectangle of scrap paper to the front of the card. Use scissors to cut a rectangle that is slightly smaller than the front of the card out of a different color of cardstock or craft paper. Use a glue stick to attach this to the front of the card to create a border.[2]Advertisement
-
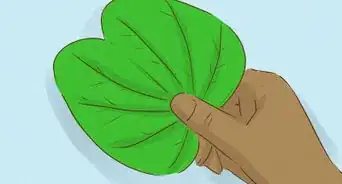
3Cut 3 diyas out of scrap paper and glue these onto the card. Diyas are small, rounded candles that are used during Diwali. You can draw the outline of each diya onto the scrap paper first if you like. Arrange each diya on the card, making sure that there will be enough room for the flame at the top, and then use a glue stick to glue them down.[3]
- Try to make your Diwali card as bright and colorful as possible. Look for scrap paper that has bright colors, pretty patterns, or interesting textures.
- You don’t have to use the same scrap paper for each diya or flame.
-
4Cut 3 flames out of scrap paper and glue 1 above each diya. Use yellow, orange, or red scrap paper to create the flames. Glue each flame so that the base rests on a diya.[4]
-
5Add glitter or sequins to embellish your card. Draw simple dots or an edge around the front of your card using craft glue. Sprinkle glitter over the glue before it dries. Alternatively, add small dots of craft glue on the background of your card. Firmly push a sequin or gem onto each spot of glue.[5]


Making a Card with Diwali Stickers
-
1Fold the cardstock into a card. Use a rectangular piece of cardstock in the color and size that you prefer. Bring the corners of the cardstock together crosswise to fold it into the shape of the card.[6]
-
2Decorate the front of the card using Diwali-themed stickers. Get creative with the stickers and decide how you want to arrange them before you stick them on. Add 1 large sticker to the center of the front of the card or use several smaller stickers to decorate the card.[7]
- Diwali-themed stickers include diyas, candles, fireworks, and pictures of Hindu deities. Popular choices include Goddess Lakshmi, the Goddess of wealth, and Lord Ganesha, the God of intelligence.[8]
- Alternatively, you can draw Diwali-themed pictures rather than use stickers. You can also use a combination of both stickers and drawings on the card.
-
3Create a ribbon or lace edge around the card. Once you have placed the stickers, create a border around the front of the card. Find some ribbon or lace and cut it to size. Then use craft glue to stick it to the card.[9]
-
4Add glitter to the card to make it stand out. Use glitter glue to add more decorations to your card. You can cover the background of the front of the card with small dots of glitter glue or use the glitter glue to draw a pattern on the card.[10]
- If you don’t have glitter glue, use craft glue instead and sprinkle glitter over it.[11]


Making a Card with Iris Folding
-
1Fold a sheet of A3 cardstock in half. The size of A3 paper is 11.7 in × 16.5 in (30 cm × 42 cm). Bring each corner of the short edge over to the opposite corner and press down on the cardstock to create a fold.[12]
-
2Draw the outline of a lantern on the front of the card and cut it out. Draw a hexagon that is approximately 3 in (7.6 cm) wide in the center of the card with a pencil. Then draw a thin rectangle above and below the hexagon to create a lantern shape. Make a gentle fold within each shape and use scissors to cut the shapes out, leaving only an outline of each shape.[13]
-
3Cut out strips of colored paper in 3 different colors. Pick the colors that you want to use for your lantern. Make sure that each strip measures approximately 1 in × 5 in (2.5 cm × 12.7 cm) and that you have at least 15 strips overall so that there is enough paper to cover the lantern shape.[14]
- The exact number of paper strips that you will need depends on the size of the lantern that you cut out from the card.
- Use a ruler to measure out the strips.
-
4Fold each strip in half. Bring the opposite corners of each strip of colored paper together. Fold the strip lengthwise to create long, thin rectangular shapes.[15]
-
5Attach the strips to the inside of the card so that they cover the lantern outline. Arrange the first color of strips so that they cover 1/3 of the lantern. Then arrange the second color of folded strips in a different direction so that another third of the lantern is covered. Use the third color of the strips to cover the remaining parts of the lantern in a third direction.[16]
- Use glue to attach the strips to the inside.
- The lantern will look as though it is made from a weaving pattern. This is called iris folding.
-
6Use a piece of cardstock to cover the iris folding on the inside of the card. Cut a piece of cardstock to size. Use glue to attach it behind the lantern, sticking to the inside of the card.[17]
- Keep the card open while the glue dries to avoid gluing your card together.
- This means that you will only be able to see the iris folding from the outside of the card, as the inside will be covered.
-
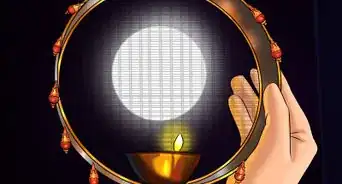
7Draw tassels on the lantern using glitter glue. Use your favorite glitter glue to add wavy lines extending from the bottom rectangle of the lantern. You can also add glitter glue dots stemming from the lantern to create strings of lights.[18]


Things You’ll Need
Making a Card with Scrap Paper
- Cardstock
- Scrap or craft paper
- Scissors
- Glue stick
- Glitter glue or sequins
Making a Card with Diwali Stickers
- Cardstock
- Diwali-themed stickers
- Ribbon or lace
- Craft glue
- Glitter glue
Making a Card with Iris Folding
- A3 cardstock
- Pencil
- Scissors
- Colored paper
- Ruler
- Glue
- Glitter glue


References
- ↑ https://www.activityvillage.co.uk/diya-collage-card
- ↑ https://www.activityvillage.co.uk/diya-collage-card
- ↑ https://www.activityvillage.co.uk/diya-collage-card
- ↑ https://www.activityvillage.co.uk/diya-collage-card
- ↑ http://posts.anamikamishra.com/blog/handmade-diwali-greeting-card-ideas-with-photos//
- ↑ https://festivals.awesomeji.com/diwali/cards/index.html
- ↑ https://festivals.awesomeji.com/diwali/cards/index.html
- ↑ https://www.boldsky.com/yoga-spirituality/faith-mysticism/2013/why-lakshmi-ganesh-worshipped-together-035996.html
- ↑ https://festivals.awesomeji.com/diwali/cards/index.html
- ↑ https://festivals.awesomeji.com/diwali/cards/index.html
- ↑ http://posts.anamikamishra.com/blog/handmade-diwali-greeting-card-ideas-with-photos//
- ↑ https://www.hobbyideas.in/diy/view/how-to-make-lantern-diwali-greeting-card-with-irish-fold
- ↑ https://www.hobbyideas.in/diy/view/how-to-make-lantern-diwali-greeting-card-with-irish-fold
- ↑ https://www.hobbyideas.in/diy/view/how-to-make-lantern-diwali-greeting-card-with-irish-fold
- ↑ https://www.hobbyideas.in/diy/view/how-to-make-lantern-diwali-greeting-card-with-irish-fold
- ↑ https://www.hobbyideas.in/diy/view/how-to-make-lantern-diwali-greeting-card-with-irish-fold
- ↑ https://www.hobbyideas.in/diy/view/how-to-make-lantern-diwali-greeting-card-with-irish-fold
- ↑ https://www.hobbyideas.in/diy/view/how-to-make-lantern-diwali-greeting-card-with-irish-fold
- ↑ http://thecraftyangels.com/handmade-diwali-card/
About This Article

To make Diwali cards, start by folding a piece of cardstock crosswise and gluing a rectangular piece of scrap paper to the front. Next, cut 3 small, round candles, known as diyas, out of a brightly-colored or patterned piece of scrap paper and glue them to the card. Once the diyas are in place, cut out 3 flames from orange, red, or yellow paper and glue them above the diyas. If you want to make your card even brighter, spread some glue around the edges and sprinkle on some glitter. For tips on how to use Diwali stickers on your card, keep reading!