X
wikiHow is a “wiki,” similar to Wikipedia, which means that many of our articles are co-written by multiple authors. To create this article, 20 people, some anonymous, worked to edit and improve it over time.
The wikiHow Culinary Team also followed the article's instructions and verified that they work.
This article has been viewed 80,659 times.
Learn more...
Is your family bored of regular old pancakes? Looking for a fun, easy recipe that children can help with? Try these pancakes in the shape of everyone's favorite cartoon mouse! This recipe is simple, easy, and takes only a few minutes — perfect for breakfast after sleepovers.
Ingredients
- Pancake batter — Click for recipe; any standard pancake batter from mix or scratch will do.
- Butter
- Your preferred spread (syrup, jam, honey, peanut butter, etc.)
- Chocolate chips
- Blueberries
- Strawberries; halved
- Chocolate sauce
- Turkey baster
Steps
Part 1
Part 1 of 2:
Basic Pancakes
-
1Whip up some pancake batter. You can make Mickey Mouse pancakes from basically any normal pancake batter. It doesn't matter whether you make it from scratch or use a mix (Bisquick, Krusteaz, etc.)
- For a few good pancake recipes, visit our guide to making pancake batter. This page includes a recipe for gluten-free pancakes.
-
2Heat butter in a wide pan or skillet. Take a generous helping of butter (about one or two tablespoons should be enough) and place it in the pan. Warm the pan over medium heat on the stove. The butter should quickly melt. Spread it around the pan so that the bottom is evenly-coated.
- Wider pans are best for this job — remember that you'll have to have enough room for Mickey's giant ears.
- If you don't want to use butter, try margarine or a neutral-flavored cooking oil (like vegetable or canola oil).[1]
Advertisement -
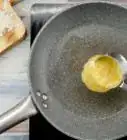
3Spoon a pancake onto the pan. When the pan is hot enough that a drop of water will sizzle and "dance" as soon as it touches the pan, you're ready to cook. Gather a little batter in a cup or spoon and pour it onto the pan. About 1/4 cup of batter will be enough for a medium-sized pancake.[2] Pour the batter in a single pile and let it gradually widen into a flat circle.
- Try to leave room on the pan on one side of the pancake for Mickey's ears.
-
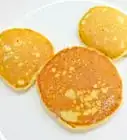
4Spoon two more pancakes (touching the bigger one) onto the pan. Drop two more pancakes about an inch away from the head and let them spread out so that they touch the first one. These are Mickey Mouse's famous ears! You want them to be on the same side of the head, but with an inch or two of space between them. They should touch the head, but they shouldn't touch each other.
- The ears should be a little smaller than the first one. Mickey has big ears, but they aren't bigger than his head.
-
5Check to see if the first side is done. Cook until bubbles start to form, pop, and stay open on the surface of the batter.[3] Slip a stiff wood or metal spatula under the edge of the pancake and take a peek at the underside. If it looks golden-brown, you're ready to flip. If it's still light-colored, give it an extra minute or two.
- The thicker your pancake is, the longer it will take to reach this "flippable" point.
-
6Flip carefully. Slide the spatula under the center of the head. If your spatula is wide enough, try to support the ears as well. In a single, confident motion of the wrist, lift the pancake, turn it, and drop it face-down in the pan again.
- This is the only hard part of making a Mickey Mouse pancake. The ears make the pancake a little awkward to flip all at once — it's easy to tear one off accidentally. If you're having trouble, WikiHow has a help article on this topic as well.
- If you lose an ear when you flip, let it keep cooking on its own. Just before you serve the pancake, move it next to the head again. Drop a small amount of fresh batter between the two and let it cook for an extra minute or so. This can work like "glue" to stick the ear back to the head.
-
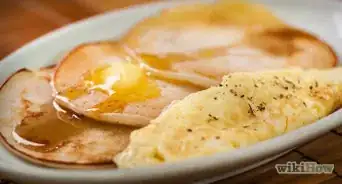
7Serve hot with your favorite topping. After a few more minutes, use the same spatula trick to check for rich golden-brown color on the underside. If you see it, your pancake is most likely done. Carefully transfer it to a plate, taking care with the floppy ears. Garnish with syrup or whatever topping you please and enjoy!
- If you're worried about the pancakes being under-cooked, make a small cut in the thickest part to look for thick, uncooked batter. Serve the pancake with this side down if you think a child will complain about the cut in Mickey's face.
-
8Add more grease as needed for additional pancakes. Each pancake you make will soak up some of the butter (or oil, etc.) you're using to grease your pan. If your pan looks like it's running dry, just give it a quick wipe with a paper towel then add another helping of grease.
- Don't neglect this — if you don't grease your pan properly, your pancakes will stick to the pan. This can make them difficult to flip (and can burn them).
Advertisement
Part 2
Part 2 of 2:
Ideas for Extra Details
-
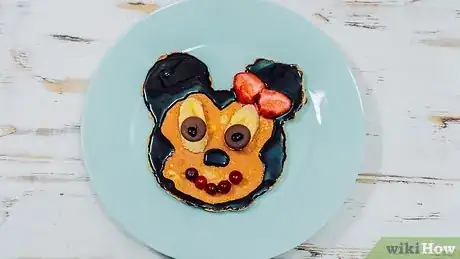
1Make a smiley face from chocolate chips or berries. Looking to give your guest or child a sweet surprise? One easy way to do this is to add delicious extras to the batter to create a face for Mickey. For best results, you'll want something sweet and dark-colored (like chocolate or blueberries) so that you can see (and taste) the smile!
- Add the mouth and eyes on top of the pancake as soon as you've spooned in all the batter. This will give them time to sink into the batter so they're less likely to fall out.
-
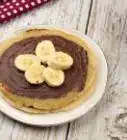
2Use banana slices for detailed eyes. To recreate Mickey's cartoon-style eyes, you'll just need a banana and a few berries or chocolate chips. For this, you'll want to wait for the pancake to cook completely on both sides. When you serve the pancake, cut two thin, oval-shaped pieces of banana (cut diagonally through the banana to get the oval shape). Place these two slices in the center of the head to make the whites of Mickey's eyes. Put a chocolate chip or berry in the bottom corner of each eye to make Mickey's pupils.
- If you want Mickey to have a mouth too, add a smile with the chocolate chips or berries before you flip the pancake the first time.
-
3Use strawberry halves to make a bow for Minnie Mouse. Minnie Mouse's face is very similar to Mickey's, but she almost always wears a red or pink bow. To make this bow, chop a strawberry in half. When you serve the pancake, put the two halves at the top of Minnie's head so that the skinny ends touch to form the bow.
-
4Use chocolate sauce to "paint" the dark parts of Mickey's face. Mickey's ears and "hair" are black. To recreate this, you can use chocolate sauce (or another dark-colored topping) to fill in these parts of the pancake. When the pancake is done, put a small amount of sauce on each ear and spread it around with the back of a spoon to color the ears. Then, color in the edges of the top half of Mickey's head with the sauce to make his "hairline."
- If you want your pancakes to be as accurate as possible, give Mickey a widow's peak. In other words, make his hair come together in a sharp point at the top of his forehead. You can look at any picture of Mickey or Minnie Mouse to see what this looks like.
-
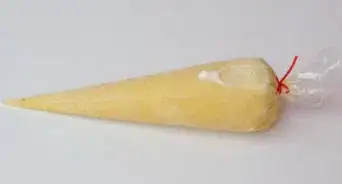
5"Layer" batter to create shaded sections. This trick is a little challenging, but it's great for making amazing-looking pancakes. You'll need a turkey baster or a pastry bag so that you can dispense small, detailed amounts of batter. The basic idea is to lay down batter for the darkest parts of Mickey's face first, then lay down batter for the lighter parts. The batter you add first will cook the longest, making it darker than the rest. See below for step-by-step directions:
- Put a little pancake batter in a turkey baster or pastry bag.
- Draw Mickey's mouth, nose, hairline, and eyes in the pan. For the eyes, don't fill in the "whites" yet — just draw the outlines and pupils. Add two scoops of batter where his ears will be. These should touch his hairline.
- Let these cook on their own for a minute or two until they get a light golden-brown color.
- Add a scoop of batter right in the center of the facial features. This will fill in Mickey's face and the whites of his eyes. It's OK if this batter spills over what you've already laid down. Use a spoon or spatula to get a circular shape for the face.
- When the second helping of batter turns golden-brown, carefully flip the pancake over and cook the backside as normal. You should see Mickey's features highlighted in the darker parts of the pancake.
-
6Finished.
Advertisement
Warnings
- When flipping the pancake, ensure you flip carefully. The pancake is big and flipping too quickly will cause the 'ears' to break off.⧼thumbs_response⧽
Advertisement
References
About This Article
Advertisement
