This article was co-authored by wikiHow Staff. Our trained team of editors and researchers validate articles for accuracy and comprehensiveness. wikiHow's Content Management Team carefully monitors the work from our editorial staff to ensure that each article is backed by trusted research and meets our high quality standards.
The wikiHow Video Team also followed the article's instructions and verified that they work.
This article has been viewed 161,268 times.
Learn more...
You can get a jump start on the growing season by planting seeds indoors, where it is warm and not subject to freezing temperatures. Biodegradable pots are a great way to start seedlings, because you can plant the entire thing in the soil when the time comes to plant the seeds outside. Store-bought pots can get expensive, however. Luckily, it is cheaper (and more environmentally friendly!) to make pots at home using newspaper.
Steps
Making Round Pots
-
1Cut a strip from a sheet of newspaper. How wide you cut the strip depends on how tall you want the pot to be. You need to cut the strip wide enough to include the height of the finished pot and half of the jar's diameter. You may also want to add an additional ½ to 1 inch (1.27 to 2.54 centimeters) for the rim.[1]
- You will need one strip for each pot.
-
2Wrap the strip around a jar. Use a small jar (ie: spice jar) for small pots, and a large jar or tin can for bigger pots. You can also use a glass or another cylindrical object instead.[2]Advertisement
-
3Slide the paper down the jar partway. If your jar has an opening on one end, make sure that you are sliding towards the bottom. You need to slide the paper far enough down so that you can fold the edges down and cover the base of the jar.[3]
-
4Fold the paper down onto the base of the jar. Fold the top and bottom edges down first, creating two triangular flaps. Next, fold the two flaps down. If you want to, you can secure them with a drop of glue or a piece of tape.[4]
- If you are using tape, make sure it is paper-based (ie: masking tape) or biodegradable.
-
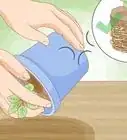
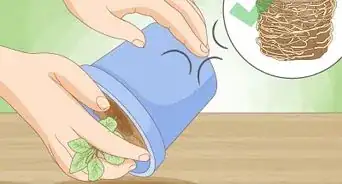
5Gently slide the paper off of the jar. If you decided not to tape or glue the flaps down, you will need to be extra-careful so that the pot does not fall apart. It may be easier to pinch and pull it by the flaps.[5]
-
6Fold the top edge down into the pot. This will create a reverse brim that will help hold the pot together. The smaller the pot is, the smaller the brim should be. A ½ inch (1.27 centimeters) brim will work best for small pots, while a 1 inch (2.54 centimeters) brim will work better for larger pots.[6]
- At this point, you are done. You can make more pots, or you can make just one pot and move onto the next step.
-
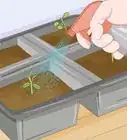
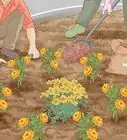
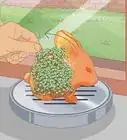
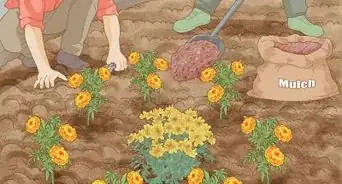
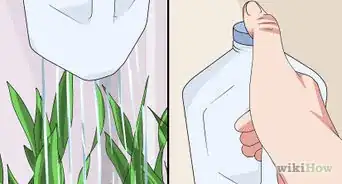
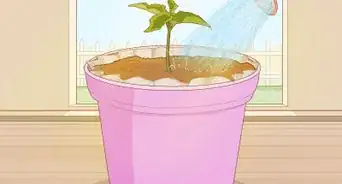
7Use the pot(s). Fill the pot(s) with damp soil. Plant the seeds according to the depth indicated on the package. When it comes time to transplanting the seedlings, put the entire pot into the soil. The newspaper will decompose in the soil as the seedling continues to grow.


Making a Square Pot
-
1Cut a 22 by 11-inch (55.88 by 27.94-centimeter) sheet of newspaper. In most cases, all you have to do is tear a full sheet of newspaper in half. You can also use a different size of newspaper; just make sure that it is twice a long as it is wide.[7]
- Avoid using the glossy ads often found in newspapers. They will not decompose as quickly as regular newspaper.
-
2Fold the paper in half widthwise to make a square. Your newspaper will likely already have a crease in the middle; you can use this crease as a guide. For a neater finish, run your fingernail along the crease to sharpen it.[8]
-
3Make a vertical crease down the middle of the paper. Fold the paper in half lengthwise to make a vertical crease, then unfold it. You should have a crease running down the middle, from the top, folded edge to the bottom, loose edge.[9]
-
4Bring the corners on the top edge towards the crease you made. Make sure that you are folding the corners that are on the folded edge, not the loose edge. Fold the corners towards the vertical guideline running down the center of the page.[10]
- You'll have something that looks like a house.
-
5Fold the top sheet from the bottom edge twice. The bottom edge will have two layers. Take the bottom layer, and fold it upwards so that it touches the bottom edge of the folded corners. Fold it up again so that the corners are nestled inside the crease. Run your fingernail along the folds to sharpen them.[11]
- Leave the second layer alone for now.
-
6Flip the paper over and bring the side edges to the middle. Turn the paper over so that you can see the back; keep the triangle at the top pointing upwards. Fold the left and right side edges towards the middle, vertical guideline from before.[12]
- The side edges will create a pocket for the next step.
-
7Fold the bottom twice, then tuck the top into the pocket. Fold the bottom edge so that it touches the bottom of the "pocket." Fold it again so that it touches the top edge of the pocket. Unfold it to reveal two segments, then tuck the bottom segment into the pocket.[13]
- You will have something that looks like an envelop.
-
8Make horizontal and diagonal creases in the triangular tip. Fold the triangular tip down until it touches the pocket's folded edge, then unfold it. Next, fold the left, slanted edge down until it touches pocket's folded edge, then unfold it. Repeat for the right slanted edge.[14]
- Flip the paper over and repeat this step for the back.
-
9Open up the pot. Use your fingers to open up the packet into a box shape. Next, use your fingers to shape the bottom, and fold the flap don; use the creases you made from before. Pinch the folds between your fingers to make them sharper.[15]
-
10Use the seed pot. Fill it with damp soil, then plant the seed according to the instructions on the packet. When the time comes to plant the seedling outside, you can put the entire pot into the soil. If you want to, you can tear the bottom out as well; this will help the roots reach the ground soil faster.


Making Paper Mache Seed Pots
-
1Cut or tear your newspaper into strips. You can do this by hand or with a pair of scissors. You can even use a paper shredder to speed up the process. You will be making the pots in a 12-cup muffin pan, so plan on using about 10 sheets of newspaper.[16]
- Exclude any glossy ads. They will not "melt" properly or degrade fast enough.[17]
- Speed things up with a paper shredder.
-
2Soak the newspaper in warm water for 2 to 3 days. Cover the newspaper with 1½ inches (3.81 centimeters) of warm water. How much water you end up using depends on the size of the container the newspaper is in, and how much newspaper you are using. Allow the newspaper to sit in the water for 2 to 3 days.[18]
- The paper will soak up the water and turn somewhat slimy; this is fine.
-
3Blend the newspaper. A stick blender will work the best, but you can use a regular one as well. Keep blending until the paper turns soupy, like oatmeal. If the paper doesn't blend easily, add more water. The amount does not matter; you need just enough to loosen the paper up.[19]
-
4Strain the excess moisture from the pulp. Set a colander into a bowl or bucket, then line it with gauze or muslin. Plop the newspaper pulp into the lined colander, then gather up the edges of the fabric. Squeeze the bundled up pulp until all the water drains from it.[20]
- You still want the pulp to be somewhat wet. If you press your finger into it, and the well fills with water, you've strained enough.
- Alternatively, you can put the pulp into a fine, mesh strainer, then press it against the mesh until the excess water drains out.[21]
-
5Knead some flour into it. Toss the pulp into a large mixing bowl, then add a few tablespoons of flour. Knead the flour into the pulp until it starts to resemble clay.[22]
-
6Press the pulp into a muffin pan. Roll some pulp into a small ball, then drop it into a cup in a muffin pan. Use your fingers to create a well in the middle of the pulp, then press it against the sides of the muffin cup. Do this step until you have used up all your pulp, or until all of the muffin holes are filled.[23]
- Try to make it the same thickness all around as much as possible.
-
7Allow the pots to dry. Leave them in a warm, dry, sunny spot for 1 to 2 days. If you are in a hurry, you can dry them in an oven preheated to 220°F (105°C) for about 30 to 60 minutes.[24]
- Keep an eye on the pot if you are baking them. Don't let them burn.
- How long it takes for the pots to dry depends on how thick you made them. The thicker they are, the longer they will take.
-
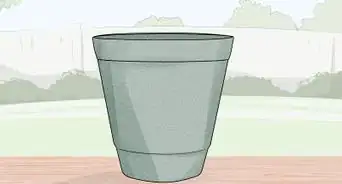
8Use the pots. Once the pots are dry, take them out of the muffin tin; if you baked them, let them cool off first. Fill the pots with damp soil, then plant the seeds according to the depth on the packet. When the time comes to transfer the seeds into the garden, you can plant the entire pot into the soil.


Community Q&A
-
QuestionWhich flour should be used?
 Susan ButlerCommunity AnswerIt is best to use plain flour when making newspaper seedling pots by baking them.
 -
QuestionHow long will a rolled newspaper last? Also, can coffee filters or cupcake liners be used?
 T. ChinsenTop AnswererAs long as the rolled newspaper does not get soaking wet, it will last the same as any seedling pot. Coffee filters are extremely porous and flexible, and would need added support material. Cupcake liners are not porous and do not soak up water. It is not the best choice for for a seedling pot, as the seedling can drown in water if too much is put in the liner.
 -
QuestionCan I use these paper pots to start begonia bulbs indoors?T. ChinsenTop AnswererThe paper pot will need to be deep enough to put the bulb in and be covered with soil. Most bulbs need to be started in at 4" deep hole with soil covering them when they are planted outdoors.
Things You'll Need
Making Round Pots
- Newspaper
- Scissors
- Jar
- Tape or glue (optional)
- Soil
- Seeds
Making a Square Pot
- Newspaper
- Soil
- Seeds
Making Paper Mache Seed Pots
- Newspaper
- Bowl or bucket
- Warm water
- Colander
- Gauze or muslin
- Handheld blender (or regular blender)
- Flour
- 12-cup muffin pan
- Oven (optional)
- Soil
- Seeds


References
- ↑ https://www.youtube.com/watch?v=QqNsmkO27Eg
- ↑ https://www.youtube.com/watch?v=pSJab0Re2fA
- ↑ https://www.youtube.com/watch?v=pSJab0Re2fA
- ↑ https://www.youtube.com/watch?v=pSJab0Re2fA
- ↑ https://www.youtube.com/watch?v=pSJab0Re2fA
- ↑ https://www.youtube.com/watch?v=pSJab0Re2fA
- ↑ https://www.youtube.com/watch?v=UFlUNv5590c
- ↑ https://www.youtube.com/watch?v=UFlUNv5590c
- ↑ https://www.youtube.com/watch?v=UFlUNv5590c
- ↑ https://www.youtube.com/watch?v=UFlUNv5590c
- ↑ https://www.youtube.com/watch?v=2ou-3ZBI_ac
- ↑ https://www.youtube.com/watch?v=2ou-3ZBI_ac
- ↑ https://www.youtube.com/watch?v=2ou-3ZBI_ac
- ↑ https://www.youtube.com/watch?v=2ou-3ZBI_ac
- ↑ https://www.youtube.com/watch?v=2ou-3ZBI_ac
- ↑ https://www.youtube.com/watch?v=5-TH4AtOGG8
- ↑ http://puretraditions.com/paper-mache-seedling-pots/
- ↑ https://www.youtube.com/watch?v=5-TH4AtOGG8
- ↑ https://www.youtube.com/watch?v=5-TH4AtOGG8
- ↑ https://www.youtube.com/watch?v=5-TH4AtOGG8
- ↑ http://puretraditions.com/paper-mache-seedling-pots/
- ↑ https://www.youtube.com/watch?v=5-TH4AtOGG8
- ↑ https://www.youtube.com/watch?v=5-TH4AtOGG8
- ↑ http://puretraditions.com/paper-mache-seedling-pots/
About This Article