This article was co-authored by Amy Guerrero. Amy Guerrero is an Arts and Crafts Specialist and the Owner of Sunshine Craft Co., a crafting studio based in Phoenix, Arizona. Amy specializes in macrame, DIY crafting, and teaching fiber arts. She offers monthly in-person and online workshops along with having developed a range of DIY craft kits for at-home projects. Amy holds a BS in Industrial Design from Philadelphia University. She worked as a graphic designer before starting her own business. Sunshine Craft Co. is a creative hub that offers a wide range of workshops, tools, and resources for any craft project to inspire creativity and community engagement.
There are 8 references cited in this article, which can be found at the bottom of the page.
This article has been viewed 34,648 times.
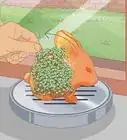
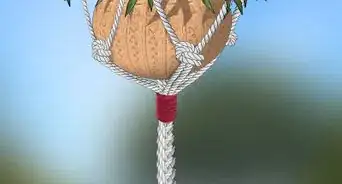
Hanging plants are a great decoration for any room to create a cozy, boho vibe. But let's be real, hanging planters are expensive. Luckily, you don’t need to buy one! Macrame plant hangers are super easy to make yourself with just a few dollars and some rope. In a few minutes–and with a few simple knots–you’ll have your very own DIY macrame plant hangers.
Steps


Expert Q&A
-
QuestionHow do you hang plants off the wall?
 Amy GuerreroAmy Guerrero is an Arts and Crafts Specialist and the Owner of Sunshine Craft Co., a crafting studio based in Phoenix, Arizona. Amy specializes in macrame, DIY crafting, and teaching fiber arts. She offers monthly in-person and online workshops along with having developed a range of DIY craft kits for at-home projects. Amy holds a BS in Industrial Design from Philadelphia University. She worked as a graphic designer before starting her own business. Sunshine Craft Co. is a creative hub that offers a wide range of workshops, tools, and resources for any craft project to inspire creativity and community engagement.
Arts & Crafts SpecialistUse a shelf bracket! Using a shelf bracket allows you to hang your plant hanger away from your wall without having to hang it from the ceiling.
Things You’ll Need
- Rope or twine
- Scissors
- Nail
- Carabiner
- Ruler or tape measure


Expert Interview
Thanks for reading our article! If you'd like to learn more about gardening, check out our in-depth interview with Amy Guerrero.
References
- ↑ https://gardentherapy.ca/modern-macrame-plant-hangers/
- ↑ https://gardentherapy.ca/modern-macrame-plant-hangers/
- ↑ https://www.hgtv.com/design/make-and-celebrate/handmade/how-to-make-an-easy-macrame-plant-hanger
- ↑ https://www.hgtv.com/design/make-and-celebrate/handmade/how-to-make-an-easy-macrame-plant-hanger
- ↑ https://youtu.be/6OLUNpryJs4?t=18
- ↑ https://www.hgtv.com/design/make-and-celebrate/handmade/how-to-make-an-easy-macrame-plant-hanger
- ↑ https://gardentherapy.ca/modern-macrame-plant-hangers/
- ↑ https://youtu.be/6OLUNpryJs4?t=56
- ↑ https://gardentherapy.ca/modern-macrame-plant-hangers/
- ↑ https://gardentherapy.ca/modern-macrame-plant-hangers/
- ↑ https://gardentherapy.ca/modern-macrame-plant-hangers/
- ↑ https://youtu.be/6OLUNpryJs4?t=78
- ↑ https://gardentherapy.ca/modern-macrame-plant-hangers/
- ↑ https://youtu.be/7kmPmvBlw9w?t=257
- ↑ https://www.hgtv.com/design/make-and-celebrate/handmade/how-to-make-an-easy-macrame-plant-hanger
- ↑ https://youtu.be/7kmPmvBlw9w?t=94
- ↑ https://www.hgtv.com/design/make-and-celebrate/handmade/how-to-make-an-easy-macrame-plant-hanger
- ↑ https://gardentherapy.ca/modern-macrame-plant-hangers/
- ↑ https://www.hgtv.com/design/make-and-celebrate/handmade/how-to-make-an-easy-macrame-plant-hanger
- ↑ https://youtu.be/7kmPmvBlw9w?t=111
About This Article