This article was co-authored by wikiHow Staff. Our trained team of editors and researchers validate articles for accuracy and comprehensiveness. wikiHow's Content Management Team carefully monitors the work from our editorial staff to ensure that each article is backed by trusted research and meets our high quality standards.
This article has been viewed 39,576 times.
Learn more...
Making your own furniture using willow wood is both fun, cheap, and easy. Plus you get to enjoy the satisfaction of having made something with your own two hands. Making willow furniture is simple once you have the right materials and know what it is that you want to make.
Steps
Gathering the Wood
-
1Collect green willow branches in the Spring. Gather your willow branches when the tree’s buds start to swell on the branches and the small, green leaf tips start to appear. If you cut your branches before then, the wood will not be as malleable to use to make furniture. Willows love water, so look near lakes and ponds, riverbanks, and along road rights-of-way for wood to harvest.
- If you’re not gathering willow from your own property, be sure to ask permission before you cut any branches.
- You may need a permit to cut wood from the side of a road or highway, but if you contact your local highway department or local government and ask permission, they may allow you to trim a tree. After all, it means less work for them!
-
2Use pruning shears to cut branches 3⁄4 in (1.9 cm) in diameter. For thinner branches and switches that will be used to fill in frames and aren’t intended for structural support, take a pair of pruning shears and clip off long lengths of branches. You can trim the branches into smaller pieces when you go to build your furniture. Shear the branches in 1 clipping motion to prevent the branch from cracking or splitting.
- You will need about 150 ft (46 m) of smaller branches to use for your furniture.
- Keep the thin branches pliable by putting the end you shear into a container of water.
Advertisement -
3Collect a bunch of small twigs to use as filler material. If you plan to make furniture that has gaps that you want to fill in or if you want to have a surface without gaps, like on a table, gather twigs and small branches that you can use. You can also gather thin switches that you can cut to size later.
-
4Saw branches 1.5–1.75 in (3.8–4.4 cm) in diameter with a carpenter’s saw. These larger pieces of wood will be used to create the structural supports and the frames. Place the saw's blade against the wood and cut in smooth back and forth motions until you cut through the branch. Cut large lengths of wood so you can cut them down to size later.
- Gather about 50 feet (15 m) of larger branches.
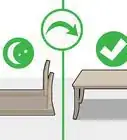
Tip: Larger branches will need to be cured before you use them to build furniture because the green or fresh wood will twist and shrink as it dries out. Stack the larger branches in a place where they are exposed to sun and wind and allow them to sit for 1 week before use.
-
5Trim the ends of the branches with a carving knife to prevent splitting. The ends of the wood you gathered may be uneven or jagged and can split as the wood begins to dry. To keep the ends from fraying, take a carving knife and trim the bark inward around the ends of the branches to make a smooth surface that won’t crack or peel.
- Trim carefully and always cut away from you with your knife.


Making a Chair
-
1Cut lengths of the larger diameter and smaller diameter branches to size. You will need 3 lengths of 14 in (36 cm) and 4 of 28 in (71 cm) from the large branches, and 14 lengths of 21 in (53 cm) small branches. The structural components of your willow chair will always have the same proportions: the rear legs and the two backrest supports will always be twice as long as the front legs, and the length of the braces, rungs, and other crosspieces will always be between the two.[1]
- Use cutting shears for the thinner pieces and a saw for the thicker ones.
- Trim any ends to prevent the branches from splitting.
-
2Place a 14 in (36 cm) and a 28 in (71 cm) branch on the ground. You want to start making your chair one half at a time so you can connect the two halves using your thinner branches as rungs later. Place them flat on the ground, parallel to one another, spaced out about 21 inches (53 cm) apart, or about the length of one of the smaller branches that will connect them.[2]
- Lay the longer branch at a slight angle if you want the rear of the chair to lean back further.
-
3Nail 2 of the 21 in (53 cm) branches across to connect them. Use 2 of your smaller branches to serve as rungs that will connect the front leg (shorter branch) to the rear leg (longer branch). The lower rung should be about 3 in (7.6 cm) from the end of the two legs and the top rung should be about 1.5 in (3.8 cm) from the top of the front or shorter leg. Use a hammer to nail a nail through both branches.[3]
- Use nails that are long enough to go through both branches but not so long that they’re sticking out so far that they could cut or scrape you.
- When you finish crafting one side, make another one that is complementary to the first one using the same procedure.
-
4Stand the 2 sides up side by side and nail crosspieces to connect them. When both halves are finished, stand them up next to each other about 18 in (46 cm) apart. Connect them by nailing 1 of the 21 in (53 cm) branches to the small space just above the the top rung at the front of the chair. Then nail 1 of the smaller branches just beneath the top rungs and 1 just above the bottom rung at the front of the frame for structural support.[4]
- Always nail branches to the legs of the chair to avoid the wood splitting.
Tip: Have another person help you hold up the two halves so you can nail them together.
-
5Attach crosspieces to the back of the frame. Nail 1 of the 21 in (53 cm) branches to the open side of the back of the frame atop the lower rungs and another atop the upper rungs. Nail into the legs of the chair. This will complete the bottom part of the frame and the structure should be able to stand on its own and be pretty solid.[5]
-
6Nail 2 of the 28 in (71 cm) branches to the back of the chair. Take 1 of the branches and nail it into the two back legs, halfway up the backrest. Then take the other large branch at nail it across the top of the two uprights. There should be about 5–6 inches (13–15 cm) of overhang, so center the branches when you attach them.[6]
-
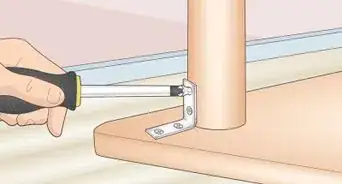
7Lay the frame on its side and add a brace to the front and back of the frame. To solidify the frame of the chair, you’ll need to add additional braces. After you lay the frame on one side, attach 1 small branch high on the inside of the front leg and 1 low on the inside of the rear leg. Be sure to nail them on the inside of the chair’s frame.[7]
- When you’re finished, lay the frame on its opposite side and repeat the process.
-
8Form the seat by nailing 2 short branches across the top and 1 on the backrest. Stand your chair back up and attach 2 of the short branches across the top of the seat parallel to one another and evenly spaced apart. Then take 1 small branch and nail it 3–4 in (7.6–10.2 cm) up on the seat back, between the two long back supports.[8]
- Make sure the nails aren’t sticking too far out so they don’t scratch or cut you when you sit in the chair.
-
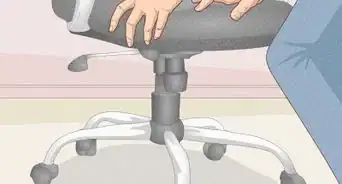
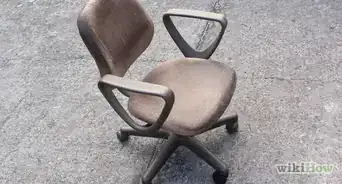
9Strap a seat cushion to the seat of the chair to make it more comfortable. Use an outdoor seating cushion that has straps on the corners to attach it to the chair. Secure it firmly and check to see that the chair is stable by wobbling it back and forth. Sit in the chair to test its strength. If you need to add any additional supports, you can do so.[9]
-
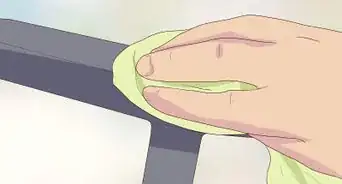
10Use linseed oil to create a finish and to seal the wood. Linseed oil is a great natural solution to use as a sealant to keep out moisture and prevent the wood from rotting. It also creates a nice, shiny finish on the wood. Use a cloth or brush to spread the oil evenly over the surface of the wood. You can use a spray bottle to apply to oil or apply it directly to the wood.


Crafting a Small Table
-
1Cut the large diameter branches to size. For the table, you’ll need 4 lengths of 18 in (46 cm), 4 of 14 in (36 cm), and 4 lengths of 12 in (30 cm) large diameter branches. Use branches that are about 1.5–1.75 in (3.8–4.4 cm) in diameter to form the frame of the table. Make sure you trim the edges of the branches to prevent them from splitting or fraying.[10]
- Use a carpenter’s saw to cut the thicker branches.
-
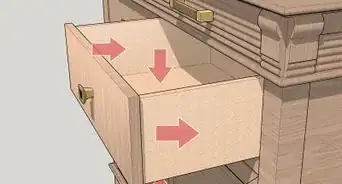
2Lay 2 of the 18 in (46 cm) branches parallel on the ground. To make your frame, start one side at a time. Lay 2 of the longer branches parallel to each other on the ground spaced out about 14 inches (36 cm) apart. Don’t worry about taking actual measurements for the spacing because the branches you already cut will fit into place.[11]
-
3Connect the branches with a 14 in (36 cm) and a 12 in (30 cm) branch. Nail a 14 in (36 cm) branch about 5 in (13 cm) from the end of the 2 larger branches by nailing through the outside of the longer branch. Then nail a 12 in (30 cm) branch about 3 inches (7.6 cm) from the top of the two longer branches.[12]
- Make sure you use nails long enough to penetrate through both of the branches.
- Then repeat the process again with the other 2 18 in (46 cm) branches.
-
4Attach the two sides together with the remaining branches. Use the 2 12 in (30 cm) branches to connect the sides at the top, nailing through the outside of the longer branches. Then connect them at the bottom using the 2 14 in (36 cm) branches to complete the frame and create a slightly wider base for the table.[13]
- Wobble the frame to make sure it is stable. If it is shaky, you can add additional nails to help stabilize it.
-
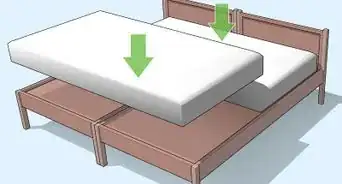
5Lay small branches across the top and bottom rungs to form a table top. Depending on how you want your table to look, space the small branches out across the top of the frame using the upper rungs and do the same on the bottom rungs. Leave little to no space between the small branches for a more smooth surface, or leave gaps for a more rustic look.[14]
Tip: Use pruning shears to trim the branches to size.
-
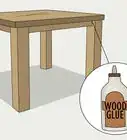
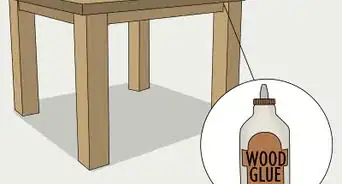
6Glue or nail the branches across the top and bottom rungs. With your smaller willow twigs and branches laid side by side to form a table top, either glue or nail them into place. If you nail them, be sure to use small nails that won’t poke through the bottom of the rung. Make sure the branches are firmly secured before you use your table.[15]
-
7Apply linseed oil to finish and seal the wood. Use a rag or a brush to apply linseed oil all over the willow table to prevent the wood from rotting and to create a finish that will look nice. You can use a spray bottle or apply the oil directly to the wood. Just be sure to apply an even coating over the entire surface.


Community Q&A
-
QuestionHow can I face cabinet doors with willow branches?
 Community AnswerAssuming they're thin, prepare the branches as you see fit (such as removing bark, if that's the finish you want or varnishing and so on), then nail them on with fine nails.
 -
QuestionDoes willow furniture need to be treated to keep bugs from getting in the wood?
 Community AnswerAll wooden furniture is a target for woodworms, so applying a treatment such as a varnish is advisable.
Things You’ll Need
- Willow branches of various sizes
- Tape measure
- Hammer
- Nails
- Pruning shears
- Carpenter’s saw
- Carving knife
- Linseed oil


References
- ↑ https://cutthewood.com/diy/wooden-chairs
- ↑ https://cutthewood.com/diy/wooden-chairs
- ↑ https://cutthewood.com/diy/wooden-chairs
- ↑ https://www.familyhandyman.com/woodworking/easy-outdoor-chairs-you-can-build/
- ↑ https://cutthewood.com/diy/wooden-chairs
- ↑ https://www.familyhandyman.com/woodworking/easy-outdoor-chairs-you-can-build/
- ↑ https://www.familyhandyman.com/woodworking/easy-outdoor-chairs-you-can-build/
- ↑ https://cutthewood.com/diy/wooden-chairs
- ↑ https://www.familyhandyman.com/diy-advice/ikea-hacks-add-ties-to-outdoor-furniture-cushions/
- ↑ https://boyslife.org/hobbies-projects/projects/133914/how-to-make-a-twig-table/
- ↑ https://boyslife.org/hobbies-projects/projects/133914/how-to-make-a-twig-table/
- ↑ https://boyslife.org/hobbies-projects/projects/133914/how-to-make-a-twig-table/
- ↑ https://boyslife.org/hobbies-projects/projects/133914/how-to-make-a-twig-table/
- ↑ https://boyslife.org/hobbies-projects/projects/133914/how-to-make-a-twig-table/
- ↑ https://boyslife.org/hobbies-projects/projects/133914/how-to-make-a-twig-table/
About This Article