X
wikiHow is a “wiki,” similar to Wikipedia, which means that many of our articles are co-written by multiple authors. To create this article, 9 people, some anonymous, worked to edit and improve it over time.
This article has been viewed 43,176 times.
Learn more...
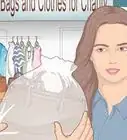
Purses can be a quick and easy accessory that take an outfit from office to night on the town, but they can get expensive. If you know how to make a clutch purse, especially from inexpensive supplies, you can expand your accessories wardrobe without spending too much money. You can even recycle kitchen linens or old fabrics around your house, making your new clutch a green project, as well.
Steps
Method 1
Method 1 of 2:
Making a Clutch with a Metal Frame Clasp
-
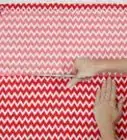
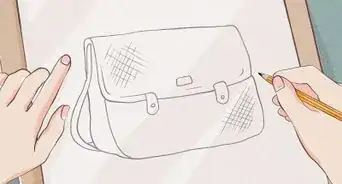
1Choose a beautiful fabric for your clutch. It may be best to use a thick fabric here like drapery because it will provide a thicker lining for your clutch, but you can choose cotton if you found a pattern that you really like. Purchase half a yard or so of this fabric from your local craft or sewing store.
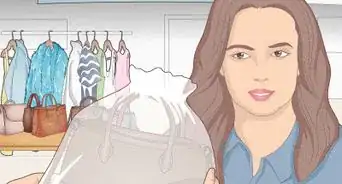
- You'll also need some lining fabric to line the inside of your clutch. You can choose a simple white color so that it doesn't show through your fabric, or if you are using a dark fabric, you can choose a darker color or a fun pattern. On top of those fabrics you'll need a metal clutch frame hardware for your clasp and some fusible fleece. You should be able to find all of these items in the sewing section or craft department of a craft store.
-
2Cut your fabric and lay it out. Take your fabric and place it on a table with the decorated side of the fabric face down. Then, cut your fabric so that it is 13 inches tall by 13.5 inches wide. Cut an identical piece of lining fabric -- 13 inches tall by 13.5 inches wide.Advertisement
-
3Cut and iron craft fuse to your main fabric. Take a piece of craft fuse and cut it so that it is a little bit smaller than your main fabric. Think about taking off a fourth of an inch on each side. Then, fuse it to the backside of your fabric with an iron. Make sure it is spread evenly across your fabric.
-
4Fuse fleece to your fabric. Once you have fused your craft fuse to your main fabric, you will take a piece of fusible fleece and cut it 10 inches wide and 13 inches tall. Then, fuse it to your craft fuse, so that it is evenly spaced on your fabric. It should be the exact height as your main fabric, but there should be about a 1.75 inch gap between each edge of your main fabric and the edge of your fleece.
-
5Flip your fabric around and sew a seam. Turn your main fabric over so that the design is on the front and the fused fabrics are on the back. Then, take your lining and place it on top of your fabric. Sew a half inch seam straight across the top of your fabric and the bottom of your fabric.
- You want to place your fabric so that the 13.5 inch sides are horizontal and the 13 inch sides are vertical. Make sure you sew a seam along the 13.5 inch sides of your fabric, which should be the top and bottom of your fabric if you have placed it correctly on the table.
-
6Flip your fabric right side out. After you have sewn two of the sides, turn your fabric right side out so the design is now facing outside. Then, iron your fabric nice and smooth to remove any wrinkles. Face your fabric so that the two seams are on the top and bottom of your fabric.
-
7Line up the seams of your fabric. Take your fabric, and fold it in half so that the two seams line up with each other. The decorated side of your fabric should be on the outside of your fold. Once you have created your fold, the left and right side of your clutch should be open (not yet sewn), and your fabric should be much wider than it is tall.
- Once you have done this, pin the top of your fabric with paperclips or pins to prepare to sew. Space the paperclips or pins about an inch away from the left and right sides of your fabric.
-
8Sew a 3/8 inch seam. After you have placed two pins or paper clips on the top of your clutch to hold it together, sew a seam along both open sides of your clutch. Simply, sew a 3/8 inch seam from the top to the bottom and then trim the sides an eighth of an inch. Then, clip a tiny corner at the bottom right and left corner of your clutch, through the stitching. Start from the stitch and clip upwards at a diagonal, towards the edge of your clutch.
-
9Flip your fabric inside out and sew. Because you still have a raw edge on your fabric you'll need to flip it inside out. Sew another 3/8 inch seam along the two sides of your fabric that you just sewed. This will get rid of the raw edge when you flip your fabric right side out. Then, once you've sewn both sides clip the bottom corners again.
-
10Create the bottom corners. Flip your fabric right side out again, so that the decorated fabric is on the outside. Then, place it on the table so that side seam is pressed out flat. Push the corner out and then measure about an inch and a half and mark it. Then, stitch that seam, cut it to an eighth of an inch and repeat on the other corner. Then, once again turn the fabric inside out.
- To create this stitch you basically want to place your clutch on the table so that instead of lying it flat on its side with the seams on the right and the left, you want to place the bottom of the clutch on the table, and press the two side seams flat towards the middle of the clutch. When you do this, you should create a triangle on both sides of your clutch with the seams as the height of each triangle. The corner you want to mark and sew is the top point of each triangle.
-
11Stitch the corners again and apply glue. Now that your clutch is inside out, stitch the corner again. Then, flip your clutch right side out and you'll end up with the final shape of your clutch. Apply glue to the inside frame of your clasp, starting about half an inch from the edge. Draw a bead of glue to the other side of the frame, about half an inch away from the edge.
- Do one side and then attach it to one side of your clutch, wrapping tape around it to hold it as the glue dries. Then, repeat on the other side of the clasp frame. Your glue will need to set a few hours to completely dry. Make sure you use a multi-purpose cementing glue. These are usually found in small tubes.
- It's helpful to mark the borders on your clutch, where you want your clasp to be. Sometimes it takes a little bit of work to attach the clasp to the clutch, so be patient as you fit the fabric into the frame.
-
12Lift up on the frame and finish your clutch. Once the glue has completely dried on your frame, lift up on the sides of the clasp frame (the part of the clasp inside your clutch). As you lift up the sides, invert the sides of your clutch. Then, remove the tape, close your clutch, and you are finished!


Advertisement

Method 2
Method 2 of 2:
Sewing an Envelope Clutch
-
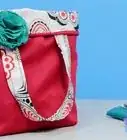
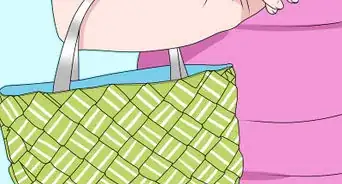
1Gather your supplies. For this clutch, you will need three different fabrics: two for for the outside of your clutch and a fabric for the lining. All fabrics should be quilting weight cotton fabric. To be safe, you may want to get a yard of each fabric. You will also need fusible interfacing, and then any tools you like to use to sew, like a rotary cutter, pins, a ruler, etc.
- For a really cute clutch, use two different designed fabrics that work well together for the outside of your clutch. You could use fabrics of the same color, or different colored fabrics. Both fabrics will show, so make sure you like the way they look together.
- Because you will have lining, you can choose to use any type of fabric. Just make sure the fabric you choose is durable and will hold the items in your clutch. Quilting weight cotton is good because it is heavier and will hold its shape better, but there is flexibility here.[1]
-
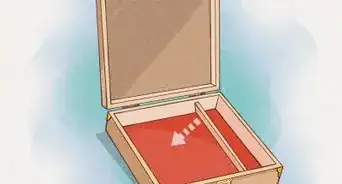
2Measure and cut your fabrics. For your main fabric, measure and cut a piece that is 12.75 inches by 19 inches. For your second fabric (this will be the flap in the envelope) cut two pieces each measuring 12.5 inches by 5.5 inches. Then, the lining needs to be 12.5 inches by 28.5 inches. And finally, measure and cut the interfacing to 12.75 inches by 29 inches.[2]
-
3Line up your main and flap fabric. Place your main flap fabric on the table with the decorated side face up. Then, place your flap fabric on top of your main fabric with the decorated side facing down (the right sides of the fabrics should be touching each other). Then, line them up so the long side of the flap fabric (12.5 inches) and the short side of the main fabric (12.5 inches) are together. Sew a quarter inch seam along the top of the lined pieces, or the 12.5 inch side.[3]
- Make sure you don't sew along the 5.5 inch sides of the flap fabric. You want to leave those open and only sew along one side of the fabric.
-
4Join the second flap fabric to the main fabric. Place your other piece of flap fabric at the other end of the main fabric, with the right sides of the fabric facing each other and the two 12.75 inch sides lined up. Sew another quarter inch seam along the top of the fabric, leaving the two 5.5 inch sides and the middle 12.5 inch side open.[4]
- At this point you should have your long piece of main fabric with the two flap pieces on each end of your fabric. You should be able to see the right side of your main fabric, but only the wrong sides of your flap fabric.
-
5Open up your piece and attach interfacing. Flip your flap pieces over so that the fabric is one long line. Then, iron the seams so that they lay flat. Turn your fabric over so that the wrong side faces up and the right side is down. Place your interfacing shiny side down on the wrong side of the fabric you just created. Line it up and press it down so it adheres to the fabric.[5]
-
6Fold your fabric in half. Once you have pressed the interfacing on your fabric, fold it in half, so that the two flap pieces meet and the interfacing is on the outside of your fabric. The decorated side of your fabric should not be showing. Sew along the right and left sides of your fabric with a quarter inch seam, starting from the flap and moving towards the end of your main fabric.[6]
-
7Fold and sew your lining fabric. Take your lining fabric, the piece that is 12.5 by 28.5 inches, and fold it in half with right side facing in, so that you have a piece 12.5 inches by 14.25 inches. Then, sew along the 14.25 inch sides with a quarter inch seam.[7]
-
8Iron out the top edge of your clutch. Take your clutch at the open end and turn over the top edge, where the flap fabric is, about a quarter of an inch. Press your fold down and iron it out so that it stays in place. Do the same with the top edge of the lining, keeping it with the wrong side out and right side facing in.[8]
-
9Flip your clutch right side out. Take your clutch and turn it so the fabric is on the right side. Iron out your fabric to remove any wrinkles, and press down the seams. Then, place your lining inside your clutch, by pushing down the corners of your lining into the corners of your clutch. Make sure you leave the lining inside out. Position the lining so the top of it sits about an eighth of an inch below the top of your clutch.[9]
- At this point, the right side of the lining will show when you look in your clutch. This is why it could be fun to use a cute color or pattern for your lining so that when you open up your purse you don't just see a white or black lining.
-
10Sew along the top edge of the clutch. To attach your lining to your clutch, you'll need to sew a top stitch. Start at the right or left seam of your clutch and sew a straight line along the top of your clutch, about an eighth of an inch from the edge of your fabric. Then, sew another line, starting again at a seam, about a quarter of an inch from the fabric edge. This will attach your lining to your fabric.[10]
-
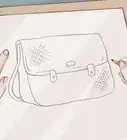
11Fold your clutch over and finish. Take your clutch and fold it over so that you can see about three quarters of an inch of the main fabric at the top of your clutch. Then, fill it with your items and you're done!
- If you want extra security for your clutch, you can add a button or two to the top of your clutch so that you can button it closed while you are holding it. However, the fold in the envelope should be long enough that nothing should fall out of your purse easily.


Advertisement
Community Q&A
-
QuestionWhat is a fusible interfacing?
 Community AnswerIt is interface that will adhere to your fabric. Using when it is ironed.
Advertisement
Things You'll Need
- Fabric (drapery or thick cotton)
- Lining
- Fusible Interfacing
- Metal frame for clasp
- Scissors
- Ruler or tape measure
- Sewing machine
- Pins or paper clips

References
- ↑ http://seekatesew.com/envelope-clutch-pattern/
- ↑ http://crafts.tutsplus.com/tutorials/the-easiest-way-to-make-your-own-gorgeous-envelope-clutch--craft-5356
- ↑ http://crafts.tutsplus.com/tutorials/the-easiest-way-to-make-your-own-gorgeous-envelope-clutch--craft-5356
- ↑ http://crafts.tutsplus.com/tutorials/the-easiest-way-to-make-your-own-gorgeous-envelope-clutch--craft-5356
- ↑ http://crafts.tutsplus.com/tutorials/the-easiest-way-to-make-your-own-gorgeous-envelope-clutch--craft-5356
- ↑ http://crafts.tutsplus.com/tutorials/the-easiest-way-to-make-your-own-gorgeous-envelope-clutch--craft-5356
- ↑ http://crafts.tutsplus.com/tutorials/the-easiest-way-to-make-your-own-gorgeous-envelope-clutch--craft-5356
- ↑ http://crafts.tutsplus.com/tutorials/the-easiest-way-to-make-your-own-gorgeous-envelope-clutch--craft-5356
- ↑ http://crafts.tutsplus.com/tutorials/the-easiest-way-to-make-your-own-gorgeous-envelope-clutch--craft-5356
About This Article
Advertisement