wikiHow is a “wiki,” similar to Wikipedia, which means that many of our articles are co-written by multiple authors. To create this article, 14 people, some anonymous, worked to edit and improve it over time.
This article has been viewed 48,188 times.
Learn more...
Coin rings have become increasingly popular in recent years. People enjoy making DIY jewelry, and small businesses have even cropped up where people make coin rings for a living. Doing so is a time-consuming but rewarding process. There are a couple of different ways that it can be done. Be sure that an adult is available to help you with this project if you are a youth.
Steps
Making a Coin Ring With a Rotary Tool
-
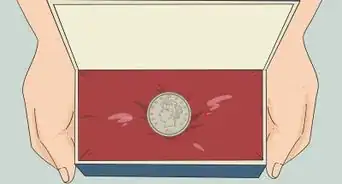
1Select the coin you want to use for your ring. Coins that are made from silver or gold are best, as coins made from nickel and copper will leave stains on your finger.
- When you are first starting out with making coin rings, you should practice with smaller coins, such as nickels, dimes, or pennies. This is just to get the hang of the process.
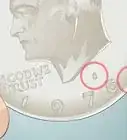
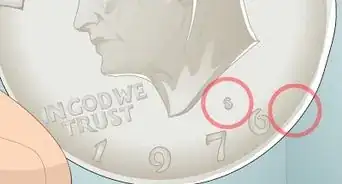
- Quarters are a highly recommended coin because of their larger size. Look for quarters made prior to 1965, because until that point, quarters were made with 90% silver.[1]
- Half-dollar coins are also a good option, again because of their size. It is still best to look for half-dollar coins made prior to 1965 due to their high silver makeup.[2] Half-dollars are especially recommended for people with large ring sizes.
-
2Gather the materials that you need in your workspace.[3] Be sure to complete the project in a garage or workshop space that you can easily accommodate all of the tools necessary.
- A silver coin
- A hammer
- A vise (This is a tool that can be bolted down to a table or work surface. It has a clamp with a rod that can be turned to open and close the grip onto something, like the coins, in this case. It also has an anvil on the side opposite the tightening rod.)
- A ring-sizing mandrel (This is a rod that is wider at one end and tapers down to a smaller point. It is used to size rings.)
- A drill and drill bit (recommended size: 1/8” or 3/16”)
- A handheld rotary tool (A rotary tool is a small, handheld device with a small rod that sticks out of the tip. Different parts can be added to the tip based on what you want to do, like file something down, polish it, et cetera.)
- A carbide cutting bit (This is a particular type of bit used for cutting through metal and can be attached to the rotary tool.)
- Calipers (Similar to a ruler, this is a measuring stick that has moveable arms. The arms are used to measure something, so you expand or narrow them to whatever the object is.)
- Sandpaper (recommended grit: 200-600)
- Felt polishing tip and polishing compound
Advertisement -
3Set the coin in the vise. Stand it up on an edge so that you can tap the edges with the hammer.[4]
- You can secure the coin in the grip of the vise to reduce the risk of hammering a finger or thumb in the upcoming steps. However, you will have to stop very frequently to turn the coin in the vise so that you tap all around it evenly.
- You can also grip the coin between your index finger and thumb to keep it in a standing position and prevent it from moving. This can be unsafe, as you run the risk of hammering a finger, so take care. Have an adult do this for you, if you are a youth.
-
4Tap lightly on the edge of the coin with the hammer. Lightly tapping is an absolutely essential component of this step.[5]
- Tapping too hard on the edges causes the coin to become warped, and it is extremely hard to repair that mistake.
-
5Rotate the coin as you tap, so that you tap all the way around the coin. Try to avoid tapping the same spot on the coin repeatedly, so as to avoid making one edge of the ring too flat.[6]
- Rotate the coin slightly with every tap. You can gently turn it toward you or away from you as you go.
- After about 10 minutes of tapping, you should observe that the reeded edge (i.e. the lined edge) has started to flatten. Eventually, those reedings should disappear altogether.[7]
-
6Continue tapping lightly with the hammer until the edges are completely flattened and widened. This could take up to two hours, so prepare yourself for this time-consuming process.[8]
- Eventually, the text on the edge of the coin should start to wrap around what will soon become the inside of the ring.
- The coin should continue to shrink in diameter while the band of the ring continues to flatten and widen from the tapping.
- Half-dollar coins take even more time to tap, as they are larger than a quarter, so keep this in mind when you choose your coin.
-
7Check for warping as you tap. Despite tapping lightly, it is possible that the coin could start to warp a bit. Be sure to check for warping periodically so that you can correct it early.[9]
- Lay the coin down flat on the vise. Bend down to the coin's level and check for space between the coin and the surface. You can correct very minor warping with sanding later, or you can try corrective tapping to amend the warp if it is a bit bigger.
-
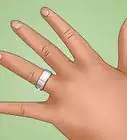
8Determine the necessary ring size. Use your calipers to measure the inside diameter of the coin, but before you go too far with tapping down the edges, be sure you know what ring size you want the coin to become.[10]
- 14.1 mm = size 3
- 14.5 mm = size 3 ½
- 14.9 mm = size 4
- 15.3 mm = size 4 ½
- 15.7 mm = size 5
- 16.1 mm = size 5 ½
- 16.5 mm = size 6
- 16.9 mm = size 6 ½
- 17.3 mm = size 7
- 17.7 mm = size 7 ½
- 18.1 mm = size 8
- 18.5 mm = size 8 ½
-
9Decide if you want the band to have a half round. This refers to the outer edges of the band curving down slightly.[11]
- Stand the coin on the flat surface of the vise again and lean it at about a 75-degree angle. Lightly tap the edges as you did before, except this time, tap them down toward the center of the ring. Remember to rotate as you tap to avoid tapping the same spot consecutively.
- Flip the coin to its other side and repeat.
- Check that the curvature is uniform by holding the holding the coin upright and rotating it in your fingers, focusing on the curvature all the way around.
-
10Smooth the edges of the coin on sandpaper. Before moving any further in the development, it is important to stop and smooth the outer edges of the coin from any waviness or warping.[12]
- Use a 200-220 grit sandpaper, and lay it on a flat surface. Then, lay the coin flat on one side on the sandpaper, and gently move it in a circular motion to soften the edges. Avoid taking too much off the edges because you will start to lose some of the text and other features of the coin. Then, flip the coin to its other side and repeat.
-
11Put the coin inside the vise grip with a towel or rag around it. The towel protects the edges of the ring from the vise. The coin should be flat, as if it is laid on its side, not standing up.[13]
- Take care to grip the vise tight enough to hold the coin in place but not so tight as to cause warping.
-
12Drill a hole into the center of the coin. Be sure to push all the way through the ring, taking care not to push so hard that the coin slips out of the vise.[14]
- Use a drill bit size that is compatible with your carbide cutting bit. The suggested sizes are listed in Step 2.
-
13Cut out the middle of the coin with a rotary tool and carbide cutting bit. Run the rotary tool at a high speed so that it cuts out the middle smoothly and cleanly.[15]
- Be very careful with this step and pay much attention while you are doing it. If the cutting bit slips out, it could damage the inside of the ring in the process, causing you to lose some of the coin face and text that make it so unique.
-
14Slow the cutting and periodically check the ring size on the mandrel. As you get close to the edges of the ring, slow the rotary tool a bit.[16]
- Rotate the ring inside the vise to ensure an even circular diameter inside the ring.
- Occasionally take out the ring and check its size on the ring-sizing mandrel. If you do not have a mandrel, then try it on your own finger.
-
15Sand the edge at the half round with sandpaper. By now, there is likely a sharp edge at the transition where the half round starts, so take time to sand it down.[17]
- Slip the ring over the tip of your index finger and begin sanding the transition at the half round. Start out with 200-220 grit sandpaper and work your way up to about 600 grit sandpaper.
- The more sanding you do now, with finer grit sandpaper, the less polishing that needs to be done on the band of the ring.
- Do not sand inside the ring, as you will lose the details of the coin face and text.
-
16Stand the ring upright in the vise and secure the grip. This frees up an edge of the ring for polishing without having to hold it.[18]
- Rub polishing compound on the ring with a paper towel. This prepares you to polish it with the polishing tip.
-
17Polish the ring with the felt polishing tip on the rotary tool. Hold the rotary tool so that the sides of the felt polishing tip rub against the ring.[19]
- Rotate the ring occasionally so that you polish all the way around it. You will have to continue to apply polishing compound as you reach new sections of the ring.
- Polish until you remove all of the sanding lines and the ring is extremely shiny.
-
18Put the ring back in the vise so that it is flat, as it was in Step 11. Now you can polish the inside of the ring.[20]
- Apply polishing compound inside the ring, and then polish it with the rotary tool and felt polishing tip.
- Remember to put the grip tight enough to hold the ring but not so tight as to warp it.
-
19Polish your ring every couple of months to touch it up. DIY rings are a bit more susceptible to scratches, so taking the time to polish it every couple of months will keep it in good shape.


Making a Coin Ring With a Mandrel
-
1Choose the coin that you want to use for the ring. Small coins, such as pennies and dimes, are not recommended.
- To get the hang of making a coin ring, it is recommended to practice with smaller coins, such as nickels, dimes, or pennies.
- Quarters and half-dollar coins are the most recommended coins due to their size.
- Be sure to find a coin that is made with 90% silver. Usually, these coins were made prior to 1965.[21]
-
2Collect the tools that you need to complete the project. Be sure to work in a space where you can use tools, such as a drill, as they can be loud and messy.
- A silver coin
- A hammer
- A ring-sizing mandrel (This is a rod that is wider at one end and tapers down to a smaller point. It is used to size rings.)
- A drill and drill bit
- Calipers (Similar to a ruler, this is a measuring stick that has moveable arms. The arms are used to measure something, so you expand or narrow them to whatever the object is.)
- A blow torch (A blow torch is a canister with a long, thin nozzle coming out of the top of it. When it is turned on, a bright blue, very hot flame comes out of the nozzle.)
- A couple of scrap pieces of wood
- Metal tongs
- Protective gloves and goggles
-
3Center the coin on a piece of scrap wood. If you have a standing drill press, you can center the coin below the drill bit.
- Then, put a second piece of scrap wood carefully on top of the ring. Secure it down with vise grips.
- Do not move the drill bit from its centered position above the coin.
-
4Drill your hole through the scrap wood and the coin. Push the drill all the way down through the secured top board and through the coin. Then, lift the drill bit back out.
- Recommended drill bit sizes are 1/8” and 3/16”.[22]
-
5Verify that your hole is centered in the coin by using calipers. Calipers measure a distance or width, so hold them up to the ring and measure the sides around the hole.
- It is challenging to recover a coin ring if the hole is off-center. If this is the case, you may need to start over with a new coin.
-
6Hold the coin in a pair of metal tongs and heat it with a blow torch. The purpose of this is to make the coin easier to mold and work with.
- When you are done heating it, the coin may have blackened. It will likely now look like a black washer.
- Do not touch the coin with your bare hands until it cools.
- Wear your protective gloves and goggles while you use the blow torch.
-
7Slide the coin onto the mandrel. You will use the mandrel to hammer the sides of the coin down, so it will only slide so far onto the mandrel for now.
- Set the tip of the mandrel on a piece of scrap wood to hold it in place. This reduces the risk of the mandrel moving around or jumping while you hit it.
-
8Hammer down the sides of the coin around the mandrel. Turn the mandrel periodically so that you hit all sides of the coin, flattening it against the mandrel.
- The ring will be slightly warped from this, as the mandrel grows in size from one end to the other. Therefore, one side of the ring will be wider than the other. This will be fixed.
- This will be tedious and time-consuming. Take care while you hit the coin not to damage or scratch it.
-
9Slip the ring off of the mandrel and set it on a piece of scrap wood. Make sure that the smaller side of the ring is down on the wood and the wider side it up. This will make it easier for you to shape that edge down to a normal ring shape.
-
10Apply heat periodically and hammer the wide edge down until you achieve the shape you want. The band will thicken as you hammer the wide edge down so that it is flat and the same size as the other side of the ring.
- This process will push the metal down, which will slightly alter the ring size.
- Wear the protective gloves and goggles as you heat the ring again.
-
11Polish the ring once it has reached the shape and size you desire. You can polish the ring with a soft cloth, or you can use a polishing compound and felt finishing tip on a rotary tool.
- If you use a rotary tool, secure the ring standing up in a vise. Apply the polishing compound to the available side of the ring and polish. Rotate the ring occasionally so that you polish all the way around it. You will have to continue to apply polishing compound as you reach new sections of the ring.


Community Q&A
-
QuestionWhat is the purpose of heating metal and then quenching it in water?
 Community AnswerHeating the metal allows you to mold it into a specific shape, and quenching it in water hardens the metal.
Warnings
- Wear protective gear when using a blow torch, such as gloves and goggles.⧼thumbs_response⧽
- Always take care, when using power tools, to maintain safety. Keep your fingers away from the tool while it runs.⧼thumbs_response⧽


References
- ↑ https://snapguide.com/guides/make-a-ring-out-of-a-quarter/
- ↑ http://coinsite.com/us-silver-coins-when-they-ended-and-what-theyre-worth/
- ↑ http://homefixated.com/diy-rings-silver-coins/
- ↑ http://homefixated.com/diy-rings-silver-coins/
- ↑ http://homefixated.com/diy-rings-silver-coins/
- ↑ http://homefixated.com/diy-rings-silver-coins/
- ↑ https://snapguide.com/guides/make-a-ring-out-of-a-quarter/
- ↑ http://homefixated.com/diy-rings-silver-coins/
- ↑ http://homefixated.com/diy-rings-silver-coins/
- ↑ https://www.bluenile.com/assets/chrome/pdf/ring_sizing_guide_0610-CA.pdf
- ↑ http://homefixated.com/diy-rings-silver-coins/
- ↑ http://homefixated.com/diy-rings-silver-coins/
- ↑ http://homefixated.com/diy-rings-silver-coins/
- ↑ http://homefixated.com/diy-rings-silver-coins/
- ↑ http://homefixated.com/diy-rings-silver-coins/
- ↑ http://homefixated.com/diy-rings-silver-coins/
- ↑ http://homefixated.com/diy-rings-silver-coins/
- ↑ http://homefixated.com/diy-rings-silver-coins/
- ↑ http://homefixated.com/diy-rings-silver-coins/
- ↑ http://homefixated.com/diy-rings-silver-coins/
- ↑ http://coinsite.com/us-silver-coins-when-they-ended-and-what-theyre-worth/
- ↑ http://homefixated.com/diy-rings-silver-coins/
- ↑ http://makezine.com/projects/coin-ring-technique/
About This Article
To make a coin ring with a mandrel, start by finding a pre-1965 quarter or half-dollar, since your ring will turn out better if you use a big coin with a lot of silver in it. Then, drill a hole through the center of the coin with a 1/8-inch or 3/16-inch drill bit. Next, heat the coin with a blow torch so it’s softer and easier to work with before sliding it onto the mandrel. After that, hammer it as you turn the mandrel, flattening the coin on all sides. Finally, remove it from the mandrel, reheat it, and hammer your ring into the desired shape. To learn how to make a coin ring with a rotary tool, scroll down!