This article was co-authored by Amy Guerrero. Amy Guerrero is an Arts and Crafts Specialist and the Owner of Sunshine Craft Co., a crafting studio based in Phoenix, Arizona. Amy specializes in macrame, DIY crafting, and teaching fiber arts. She offers monthly in-person and online workshops along with having developed a range of DIY craft kits for at-home projects. Amy holds a BS in Industrial Design from Philadelphia University. She worked as a graphic designer before starting her own business. Sunshine Craft Co. is a creative hub that offers a wide range of workshops, tools, and resources for any craft project to inspire creativity and community engagement.
There are 10 references cited in this article, which can be found at the bottom of the page.
This article has been viewed 60,791 times.
The word “collage” means “a work of art that is made by attaching pieces of different materials (such as paper, cloth, or wood) to a flat surface.”[1] This artistic assembly of pictures is a great way to display a lot of photographs, to convey a theme, to recycle materials, to decorate a wall, and to create homemade gifts. Making collages is also a great activity for kids, retreats, workshops, and team-building events. Collages are also perfect works of art to commemorate birthdays, weddings, anniversaries, retirements and even memorializing someone at a funeral.
Steps
Making an Old-School Collage Poster
-
1Determine a theme and purpose for your collage. Photos from your last camping trip can showcase your adventures, or photos from your child’s first year can be a decoration for a first birthday party. You might also choose an inspirational theme, including pictures of strong women, for example.
-
2Determine the size and shape of your collage. Collages can decorate a small area of a wall, or they can be the centerpiece for an entire room. Take into account how many pictures you have to work with; making a large collage will require lots of pictures. In addition, collages do not need to be square or rectangular, but instead can be star-shaped, heart-shaped, letter-shaped or other shapes. Use poster board, cardstock, wood panels or foam-core shapes as the base of your collage.Advertisement
-
3Choose your pictures. These can come from just about any printed material, from magazines, newspapers, old books, or postcards. Even fabric can be used in collages. If you are doing a photo collage, you should select the best photos that represent the event or convey the theme you’re going for. Depending on how large your collage is, you may need to choose 10-20 pictures, or you may need 50 pictures or more.
- Consider how large you want your pictures to be in your final collage. The pictures do not need to be the same size, nor do they need to be the same shape. In fact, a range of sizes and shapes will give more dimension to your collage and make it more interesting to the eye. Think about if you want a certain picture to dominate the collage and have subordinate pictures surrounding it, for example.
- You don’t need to always choose pictures of people. Adding in pictures of details (a bridge or road, a plate of cookies, a deck of cards from a poker game) can add dimension to your collage. These add to the overall sense you’re trying to convey in your collage. Because you are creating a collage of many pictures, you can afford to include some background or detail pictures.
-
4Print out high quality digital photos on good paper. Your collage will look better if you have high quality images with sharp resolution (at least 300 dpi; 600 dpi for larger photos).
-
5Gather your supplies. Have on hand the following supplies to keep you focused on the artistry of your collage: scissors, X-acto knife, glue or other adhesive, paintbrush, a backing sheet, pencil, plain paper, and your pictures.
- The backing sheet should be made from cardstock or poster board. The size of your collage will determine your need for how large your backing sheet will be. Choose a weight of paper that is between 80lb. and 110lb.[4]
-
6Map out your collage. Start deciding how you want to place your pictures.[5] What parts of the pictures do you want to include or leave out? Be sure to leave room for a title or name if you want to include that (for example, you might put a title such as “Sage’s First Birthday”). Keep an eye on the colors: are you grouping all the blue-toned photos together? Do you have a big spot of brown-toned photos? Spread the photos out to balance the color across the entire collage. Or, you might want only blue-toned photos in the collage so that it matches the room for which you’re making the collage. Test out different arrangements, patterns, and color schemes.
-
7Get your pictures ready for assembly. Once you have a general sense about where you want the pictures to go, you can start trimming them to fit better. Particularly for pictures that will go along the edge of your collage, you will need to trim them sharply with an X-Acto knife or paper cutter to get a smooth, straight edge.
-
8Attach the pictures to the backing material. Use white glue, Mod Podge, double-sided tape or similar adhesive. If you are using a thicker material such as wood or foam-core, you may need a stronger adhesive. Some glues and tapes will not last as long or may discolor the pictures over time. Use an archival quality tape or glue if you want your collage to last, or if you are giving it as a gift. Paint on the glue with a paintbrush to ensure complete and smooth coating. Press the picture down onto the backing sheet. Use a credit card to smooth out any air bubbles. Dab a bit more glue or other adhesive at the corners to ensure they stick fully to the paper.
- Use stickers, glitter and other materials to decorate the collage. You can also write on the collage with markers, pens, paints or crayons.
-
9Seal the pictures. You might want to apply a coating over the top of the pictures to smooth them all down and to seal them. This is an optional step and is not necessary if you are planning to frame your collage behind glass. If you choose to seal your pictures, use Mod Podge or similar coating to protect the pictures and to smooth down any rogue peeling corners.
- You can also use melted wax to coat the pictures. This should only be used if your backing is made from solid wood or other durable material, as paper will bend and cause the wax to crack. To melt the wax, choose a container you don’t mind ruining (tin cans work well for this) and heat on the stove. Be very careful! Then paint the wax over the pictures. A thicker wax coating will give a cloudy look to the pictures.
-
10Frame your collage. You can either have a professional framing service do this, or you can select your own frame. Choose a frame that is complementary in color to the collage. Have hooks on the back that will enable easy wall hanging.
- You can also make a frame out of decorated cardboard or other colored cardstock paper, or you can skip framing your collage altogether.
-
11Display your collage. Hang it on a wall that is easy to get close to (preferably not above large furniture). Because your collage has lots of pictures, you might want to display it so people (and you) can look more closely at it. Alternately, you can stand it on an easel, which can be a perfect way to display it at a birthday or anniversary party. If your collage does not have a regular frame with hooks or wire on the back, you can also stick it to the wall using glue dots, masking tape or other wall adhesive.
- You might choose to make copies of your collage to share with others. A collage in honor of a child’s first birthday is a great present for grandparents. Scan the collage and print out high quality copies. You can use a home scanner or take the collage to a professional service for scanning. You can also get the collage printed as a poster or vinyl banner, or have it printed on other objects, such as mugs, mouse pads or t-shirts.


Making a Collage of Framed Pictures
-
1Determine a theme and purpose for your collage. Photos from your last camping trip can showcase your adventures, or photos from your child’s first year can be a decoration for a first birthday party.
-
2Determine the size and shape of your collage. Collages can decorate a small area of a wall, or they can be the centerpiece for an entire room. Take into account how many pictures you have to work with; making a large collage will require lots of pictures.
-
3Choose your pictures. These can come from just about any printed material, from magazines, newspapers, old books, or postcards. Even fabric can be used in collages. If you are doing a photo collage, you should select the best photos that represent the event or convey the theme you’re going for. Depending on how large your collage is, you may need to choose just a few pictures, or you may need 10 or more.
- Consider how large you want your pictures to be in your final collage. The pictures do not need to be the same size, nor do they need to be the same shape. In fact, a range of sizes and shapes will give more dimension to your collage and make it more interesting to the eye. Think about if you want a certain picture to dominate the collage and have subordinate pictures surrounding it, for example.
- You don’t need to always choose pictures of people. Adding in pictures of details (a bridge or road, a plate of cookies, a deck of cards from a poker game) can add dimension to your collage. These add to the overall sense you’re trying to convey in your collage. Because you are creating a collage of many pictures, you can afford to include some background or detail pictures.
-
4Print out high quality digital photos on good paper. Your collage will look better if you have high quality images with sharp resolution (at least 300 dpi; 600 dpi for larger photos).
-
5Select your frames. You can use all matching frames, or use frames that are all different shapes, sizes and colors. You can either have a professional framing service do this, or you can select your own frame. Choose a frame that is complementary in color to the collage. Have hooks on the back to enable easy wall hanging.
-
6Map out your collage. Start deciding how you want to place your pictures. Do this on the floor or large table so that you are not putting unnecessary nail holes in the wall. Keep an eye on the colors: are you grouping all the blue-toned photos together? Do you have a big spot of brown-toned photos? Spread the photos out to balance the color across the entire collage. Or, you might want only blue-toned photos in the collage so that it matches the room for which you’re making the collage. Test out different arrangements, patterns, and color schemes. You may also want to swap out a frame if it doesn’t seem to work in the overall arrangement.
- Take pictures of each arrangement so you can see which ones you like the best.[6]
-
7Make paper cutouts of each frame. Using plain paper or wrapping paper, cut out shapes that are the same sizes as your frames. You will use these to help you put nails in the wall on which you will hang the framed pictures. Stick these pieces of paper on the wall with removable tape. Refer to your frames that you’ve laid out on the floor as your guide.[7]
- Mark on these papers where a nail would need to go. Nails would not go right at the very top center of each frame; rather, they will be down an inch or two, and perhaps there are two nails for a frame. Determine where the nails should go and mark it on each sheet.
-
8Hang your pictures. When you’ve finalized where you want pictures to go, hammer a good quality picture-hanging nail into the wall at the point you’ve marked on your paper cutout. Check to see if your measurement is correct by putting the framed picture on the wall. Does it hang where you want it to hang?


Making a Digital Collage
-
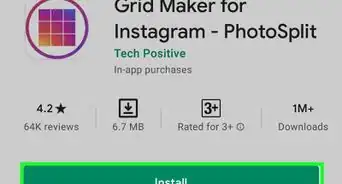
1Select your photo editing software. You can choose more or less sophisticated software programs, depending on your skill level and comfort. Some photo editing software programs are Adobe Photoshop, Corel Paintshop Pro, and GIMP. There are also apps and programs that are specifically geared towards creating collages of pictures, such as PicCollage, PicMonkey, Shape Collage, and Fotor Photo Collage, and these are easier to use. Alternately, you can use an online service like Shutterfly to make a photo book, which is bound and printed with hard- or soft-cover binding.
- Photo collage programs may give you the option to either place your pictures according to templates or in user-defined ways.
- You can also go with a more rudimentary way of creating a collage by using Microsoft Word and pasting photos into that.
-
2Determine a theme and purpose for your collage. Photos from your last camping trip can showcase your adventures, or photos from your child’s first year can be a decoration for a first birthday party. You might also choose an inspirational theme, including pictures of strong women, for example.
- You can also make a photo mosaic. For this project, choose a main image and then assemble small pictures according to color tones in the main image. These smaller pictures will be “tiles” that make up your larger picture.[8] , [9] There are a number of photo mosaic websites and programs available for download, like Mosaically, Easy Moza, and AndreaMosaic.
-
3Determine the size and shape of your collage. Think too about how you are planning to display this collage. Are you printing it out or sharing it digitally? Take into account how many pictures you have to work with; making a large collage will require lots of pictures. In addition, collages do not need to be square or rectangular, but instead can be star-shaped, heart-shaped, letter-shaped or other shapes.[10]
-
4Choose and upload your pictures. These can come from your own personal photograph collection or images you find online. If you are doing a photo collage, you should select the best photos that represent the event or convey the theme you’re going for. Depending on how large your collage is, you may need to choose 10-20 pictures, or you may need 50 pictures or more. Upload these pictures into your photo editing program.
- Use high resolution digital photos. Your collage will look better if you have high quality images with sharp resolution (at least 300 dpi; 600 dpi for larger photos).
- Consider the proportions of your pictures in your final collage. The pictures do not need to be the same size, nor do they need to be the same shape. In fact, a range of sizes and shapes will give more dimension to your collage and make it more interesting to the eye. Think about if you want a certain picture to dominate the collage and have subordinate pictures surrounding it, for example.
- You don’t need to always choose pictures of people. Adding in pictures of details (a bridge or road, a plate of cookies, a deck of cards from a poker game) can add dimension to your collage. These add to the overall sense you’re trying to convey in your collage. Because you are creating a collage of many pictures, you can afford to include some background or detail pictures.
-
5Edit, alter or add effects to the pictures. If you want to stitch two photos together or superimpose one photo on top of another, use the photo editing software to accomplish this. You can also convert some or all of the photos to black-and-white, or add a polarizing filter to make the colors pop.[11]
-
6Map out your collage. Start deciding how you want to place your pictures. What parts of the pictures do you want to include or leave out? Be sure to leave room for a title or name if you want to include that (for example, you might put a title such as “Sage’s First Birthday”). Keep an eye on the colors: are you grouping all the blue-toned photos together? Do you have a big spot of brown-toned photos? Spread the photos out to balance the color across the entire collage. Or, you might want only blue-toned photos in the collage so that it matches the room for which you’re making the collage. Test out different arrangements, patterns, and color schemes.
- Use text, icons and other effects to add decorations to the collage.
-
7Save your collage continually. As you work on your project, keep saving it so you don’t lose any of your hard work. Save your file as the default file type for your software program. This will enable you to be able to go back and edit it. When you are finished and satisfied with the project, save it to your hard drive. There are several file types that you can save your collage as, such as .jpg, .tiff, .bmp, .pdf, etc. Back it up on an external drive or cloud drive.
-
8Share your collage with others. You might post this collage on a blog or on social media. Add a statement that describes your collage and your inspiration for making it. Encourage viewers to make their own collages and share them with you.
-
9Print out your collage. Either use a home printer or use a professional service to print out a high quality version of your collage. You can also get the collage printed as a poster or vinyl banner, or have it printed on other objects, such as mugs, mouse pads or t-shirts.
- Print out an extra copy of your collage. A collage in honor of a child’s first birthday is a great present for grandparents, for example.
-
10Frame your collage. You can either have a professional framing service do this, or you can select your own frame. Choose a frame that is complementary in color to the collage. Have hooks on the back that will enable easy wall hanging.
-
11Display your collage. Hang it on a wall that is easy to get close to (preferably not above large furniture). Because your collage has lots of pictures, you might want to display it so people (and you) can look more closely at it. Alternately, you can stand it on an easel, which can be a perfect way to display it at a birthday or anniversary party. If your collage does not have a regular frame with hooks or wire on the back, you can also stick it to the wall using glue dots, masking tape or other wall adhesive.


Decoupaging a Photo Collage on an Object
-
1Determine a theme and purpose for your collage. Photos from your last camping trip can showcase your adventures, or photos from your child’s first year can be a decoration for a first birthday party. You might also choose an inspirational theme, including pictures of strong women, for example.
-
2
-
3Choose your pictures. These can come from just about any printed material, from magazines, newspapers, old books, or postcards. Even fabric can be used in collages. If you are doing a photo collage, you should select the best photos that represent the event or convey the theme you’re going for. Depending on how large your collage is, you may need to choose 10-20 pictures, or you may need 50 pictures or more.
- Consider how large you want your pictures to be in your final collage. The pictures do not need to be the same size, nor do they need to be the same shape. In fact, a range of sizes and shapes will give more dimension to your collage and make it more interesting to the eye. Think about if you want a certain picture to dominate the collage and have subordinate pictures surrounding it, for example.
- You don’t need to always choose pictures of people. Adding in pictures of details (a bridge or road, a plate of cookies, a deck of cards from a poker game) can add dimension to your collage. These add to the overall sense you’re trying to convey in your collage. Because you are creating a collage of many pictures, you can afford to include some background or detail pictures.
-
4Print out high quality digital photos on good paper. Your collage will look better if you have high quality images with sharp resolution (at least 300 dpi; 600 dpi for larger photos).
-
5Gather your supplies. Have on hand the following supplies to keep you focused on the artistry of your collage: scissors, X-acto knife, glue or other adhesive, paintbrush, pencil, plain paper, and your pictures.
-
6Map out your collage. Start deciding how you want to place your pictures. What parts of the pictures do you want to include or leave out? Be sure to leave room for a title or name if you want to include that (for example, you might put a title such as “Sage’s First Birthday”). Keep an eye on the colors: are you grouping all the blue-toned photos together? Do you have a big spot of brown-toned photos? Spread the photos out to balance the color across the entire collage. Or, you might want only blue-toned photos in the collage so that it matches the room for which you’re making the collage. Test out different arrangements, patterns, and color schemes.
-
7Get your pictures ready for assembly. Once you have a general sense about where you want the pictures to go, you can start trimming them to fit better. Particularly for pictures that will go along the edge of your collage, you will need to trim them sharply with an X-Acto knife or paper cutter to get a smooth, straight edge.
-
8Attach the pictures to the object. Use Mod Podge or another strong craft adhesive.[14] Some glues will not last as long or may discolor the pictures over time. Use an archival quality or glue if you want your decoupage collage to last, or if you are giving it as a gift. Paint on the glue with a paintbrush to ensure complete and smooth coating. Press the picture down onto the backing sheet. Use a credit card to smooth out any air bubbles. Dab a bit more glue or other adhesive at the corners to ensure they stick fully to the paper.
- Use stickers, glitter, beads, jewels, or other materials to decorate the object. You can also write on it with markers, pens or paints.
-
9Seal the pictures. Apply a coating over the top of the pictures to smooth them all down and to seal them. Use Mod Podge or similar coating to protect the pictures and to smooth down any rogue peeling corners. Alternately, use melted wax to coat the pictures. To melt the wax, choose a container you don’t mind ruining (tin cans work well for this) and heat on the stove. Be very careful! Then paint the wax over the pictures. A thicker wax coating will give a cloudy look to the pictures. Buff the wax with a cloth to give it a bit of a shine.


Expert Q&A
Did you know you can get expert answers for this article?
Unlock expert answers by supporting wikiHow
-
QuestionHow should I arrange pictures in a collage?
 Amy GuerreroAmy Guerrero is an Arts and Crafts Specialist and the Owner of Sunshine Craft Co., a crafting studio based in Phoenix, Arizona. Amy specializes in macrame, DIY crafting, and teaching fiber arts. She offers monthly in-person and online workshops along with having developed a range of DIY craft kits for at-home projects. Amy holds a BS in Industrial Design from Philadelphia University. She worked as a graphic designer before starting her own business. Sunshine Craft Co. is a creative hub that offers a wide range of workshops, tools, and resources for any craft project to inspire creativity and community engagement.
Arts & Crafts SpecialistTry out a few different layouts and take pictures of each one. That way, you can test out a few possibilities to see what you like best.
Support wikiHow by unlocking this expert answer.
-
QuestionCan I add other things besides pictures? Perhaps quotes on paper or seashells?
 Community AnswerAbsolutely! Your collage is yours to decorate however you'd like. You don't have to use pictures at all, you could do one comprised entirely of quotes and/or seashells!
 -
QuestionI want to make a collage of printed pictures on a drawing sheet for my school project, but when I paste pictures they look untidy because of the glue. What can I do instead?
 CraftsmartTop AnswererPrint pictures on a sturdy paper, such as cardstock. Then, if glue is too messy, try double-sided tape or photo corners. You can usually find these items at a local craft store, or sometimes even an office supply store.


References
- ↑ http://www.merriam-webster.com/dictionary/collage
- ↑ http://www.engadget.com/2004/10/19/how-to-make-your-own-photo-mosaics/
- ↑ http://www.designamosaic.com/photo-mosaic-process
- ↑ http://paperworks.com/about-paper-weights
- ↑ Amy Guerrero. Arts & Crafts Specialist. Expert Interview. 9 October 2020.
- ↑ Amy Guerrero. Arts & Crafts Specialist. Expert Interview. 9 October 2020.
- ↑ http://www.quickanddirtytips.com/house-home/interior-design/how-to-create-a-picture-collage?page=1
- ↑ http://www.engadget.com/2004/10/19/how-to-make-your-own-photo-mosaics/
- ↑ http://www.designamosaic.com/photo-mosaic-process
- ↑ aturntolearn.blogspot.com/2012/08/how-to-make-collage-of-pictures-in-any.html
- ↑ http://www.fotor.com/features/collage.html
- ↑ http://www.marthastewart.com/274817/decoupage-crafts/@center/1013597/decoupage
- ↑ http://www.hgtv.com/topics/decoupage/page-1.html
- ↑ Amy Guerrero. Arts & Crafts Specialist. Expert Interview. 9 October 2020.
About This Article

To make a digital collage of pictures, use a photo editing software, like Adobe Photoshop, Corel Paintshop Pro, or GIMP. Or, you can use an app or website designed specifically for making photo collages, like PicCollage, PicMonkey, or Fotor Photo Collage. You can even make your own collage using Microsoft Word. Once you've found a program, just upload all of your pictures and arrange them however you'd like. To learn how to make a picture collage on a poster, keep reading!