wikiHow is a “wiki,” similar to Wikipedia, which means that many of our articles are co-written by multiple authors. To create this article, 12 people, some anonymous, worked to edit and improve it over time.
This article has been viewed 89,090 times.
Learn more...
Even if you've never used Photoshop, it will only take a few minutes to learn the basics and get started on your collage. Once you've arranged it to your satisfaction, print it right away, or play around with Photoshop's many tools to add your own artistic effects.
Note: If using a Mac, use command instead of Ctrl for all steps.
Steps
Setting Up the Document
-
1Open a new document. Open Photoshop and use the File → New command in the top menu. Enter the following information into the popup window, then click OK:
- Width and height: Choose A4 for a typical sheet of paper, or 3000 pixels wide x 2000 pixels high for a landscape collage — or set any size you like.
- Resolution: Enter 300, or 200 if using a slow computer. Switch to a smaller value if the collage is very slow to edit or open, or use a larger one if the pictures look pixelated.
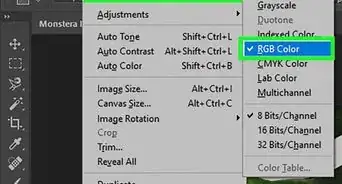
- Color Mode: RGB color
- Background contents: Choose Transparent if you plan to add your own background image. Otherwise, choose White or Black.
-
2Make it landscape style. Most collages look best on a wide, landscape style canvas. In the top menu, use Image → Rotate Canvas → 90 degrees to turn the document onto its side.Advertisement
-
3Insert a background. If you’d like a background, choose any image file on your computer. Open the file using the File → Open command in the top menu. Drag the image onto your collage, or use the following commands:
- Click the background image and press Ctrl+A to select it.
- Press Ctrl+C to copy the image.
- Click the collage window (called “untitled 1” unless you saved it).
- Press Ctrl+⇧ Shift+N to open a new layer.
- Find the Layers panel and click “Layer 1.” Type in a new name: “background.”
- Press Ctrl+V to paste the image into the background layer.
- Adjust the background image as desired. The slider above the name in the Layers panel makes it more or less transparent. Ctrl+T lets you resize or rotate the image.
-
4Trim the background. If you added a background, use this step to delete extra space around the image. Navigate to Image → Trim with the top menu. Check the boxes next to “transparent pixels,” “top,” “right,” “bottom,” and “left.” Click OK.
-
5Add a frame. If you'd like a frame, insert this by double clicking on the layer name "background.” In the pop-up window, make the following changes:
- Click on “stroke” and check the box next to it.
- Change the position to “inside.”
- Alter the size and color however you like.
- Check “inner shadow” if you’d like a shadow inside the frame.
- Click OK when finished.
-
6Save your document. Go to File → Save and name your document “photoshop collage,” or a specific, memorable name. Save frequently as you work on the document, so your work won’t be lost by mistake.


Making the Collage
-
1Insert pictures. Now you can start inserting pictures. Use File → Open to open each picture you’d like to insert. Each one will open in a new window. Transfer them onto the collage in one of the following ways:
- Drag the file directly into the collage document, without opening it, or open it and drag the image into the collage. Name the new Layer something descriptive. (To select more than one file at a time, hold down Ctrl.)
- Or open the file with File → Place Embedded (or just Place in older versions.)
- Or open the image and use copy paste functions to transfer it to the collage. See the information on adding a background above for more information.
- If you only want part of the picture, select the rectangular marquee tool at the top of the Tools panel. Drag it over part of the image, then copy and paste it as described above.
-
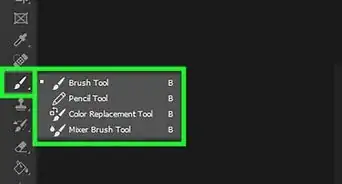
2Cut out pieces. If you want to cut out shapes more complicated than a rectangle, use the Lasso tool in the Tools window. Draw carefully around the area you want to remove, then press Delete to get rid of it. For a quicker, less precise job, select the Quick Selection tool by pressing W.
- Use Ctrl+Alt+Z to undo a mistake.
- Press the magnifying glass to zoom in before selecting small or detailed areas.
-
3Edit pictures. Select an image in your “photoshop collage” document by clicking its name in the Layers panel. Press Ctrl+T to enter Transform mode. You can now edit the image as follows:
- To resize the image, drag any corner. Hold down Shift while doing this to make sure the image doesn't distort.
- To rotate the image, move your cursor farther out from a corner until you see two arrows. Click and hold, then drag the image.
- To move the image, click and hold anywhere inside the image and drag.
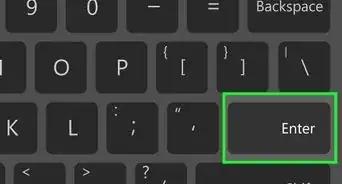
- When you're done, press Enter or click the check mark near the top right corner.
-
4Overlap pictures. The layer at the top of the Layers panel will be on top of all other images. Click and drag layer names up and down the list to change which picture is on top of another.
- Make sure your “background” layer is always at the bottom. Anything below it will not be visible.
-
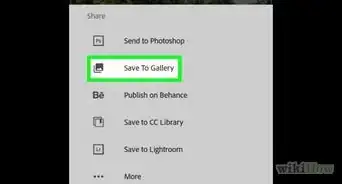
5Save the file and print it. Save your changes using File → Save, then print using File → Print. Or if you think the collage needs some words or styling, read the section below and print once you're done.
- Use File → Save As instead to change file formats. Choose PDF if you want your collage professionally printed or framed. Choose JPEG to make an image that other photo viewing software can open.


Adding Extra Effects
-
1Change layer styles. Double click on a line in the Layers panel to open a Layer Styles window for that layer. Try adding a frame with “stroke” or a shadow with “drop shadow,” or playing around with other options.
- Don't click the layer name itself, or you'll just be typing in a new name. Click the space next to it.
-
2Add adjustment layers. Use the Image → Adjustments menu or the Adjustments panel tools. Play around with these, using Ctrl+Alt+Z to undo. You can use adjustments to make the image brighter, alter the color balance, and sharpen the image, among other options.
- By default, any layer adjustment you add will apply to every layer (every image in the collage). You can change this by right clicking on the adjustment in the Layers panel and selecting "Create Clipping Mask." This applies the adjustment to only the layer beneath it.
-
3Add artistic effects. Explore the Filter top menu and play around with the tools. Try the tools listed under Artistic, Brush-stroke, Distort, Sketch, Stylize, or Texture.
- To make the image stylistically blurry, use the Noise, Pixelate, Render, Sharpen or Blur filters.
-
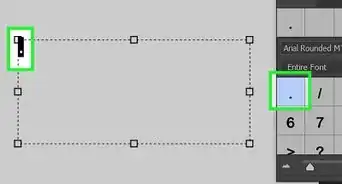
4Add text. Press T on your keyboard, or click the T symbol on the Tools panel. Drag your cursor over the image to make a text box. Type in your text. Adjust the font size and appearance by highlighting your text and altering the values in the top tool bar. Move the text box by dragging the dots at the edge of the box.
- There is no spell check. To check spelling, you'll need to copy-paste to a text editing program or online spell check.
- Once you're done, click the black cursor tool to return to the default move tool.


Community Q&A
-
QuestionHow can I fit an image into a heart shape?
 Community AnswerFind the shape button, click on your desired picture, and then click the heart.


-Step-9-Version-2.webp)
About This Article
1. Create a blank document.
2. Make it the desired size.
3. Click File.
4. Click Open.
5. Double-click an image to open it.
6. Copy part or all of the image.
7. Paste it into the blank document.
8. Repeat with other images.