This article was co-authored by wikiHow Staff. Our trained team of editors and researchers validate articles for accuracy and comprehensiveness. wikiHow's Content Management Team carefully monitors the work from our editorial staff to ensure that each article is backed by trusted research and meets our high quality standards.
The wikiHow Tech Team also followed the article's instructions and verified that they work.
This article has been viewed 601,423 times.
Learn more...
Separating images is one of the basic skills of Photoshop. If you're new to the program, this is a great way to get used to the program's selection tools and layers. And, if you just need a refresher, learning to separate images can teach how to use shortcuts and make precise selections.
Steps
Selecting the Image
-
1Create a "Selection," the moving dotted line, around your image to remove it from the background. Photoshop selections are your bread and butter. Anything within the moving dotted line can be edited, cut, or separated. If you're comfortable selecting the image you want to separate, you can move on to the section of separating the image. You have a variety of different selection tools available, each with pros and cons. The most commonly used tools include:[1]
- Shaped Selections: The icon looks like a dotted box. Click and hold the icon for more shapes, which allow you to cover any basic item.
- The Lasso Tools: You have a lot of options here, each of which requires you click the mouse, then trace out the object with your mouse. Clicking again creates an anchor point, then complete the shape to end the selection.
- Quick Selection: The icon looks like a paintbrush with a circular dotted line around the brush. This shape automatically creates selections following the edges of shapes in the image.
- Magic Wand: Hidden behind Quick Selection, or vice versa, click and hold on the "Quick Selection" button to find it. The Wand selects all pixels in a similar color range to the place you just clicked.
- Pen Tool: Icon looks like a regular fountain pen. This is the most powerful tool you've got, but also the most time consuming to use. The pen tool creates "paths" with anchor points that can b be adjusted on the fly, giving you more control than basic selections.
-
2Use the Quick Selection Tool for images with well-defined edges. Quick selection finds well-differentiated lines, like places where the color changes quickly and dramatically, to make your selection easily. To use it, simply click each section you want to add to the selection.
- To remove an area from your selection, hold the Alt or ⌥ Opt keys and click.
Advertisement -
3Use the Pen Tool to draw complex, precise borders around the object you're separating. Make sure you have the "Paths" option selected from the menu in the top left of the screen selected, then click around the object to surround it. Use Ctrl+Click to manipulate the points if you mess one up, and drag the points "arms" around to change the curve. To insert a new point, just click on the line. When you've finished, right-click the line, and click Make Selection. This turns your line into a selection.
- Use the "Free Form Pen," found by clicking and holding the pen icon, to work with curved lines.
-
4Use the Magic Wand to separate simple, mostly one-color objects. The Wand will find similar pixels and select them, letting your quickly grab large, similar areas on the image. You can, like the other tools, use Ctrl/Cmd to add to your selection and Alt/Opt to remove areas of your selection.
- Change the tolerance to make the Wand more or less precise. A high number (75-100) selects more diverse pixels while a number under ten is much more specific in selections.[2]
Separating the Image
-
1Use the "Content Aware Fill" to remove the image and automatically fill in a realistic background. This powerful tool takes your selection, finds the pixels surrounding it, then duplicates them to make a seamless cut. To use it:
- Use "Select" → "Expand" to expand the selection by 5-10 pixels to every side.
- Click "Edit" → "Fill" to open the Fill Window.
- Select "Content Aware" from the drop-down menu at the top of the window.
- Hit "Okay" to fill your item in.
- Re-use the feature to get new effects, changing the opacity as necessary. Every time you use Content Aware Fills, the computer selects pixels randomly -- so keep trying until it looks good.[3]
-
2Right-click on your selected area to remove it from the image. Selecting the image is the hard part. Once you have your dotted line around the image, simply right-click and choose how to isolate the image. You can:
- Layer Via Copy: Duplicates the selection, then creates a copy of it right on top of the original. The background image is not affected at all.
- Layer Via Cut: Removes the image from the background, turning the selection into a new, unique layer. The background image will have a hole in it.[4]
-
3Use layer masks for less destructive separation. A layer mask lets you adjust the background layer, even remove it, without actually destroying the information in the background. Simply put, it lets you toggle the background on and off with the click of a button, separating your image whenever you want. To make one:
- Select the area you want to remove.
- In the layers menu, click "Add a Mask." It is at the very bottom and looks like a rectangle with a circle in it.
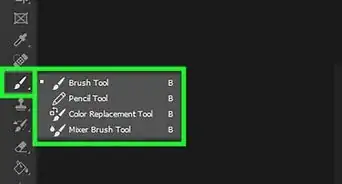
- Click on the black and white thumbnail that appears. You can now use the Paintbrush or Pencil to revise the selection by drawing over the layer mask-- anything black is "erased." Draw over the mask in white to make the image "reappear."[5]
-
4Separate layers by clicking and dragging them into a new Photoshop window. If you want to make a new composition through a layer, all you have to do is click and drag. If the layer is already separated, you can just click and drag it off the background. You can bring it into Illustrator or pull it into its own Photoshop layer. You can also delete the rest of the layers, then use "Save As."
-
5Use the stamp tool to try and fill in the background where the object was. If you want to remove an image from the background, but you don't want a giant hole where the image used to be, you'll have to find a way to replace the space where the image was. This can be easier said than done, depending on the background. If you've got a basic, simple background like grass or the ocean, the stamp tool will copy some section of the image and use it to paint over the hole.
Community Q&A
-
QuestionHow to crop cut out image ?
 Community AnswerCropping is easy with the Crop Tool. It looks like a small square with a diagonal line through the center, and you can find it above the Eyedropper Tool. You can also selected it by pressing "C."
References
- ↑ https://blog.udemy.com/photo-manipulation-tutorials/
- ↑ https://helpx.adobe.com/photoshop/using/making-quick-selections.html
- ↑ https://helpx.adobe.com/photoshop/how-to/remove-object-content-aware.html
- ↑ https://helpx.adobe.com/photoshop/how-to/photoshop-remove-person.html
- ↑ https://helpx.adobe.com/photoshop/how-to/photoshop-remove-person.html
About This Article
To separate an image from its background in Photoshop, start by outlining the image you want using the lasso or pen tool. Next, click on “Edit,” then “Fill” to open the Fill Window and select “Content Aware” to remove the image and fill in the background behind it. Once you have a dotted line around the image, right click on the area and select “Layer Via Copy” to put the image into a new layer without changing the original image. Finally, click on the selected image and drag it off the background or into a new Photoshop window. To learn how to use the stamp tool to fill in the hole in your original image, read on!
-Step-1-Version-5.webp)
-Step-2-Version-5.webp)
-Step-3-Version-5.webp)
-Step-4-Version-5.webp)
-Step-5-Version-5.webp)
-Step-6-Version-5.webp)
-Step-7-Version-2.webp)
-Step-8-Version-2.webp)
-Step-9-Version-2.webp)

