This article was co-authored by wikiHow staff writer, Rain Kengly. Rain Kengly is a wikiHow Technology Writer. As a storytelling enthusiast with a penchant for technology, they hope to create long-lasting connections with readers from all around the globe. Rain graduated from San Francisco State University with a BA in Cinema.
The wikiHow Tech Team also followed the article's instructions and verified that they work.
This article has been viewed 972,997 times.
Learn more...
Do you need to make a list in Adobe Photoshop? You can easily add a bullet point with a keyboard shortcut, by changing the font, or by copy and pasting it. You'll need to use the Type Tool to create a text box first. This wikiHow will show you how to add a bullet point using Adobe Photoshop on your Windows or Mac computer.
Things You Should Know
- Use the keyboard shortcut "ALT + 0 + 1 + 4 + 9" (Windows) or "Option + 8" (Mac) in a text box. Begin typing to show the bullet point.
- In a text box, change a lowercase "L" to "Wingdings" font. Change the font back to enter text.
- Copy and paste the bullet point: • into the text box.
Steps
Using a Keyboard Shortcut
-
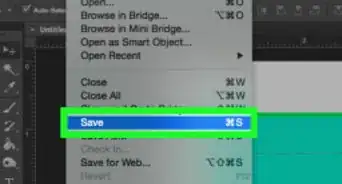
1Open a file in Photoshop. Double-click the blue app containing Ps, click File in the menu bar, and Open…. Select a file and click Open.
- To create a new document, click New… in the File drop-down.
-
2Click the Type Tool. It's the T in the Tools menu on the left side of the screen.Advertisement
-
3Create a text box. Drag the Type Tool to make a text box.
- Click the place where you want the bullet point.
-
4Use the keyboard shortcut. You'll be able to create a bullet point with the following shortcut:
- On Windows, press Alt+0+1+4+9.[1]
- On Mac, press ⌥ Option+8.
-
5Begin typing. When you enter text, the bullet point will appear to the left. Press Enter or Return to create a new line with a new bullet point.


Using Wingdings
-
1Open a file in Photoshop. Double-click the blue app containing Ps, click File in the menu bar, and Open…. Select a file and click Open.
- To create a new document, click New… in the File drop-down.
-
2Click the Type Tool. It's the T in the Tools menu on the left side of the screen.
-
3Create a text box. Drag the Type Tool to make a text box.
- Click the place where you want the bullet point.
-
4Press L. This is the key that translates to a bullet point in Wingdings.
-
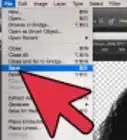
5Highlight the "l", then click the font name. You can find the font name in the upper-left corner of the window.
- A drop-down menu will open.
-
6Type wingdings and press ↵ Enter. You can also manually select Wingdings in the list.
- The "l" will become a bullet point.
-
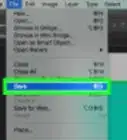
7Change the font back. Once you change the "l" to a bullet point, click the space after the bullet point. Set the font to your normal font to enter your text.


Pasting a Bullet
-
1Open a file in Photoshop. Double-click the blue app containing Ps, click File in the menu bar, and Open…. Select a file and click Open.
- To create a new document, click New… in the File drop-down.
-
2Click the Type Tool. It's the T in the Tools menu on the left side of the screen.
-
3Create a text box. Drag the Type Tool to make a text box.
- Click the place where you want the bullet point.
-
4Copy the bullet point. If you don't want to use a keyboard shortcut or use Wingdings, copy this bullet: •
- On Windows, select the bullet point and press CTRL + C to copy.
- On Mac, select the bullet point and press CMD + C to copy.
-
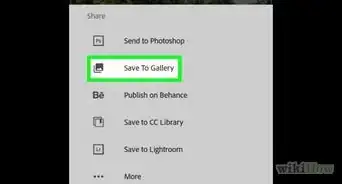
5Paste the bullet point into the text box. Your bullet point will appear.
- On Windows, press CTRL + V to paste.
- On Mac, press CMD + V to paste.
-
6Enter your text after the bullet point. As long as the bullet point is in your clipboard, you can paste it as many times as needed.


Using the Glyphs Panel
-
1Open a file in Photoshop. Double-click the blue app containing Ps, click File in the menu bar, and Open…. Select a file and click Open.
- To create a new document, click New… in the File drop-down.
-
2Click the Type Tool. It's the T in the Tools menu on the left side of the screen.
-
3Create a text box. Drag the Type Tool to make a text box.
- Click the place where you want the bullet point.
-
4Click Type. This is in the top toolbar, between Layer and Select.
-
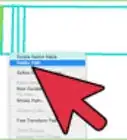
5Hover over Panels and click Glyphs Panel. It should show a checkmark when clicked.
- A new window will open with different elements and symbols.
-
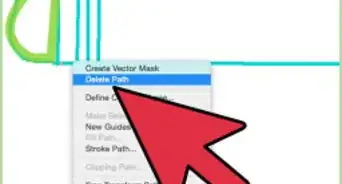
6Locate the bullet point. You may need to scroll down to find it.
-
7Double-click the bullet point. It will be entered directly into the text box.


References
About This Article

1. Open a Photoshop file.
2. Click the Type Tool.
3. Click in a text box.
4. Press Alt+0+1+4+9 on Windows,
or press ⌥ Option+8 on Mac.