X
wikiHow is a “wiki,” similar to Wikipedia, which means that many of our articles are co-written by multiple authors. To create this article, 36 people, some anonymous, worked to edit and improve it over time.
This article has been viewed 325,175 times.
Learn more...
It only takes a few steps to create your own magazine image in Adobe Photoshop. This is very simple to do, but this article assumes you already have a fair amount of knowledge using Photoshop.
Steps
-
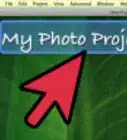
1Create a new document that is twice the width and about 50% higher than your cover image. Give the new image a gradient for the background. Any colors will do for now.
-
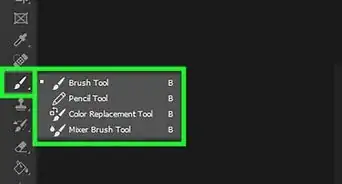
2Paste in your cover image, name the layer "Cover". Click on Edit>>Transform>>Perspective. Drag the top left handle down just a bit to add the correct perspective to the cover image. It should look something like this:Advertisement
-
3Copy the cover layer by dragging the layer down to the new layer button in the layers palette. Now move this layer behind the cover layer and name it "Back".
-
4Double click the back layer so that the layers style window comes up. Apply a color overlay, using a color that is similar to the cover, but darker.
-
5Click on Edit>>Transform>>Perspective. This time drag down the upper right handle. Just a little bit. Your image should now look something like this:
-
6Duplicate the back layer by dragging the layer to the new layer button at the bottom of the layers palette. Name this layer "Pages". This layer should be between the cover layer and the back layer.
-
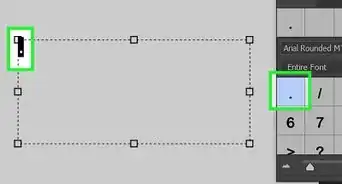
7Double click the pages layer and apply a white color overlay. Also apply a stroke style. Use black for the color, and 1px for the size. Take the opacity down to about 70%. Click OK.
-
8Move this layer down just a bit using the move tool (V). Your image should look something like this:
-
9Duplicate the page layer. Observe that magazines have more than one page. Move this layer back just a little bit. Duplicate the layer again, and again move it back just a little.
-
10Draw a marquee around the corners that are poking out, using the lasso tool, and delete the extra bits. Your image should look something like this:
-
11Change the background to something you like better, like pure white. You can also add a drop shadow or similar effect. You can crop the image to a more tight size. Use light and dark gradients to add light reflections.
-
12


Advertisement
Community Q&A
-
QuestionHow do I create a reflection or a silhouette of an object using Adobe Photoshop?
 Community AnswerDuplicate the layer with the object. Transform the object so it looks like a reflection and move it to the right position. (For a silhouette, select the object and then fill the selected space with black/color of your choice). For reflection, change the opacity so it looks faded. This step isn't necessary but it makes it seem more realistic. You can also use Gaussian Blur or other blur tools to make your reflection look more realistic.
Advertisement


About This Article
Advertisement