X
wikiHow is a “wiki,” similar to Wikipedia, which means that many of our articles are co-written by multiple authors. To create this article, 24 people, some anonymous, worked to edit and improve it over time.
The wikiHow Video Team also followed the article's instructions and verified that they work.
This article has been viewed 361,479 times.
Learn more...
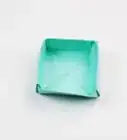
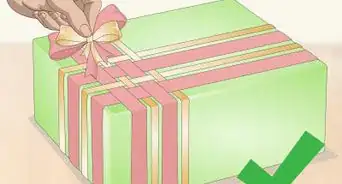
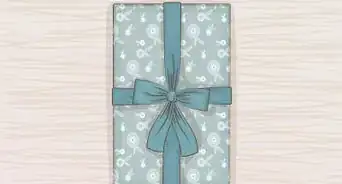
This is a great way to recycle old greeting cards and make little boxes for small gifts (or for storing small objects). This box is different from an origami box because it includes a top and a bottom. It requires only a few simple tools and supplies, and the result is charming and eco-friendly.
Steps
Method 1
Method 1 of 2:
Gift box #1
-
1Gather your supplies and tools, listed below.
-
2Cut the card in half along the fold. The easiest way to make the top fit over the bottom is to make sure both halves of the card are the same size, so you may have to trim a little. You will use the colorful front of the card as the box lid.Advertisement
-
3Decide how tall you want your box to be. This may depend on the design on the front of the card, or on how big the item is that you want to enclose. This demonstration uses 1 inch (25mm) for the top, and 1 and 1/16 (27mm) for the bottom. Add a little to the measurement for the bottom, so the top will fit over it.
-
4Draw a square in each corner of the top and bottom of the card, the size of your measurements. You can mark just the corners, making a square so you can see where to cut.
-
5Score the card all the way along all four sides, using the squares to give you the distance from the edge.
-
6Cut along the score line from the edge to the next, perpendicular score line in each corner, but do so for only one side of the square you drew. Leave one side of the box uncut to make a tab. Do this for all four corners of the card.
-
7Fold the sides up, and fold the tabs in.
-
8Glue each tab and paper clip it into place until it dries.
-
9Repeat the marking and scoring for the other half of the box.
-
10When your box is dry, place your gift or other small objects inside.

Advertisement
Method 2
Method 2 of 2:
Square gift or trinket box using an old card
-
1Cut the card apart and keep the bottom half for the bottom of your box.
-
2Cut a square out of the front of the card. Use the shorter edge as your measure, or decide what part of the image you want on top of your box. Make this the center of your square.
-
3Draw a diagonal X on the back side of the card from corner to corner. Do not fold.
-
4Fold one corner to meet the center of the X. Make a crisp crease.
-
5Fold the same corner up once again, aligning the folded edge with the center line. Then unfold.
-
6Repeat for the remaining 3 corners, making crisp creases. Unfold when done.
-
7Fold in 2 opposing corners so they meet point-to-point in the center of your square. This makes 2 large triangular shapes, pointing toward the center.
-
8Make 4 careful cuts along the crease line, from the edges, up to the next crease mark. Stop just short of cutting the triangular piece. Cut carefully to the intersection of the creases for a nice straight edge on your box. Unfold when done.
-
9Fold the other 2 opposing corners so they meet in the center. Turn the two cut flaps up and in, then fold the remaining flat sides up and over the top of the flaps, tucking it down inside your box. It should hold by itself.
- Repeat for the other side of the box.
-
10For bottom of box, cut the square 1/4 " smaller than the top. This will allow for the box to fit together nicely, without being too tight.
-
11Repeat the steps to make the bottom of the box.
-
12Decorate. If using construction or cardstock paper in solid colors, decorate as you wish.
- Hint: Use a small amount of glue stick to help hold the inside of the boxes down if needed.
-
13Add some tissue paper or cotton balls as padding for small gifts or jewelry. Use yarn or ribbon and add a bow.
Advertisement
Community Q&A
-
QuestionWhere I can find the materials?
 Community AnswerYou can find the materials at Jo-Ann's, Hobby Lobby, Michael's, or Costco during Christmas time.
 -
QuestionHow do I make a larger rectangular box?
 Community AnswerJust use poster board, or a bigger piece of paper, and follow the instructions to suit your size.
 -
QuestionCan I use paper for this?
 Community AnswerYou can use paper if you want, but it's not gong to be as sturdy.
Advertisement
Warnings
- Use scissors and other cutters with care.⧼thumbs_response⧽
- Be careful with the compass, if you're using an old metal version with a sharp point.⧼thumbs_response⧽
Advertisement
Things You'll Need
- A greeting card
- Ruler
- Pencil
- Pair of scissors
- Something to "score" the cardstock (the point of a compass, an old ballpoint pen that is out of ink works perfectly, as does the tine of a fork, a butter knife, or a small-gauge knitting needle)
- Tape
- Paper clips


About This Article
Advertisement